How to tell if ribs are done: use the bend test for ribs to judge tenderness at the grate, read the crack and droop, and know when to sauce, wrap, or rest
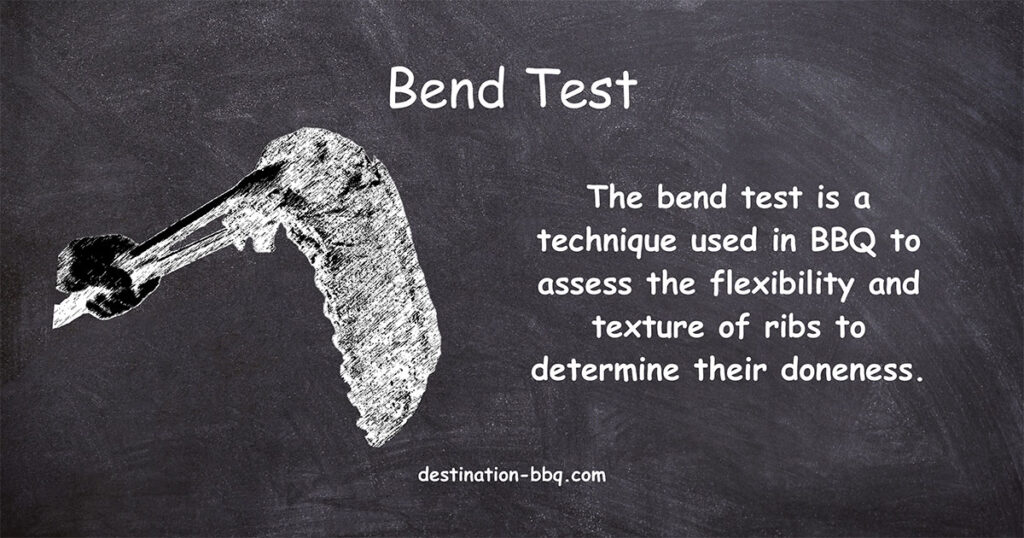
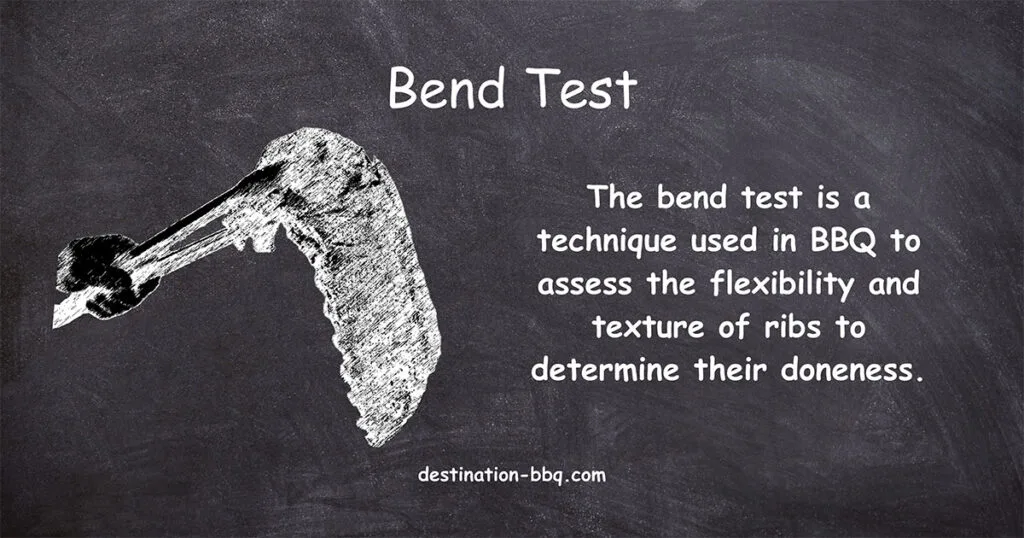
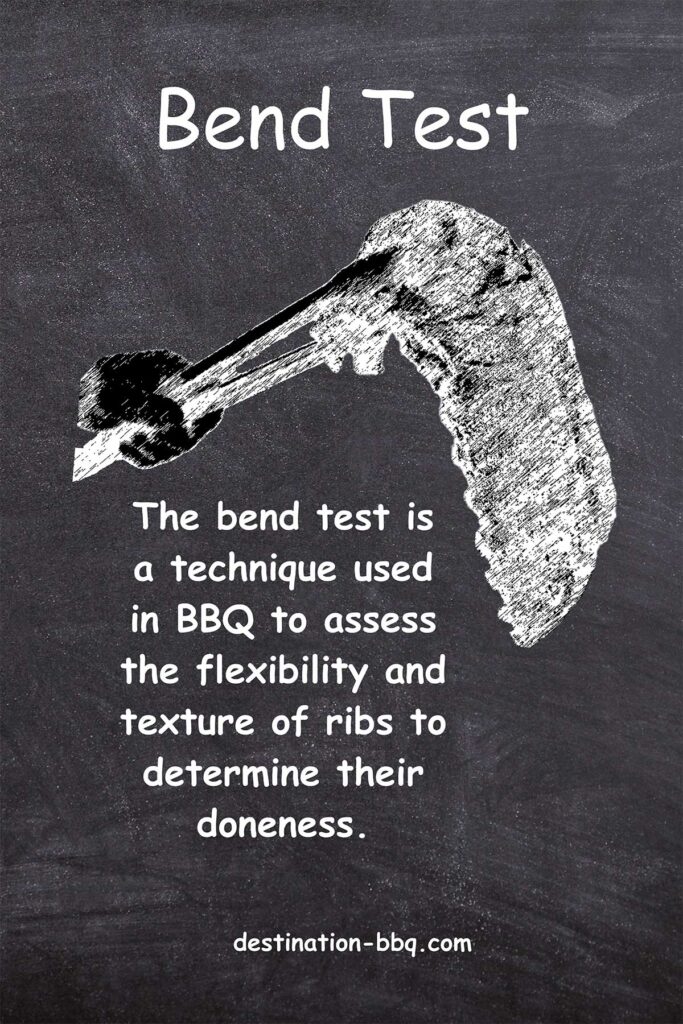
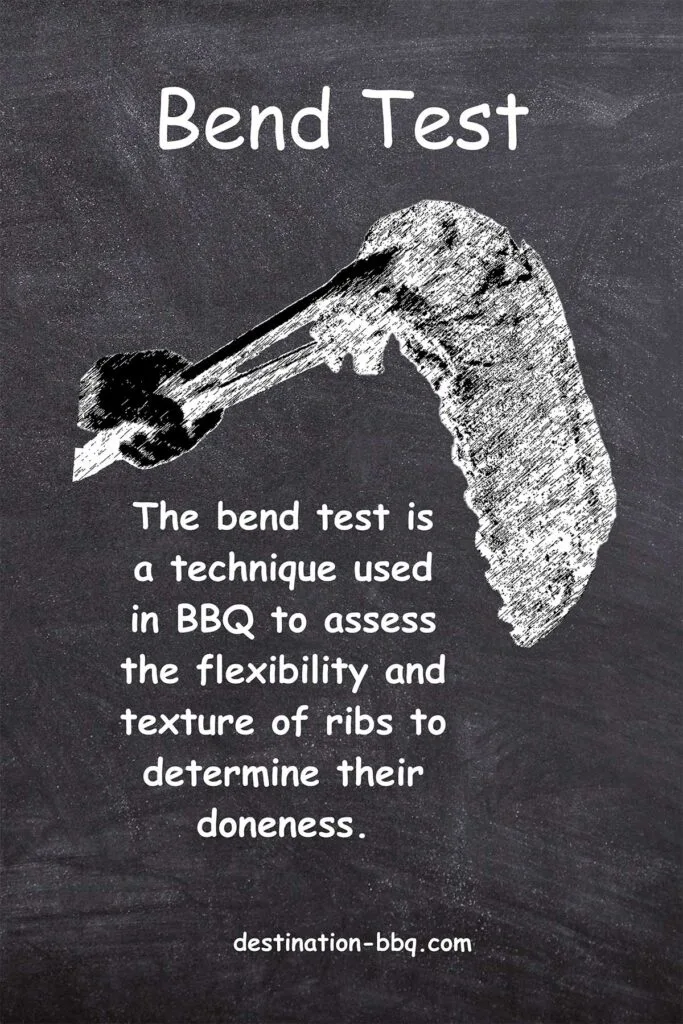
What is the Bend Test?
The bend test checks doneness of pork ribs by how the rack flexes when lifted. Slide tongs in from one end to the center, clamp along the rack’s length, and lift a few inches. A done rack forms a soft U and shows a slight surface crack without tearing, signaling tender, juicy ribs rather than tough or mushy “fall-off-the-bone” overcooked meat.
Note: This article covers pork ribs (baby back, spare, St. Louis). For beef ribs, most pros use "probe-tender" as their test of choice and begin checking near 200–203°F in the thickest section between bones.
Bend Test: Quick Start
- Begin testing as the ribs start to feel tender, usually in the last 30–60 minutes of the cook.
- Slide tongs from one end to the center and clamp along the rack’s length; lift smoothly.
- Done ribs form a soft “U” and the surface just starts to crack without tearing.
- If stiff, cook longer; if it tears or collapses, it’s overdone. Confirm with a gentle toothpick glide between bones.
Related: BBQ Wood Pairing Guide
"The bend test. This is the method I like best. I pick up the slab with a pair of tongs near the center and bounce them slightly. If they are ready, the slab will bow until the meat starts to crack on the surface. A small crack means you need a little more time. It should be close to breaking when you lift the slab."
~Craig "Meathead" Goldwyn, publisher AmazingRibs.com
Key Takeaways
- Start checks when the thickest meat between bones is ~185–190°F or in your time window. Time/temps start checks; tenderness finishes the cook.
- How to read it: center hold, lift 6–8", look for a soft U-shape and a light surface crack (no tearing).
- Confirm with a second signal: toothpick glide or gentle bone twist; pull when two tests agree.
- Wrapped cooks: vent/dry 5–10 min before testing so steam doesn’t give a false soft read.
- Scope: Pork ribs only; for beef ribs, go probe-tender near 200–203°F rather than a bend.
Understanding the Bend Test
Cooking BBQ ribs to perfection can be a challenging task for many home cooks and aspiring pitmasters. Achieving the ideal balance of tenderness and flavor requires skill and understanding of the cooking process. One of the most reliable techniques used by experienced pitmasters is the bend test, also known as the bounce test. In this article, we will explore the bend test in detail, providing you with the info you need to gain confidence in smoking ribs that are cooked just right.
Anatomy of Pork Ribs
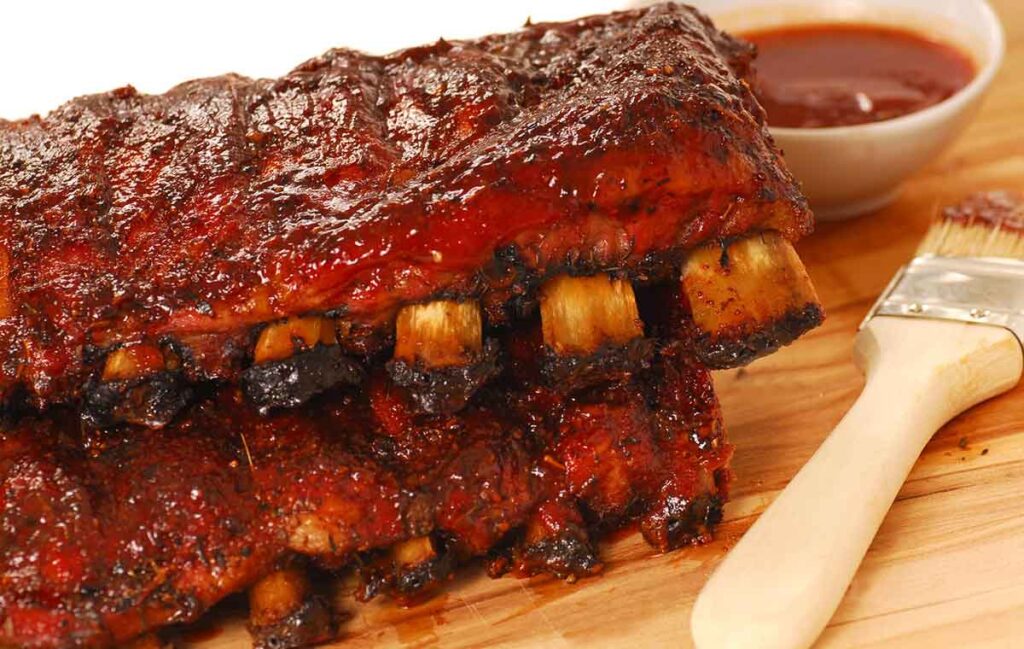

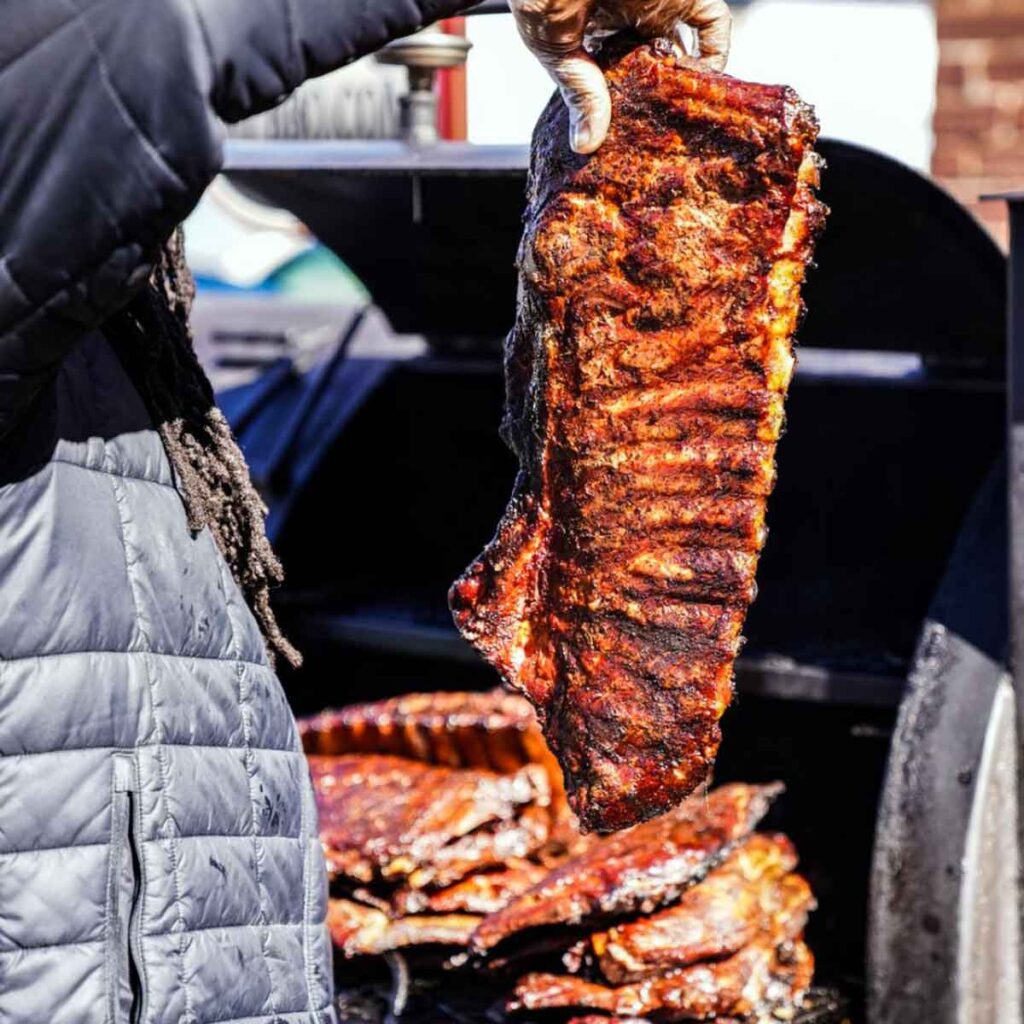
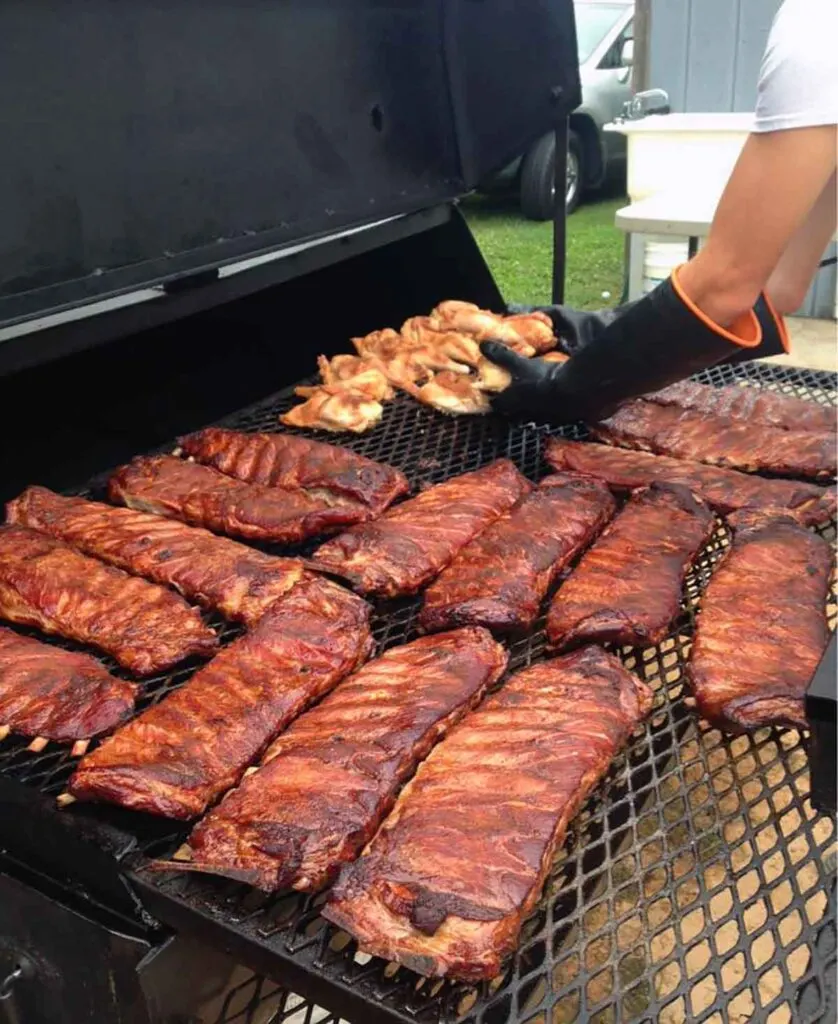
Pork ribs (baby back or spare) are a set of curved bones with meat, fat, and connective tissue between and around them. As the rack cooks low and slow, collagen melts and fat renders. The slab bows when lifted. Browning from the Maillard Reaction firms the surface, and a light crack becomes a reliable doneness cue.
The bend test uses that change. Lift the rack near the center with tongs and watch: a properly cooked slab forms a gentle U-shape and the surface shows a light crack without tearing. If it sags so much that sections separate, it is past tender.
What Affects the Bend
- Cut and trim: Baby backs are shorter and more arched; spare ribs are longer; St. Louis style removes the rib tips/cartilage. These differences change how much bow and cracking you’ll see.
- Thickness: Meatier center sections bend later than thin ends.
- Membrane (silver skin): If left on, it can limit surface cracking and make the slab feel stiffer.
- Moisture and glaze: Heavy sauce or a sugary glaze can mask surface cracks; rely more on toothpick or a gentle bone twist.
Cut-Specific Expectations
Spare/St. Louis ribs: Longer, flatter racks. Expect a deeper bow before cracking shows. St. Louis trim removes tips, so pullback and cracking can be subtler; confirm with a toothpick glide or a gentle bone twist.
Baby back ribs: Pronounced natural curve. Look for a soft U-shape and a small surface crack; they often finish earlier than spares at the same pit temp.
How to Use the Bend Test (Step by Step)
Whether you’re firing up a kettle or running a comp pit, the bend test works the same way. Near the end of the cook, after bark and color look right, lift the rack near the center with tongs and let the far end hang. You’re checking how much the softened meat allows the slab to bow.


If it barely bends, keep cooking. If it forms a soft U-shape and the surface shows a light crack without tearing, you’re close. If sections separate or flop, it’s past tender.
Backyard cooks often pair bend with visuals. Pullback of about ¼ inch can be a cue, but it’s only a rough guess; dry heat or edge exposure can cause early pullback. Use it as backup to feel.
Note: the bend test does not work for beef ribs. Per Thermoworks, "There is no bend test for [beef] ribs. Temperature is really your only guide for perfect results."
Time needed: 1 minute
Lift by sliding tongs from one end to the center, clamping along the rack’s length. A done rack forms a soft U-shape and the surface just begins to crack without tearing. Confirm with a gentle toothpick glide.
- Begin testing near the end
Start checking during the last 30 to 60 minutes of the cook, or when you see a little pullback at the bone tips.
- Lift from the center with a secure grip
Slide the tongs in from one end to the center and clamp along the rack’s length, then lift a few inches to read the bend evenly. Avoid lifting by an end alone.
- Read the bend
A done rack forms a soft U-shape and the surface just starts to crack without tearing.
- Confirm and decide
If the rack stays stiff, cook longer. If it tears or collapses, it is overcooked. Confirm with a gentle toothpick glide between bones.
Pro tips for consistent results
- Start checking when the thickest meat between bones is about 190°F or when you notice a little pullback. Use temp as a cue, not the verdict.
- If wrapped, unwrap and let the surface dry 5–10 minutes before testing so you read bark, not steam.
- Optional bounce: a gentle bounce should show fine surface checking without tearing. A wide split signals overdone.
- Log the result: note pit temp, total time, rack type, and what “done” looked like on your cooker to calibrate future cooks.
Most racks finish in the high 190s to low 200s °F, but feel makes the final call.
Tools You’ll Need
- 12-inch locking tongs: Grip near the center to lift and read the bend cleanly.
- Heat-resistant gloves: Protect hands and support the far half while testing.
- Instant-read thermometer (thin probe): Use to know when to start checks around 185°F in the thickest meat between bones; feel makes the final call.
- Wooden toothpicks or skewers: For the toothpick test between bones.
- Sheet pan or cutting board: Safe place to set the rack while you check.
- Foil or butcher paper (if you wrapped): Unwrap, then vent and dry 5–10 minutes before testing.
Nice to have: a second set of tongs for two-hand support on very tender or sauced racks.

Visual Cues to Look For
- Soft U-shape: Lift near the center; a done rack bows easily while still holding together.
- Light surface crack: As the slab flexes, look for a small crack in the top meat. Cracking without tearing is the sweet spot.
- “Himalayas” effect: Peaks and valleys form between bones as the surface sags, another sign the meat has softened.
- Modest pullback: About ¼ inch of bone tip showing can support your read. Treat it as a secondary cue, not the call.
- Bark set and color: Surface looks set (not wet). Color is even and slightly darkened where the rack flexes.
Cues that can Mislead
- Heavy sauce or glaze can hide surface cracks; confirm with a toothpick or gentle bone twist.
- Membrane left on may limit cracking and make the slab feel stiffer.
- Dry edges or hot spots can cause early pullback that doesn’t equal tenderness. Avoid by banking the coals and using indirect heat.
- Freshly unwrapped racks can read “soft” from steam; vent and dry 5–10 minutes, then test.
Use one visual cue plus one feel test (toothpick glide or gentle bone twist) before you pull the ribs.
Ways to Perform the Bend Test
- Center-hold (recommended). Grip the rack at the midpoint with tongs and lift a few inches. A done rack forms a soft U-shape, the surface shows a light crack, and the slab still holds together.
- End-hold (advanced). Clamp across a few ribs near one end (e.g., last 2–3) or about one-third in, bone-side up, and lift. At doneness, the far half bows and the top meat shows a light check without tearing. This grip can misread the bend—confirm with a center-lift or toothpick.
- Two-hand support. Slide one hand (or a second set of tongs) under the far half to keep it from folding on itself while you gently lift the near end. This gives a slower, easier read for newer cooks and prevents accidental tearing.
| State | What you’ll see in the bend | Supporting cues | What to do next |
|---|---|---|---|
| Undercooked | Rack stays stiff, bends only slightly; little to no surface cracking. | Toothpick meets resistance; little or no pullback at bone tips; bite/tug feels tight. | Cook longer; recheck in 10–15 minutes. If bark is already dark, reduce heat or wrap to protect the surface. Use a center lift with a lengthwise tong grip to get a true read. |
| Just right | Soft U-shape; gentle surface crack without tearing; slab holds together. | Toothpick slides in easily; modest pullback visible; one bite leaves a clean bite mark with a little tug. | Pull from heat. Rest loosely tented 5–10 minutes before slicing. |
| Overcooked | Floppy; folds on itself; meat may split or fall from bones on lift. | Toothpick feels mushy-easy; bones may twist out clean; surface can look wet or ragged. | Use immediately. Next time, begin bend checks earlier or shorten the wrapped phase; pull sooner once a slight crack appears. |
Note: This troubleshooting applies to pork ribs. For beef ribs, rely on temperature and probe feel rather than the bend test.
Common Bend-Test Mistakes
- Holding the wrong spot: lift near the center, not the very end, for a clean read.
- Testing right after unwrapping: vent and dry the surface 5–10 minutes so steam does not soften the bark.
- Calling it by pullback alone: use pullback as a visual backup, not the verdict.
- Reading glaze as bark set: sauce can hide surface cracks, confirm with a toothpick or gentle bone twist.
- Relying on time only: use time and temp to start checks, then let feel make the final call.
Use two signals before you pull, for example bend plus toothpick.
When to Start Testing (Time Window)
Use time only to schedule checks, not to call it done. At 225–250°F:
- Baby back ribs: begin bend checks around 3 to 4 hours.
- Spare ribs/St. Louis ribs: begin around 4 to 5½ hours.
Hot-and-fast cooks, the 3-2-1 Method for Ribs, crowded grates, and cold temperatures can shift these windows. If the bark sets early, you can start light checks sooner; if color lags, wait a bit longer before your first lift. On kettles, the Snake method, a technique for two-zone grilling, can steady the timeline and make bend checks more predictable. If you want smoke flavor that won’t race the bark too fast, see our BBQ Wood Pairing Guide.
Wrapping (Texas Crutch) and Timing


Wrapping accelerates tenderness by trapping steam and helping collagen melt faster. As the UNL Extension notes, "Slow moist heat is an easy way to tenderize collagen, as the moist collagen cooks down into gelatin."
Because that moist heat speeds things up, it is known as the Texas Crutch. If using, first unwrap and let the surface vent and dry for 5–10 minutes, then begin bend checks while you finish setting bark or sauce. If the slab already bows deeply once unwrapped, lower the heat and shorten the finishing time to avoid overshooting.
Bend vs Toothpick, Tug, and Pullback
Not sure how to tell if ribs are done? Start with the bend test and verify with other cues. Use internal temperature to know when to begin: start checking around 185°F in the thickest meat between bones, then compare a bend test vs toothpick test, add the rib tug test, and watch for rib pullback. Treat pork ribs internal temp vs tenderness as guidance and let feel be the final judge.
- Toothpick test: Slide a toothpick or wooden skewer between bones and give a small twist. If it glides in with little resistance, the rack is likely done. Test several spots along the slab.
- Bone twist (tug) test: Grip a center bone with tongs and twist gently. It should move with slight resistance, not tear clean out.
- Bone pop-up (pullback): Meat shrinking back to expose about ¼ inch of bone tip is a rough gauge. Dry heat or edge exposure can cause pullback early, so don’t rely on this alone.
- Appearance (“Himalayas” effect): As collagen melts, the top surface sags between bones, creating small peaks and valleys. That wavy top is another visual cue.
| Method | Best for | What it checks | Use with | Watch-outs |
|---|---|---|---|---|
| Bend test | All pork ribs, whole-rack read | Whole-rack flexibility and a light surface crack | Toothpick glide, gentle bone twist | End-only grips can misread the bend; slide tongs to the center and clamp along the rack’s length; not reliable on beef ribs |
| Toothpick test | Spot-checking between bones | Local tenderness, resistance in the meat | Bend test to confirm the whole rack | Hot spots can mislead; test several locations |
| Bone twist | Spare/St. Louis racks near finish | Ligament release at the bone; slight rotation without shredding | Bend test to confirm the whole rack | Twist gently; forcing can shred meat |
| Temperature | Knowing when to start checks | Internal temp in the thickest meat between bones | Use as a cue, not the verdict; many start checking ~190°F, then confirm by feel | Bones skew readings; confirm with bend + toothpick |
| Pullback (visual) | Visual backup cue | Meat receding from bone tips | Bend or toothpick to confirm | Dry edges/airflow can cause early pullback; not a finish signal |
Call the Finish: Use Two Signals
- Bend + toothpick glide
- Bend + gentle bone twist
- Visuals as backup: modest pullback, good color, slight sag
- Unsure? Temp the thickest meat between bones; many racks read high 190s–low 200s °F, then confirm by feel
If tests disagree, wait a few minutes and retest.
Thermometer as a Backup (Internal Temp vs Tenderness)
Spot temps on ribs can mislead, but they’re useful to know when to start checking. Probe the thickest meat between bones; begin bend checks near 185°F. Many racks finish in the high 190s–low 200s °F, yet tenderness makes the call, not the number.
Competition Context: What Judges Look For

Most sanctioned judging prefers ribs that bite clean with a slight tug and leave a neat bite mark. Racks that fall apart are considered past their peak and can score lower.
In fact, the Memphis BBQ Network explicitly states in their rulebook, "Ribs with meat 'falling off the bone' will be judged as overcooked."
Teams often begin light bend/toothpick checks 30–60 minutes before turn-in, then hold finished racks warm.
Competition Standard
- Clean bite with slight tug is ideal.
- “Fall off the bone” is judged overcooked.
- For spares, a half-moon bite mark is expected.
Check rules for your sanctioning body.
The Science Behind the Bend Test
What’s really happening inside the ribs as they bend? It’s all about collagen and muscle fibers. Raw ribs are full of connective tissue (collagen) that is tough. As you cook low and slow, that collagen gradually dissolves into gelatin. Gelatin is soft and slippery, making the meat springy and tender. The bend test is essentially checking whether enough collagen has turned to gelatin while still retaining moisture.
The USDA's Minimum Internal Temperature Chart confirms that pork is technically safe at 145°F, but that is far too early for tender ribs. At that temperature, the collagen is nowhere near its melting point. As Texas A&M's Meat Science program notes, "Collagen is converted to gelatin when heated … it requires a higher internal temperature (185–195°F) to achieve this conversion.”

At around 190–203°F, the tough collagen and fat in a rack fully melt, yielding a succulent, pull-apart texture. This wide temperature window explains why pitmasters wait: they want those higher temps so collagen conversion occurs. The bend test correlates with that: a rigid rib holds more uncooked collagen; an easy-bending rib means that matrix is now gentle.
The pork fat and juices also play a role. As bones heat, marrow and fat liquefy and can seep out, helping lubricate the meat. When you lift the slab, the slight bow indicates juices are plentiful, not dried out. If the ribs refuse to bend, the muscle proteins are still stiff and watery; if they flop too much, the water and fat may have evaporated completely or the structure collapsed, both signs of overcooking.
One can even liken the bend test to pressing on a spring. A perfectly cooked rib will have some resilience (springiness) but not enough to snap back rigidly. This is why pros caution against memorizing a specific temperature for ribs. Goldwyn emphasizes that a rack’s ideal tenderness can’t be read like a steak’s temp; instead he uses the bend as the final judge.
Throughout, the bark (crust) on the ribs also factors in. A good dry rub develops flavor and a nice crust of caramelized spices. When pulling on ribs, that bark will crack gently rather than crumble off. If the rack bends easily and the bark stays intact, you’ve hit a sweet spot. (Hot tip: apply your rub in advance and let it form a crust using clean, blue smoke for maximum bite.)
Different hardwoods—like hickory, oak, or fruitwoods such as apple and cherry—can deepen color and bark, but tenderness still has to be confirmed by feel.
Rest and Record
Pull finished ribs and rest 10–15 minutes, tented loosely, before slicing. This brief rest lets juices settle so slices stay moist. Keep a simple cook log (weight, cut, rub, wood, pit temperature, weather, total time, first bend-check time, finish time). Two or three notes per cook make your next rack more predictable.
History and Pitmaster Tradition
Nobody can pin a date on the first bend test, it’s more pitmaster lore than patent, but it’s a time-honored BBQ trick. Long before instant-read probes, cooks learned to gauge doneness by feel.
Many competition and backyard cooks swear by tactile tests. Meathead explains: “when I think [the ribs] are ready, I use the bend test,” because every slab is different. In Southern BBQ culture, personal experience trumps clocks. The legend goes that old-timers cooking ribs low-and-slow simply lifted up a rack to see how it flopped; this empirical method was passed down in BBQ circles.

Today’s pitmasters like Rodney Scott and championship cooks still champion it as the surest sign of “just right” ribs. For them, the bend test is part of the art, a hands-on final exam for good bark, smoke color, and tenderness all in one.
What cues do you trust most: bend, toothpick, or tug? Drop a comment with your cooker model and temps.”
Bend Test for Ribs: FAQ
Lift near the center and look for a soft U-shape with a light surface crack while the slab still holds together. Confirm with a toothpick between bones; it should slide in with little resistance. If cues disagree, wait a few minutes and retest. Use two signals before you pull.
Begin near your expected time window or when the thickest meat between bones reads about 185°F. Time and temp tell you when to start checking, not when to finish. Confirm doneness by feel with two signals, for example bend plus a toothpick glide or a gentle bone twist.
Use them together. Bend shows whole-rack flexibility; the toothpick reads tenderness between bones. If bend looks close but the toothpick still meets resistance, cook a little longer and retest. Treat pullback and color as supporting visuals, not the final call.
The bend test is designed for pork ribs. For beef ribs, most cooks use probe-tender. Start checks as internal temperature approaches 200–203°F in the thickest meat between bones. Look for a smooth probe feel with slight resistance, then rest before slicing.
Wrapping speeds tenderness. After unwrapping, vent and dry the surface for 5–10 minutes so steam does not give a false soft read. Begin bend checks earlier than you would unwrapped, then confirm with a toothpick glide or a gentle bone twist. Glazes can hide surface cracks.
Pull them off heat and serve right away so they do not dry further. For leftovers, slice and sauce for sandwiches, or chop and mix into beans or tacos. Next cook, begin bend checks sooner, shorten the wrapped phase, and confirm with two tests rather than relying on pullback.
Sources
- Meathead, “Are My Ribs Ready Yet?” — bend test, toothpick, temps. AmazingRibs.com
- USDA FSIS, “Safe Minimum Internal Temperature Chart” — pork safety baseline. fsis.usda.gov
- Texas A&M Meat Science, “Barbecue Science” — collagen → gelatin (≈185–195°F) overview. meat.tamu.edu
- UNL Extension, “Cooking Tenderness into Every Beef Cut” — moist heat tenderizes collagen. newsroom.unl.edu
- Memphis Barbecue Network, “General Rules and Information (Jan. 2024)” — rib tenderness standard. memphisbbqnetwork.com
Primary references used for definitions, temps, and competition standards.
About the author
James Roller documents South Carolina barbecue for Destination BBQ and authored Going Whole Hog. He researches techniques, interviews pitmasters, creates tools, and curates reliable sources so home cooks can cook barbecue safely and confidently at home.
More about James.See something that needs a tweak? Send a correction.
« See All BBQ Terms