Reheat leftover chicken wings by warming them through first, then finishing hot for crisp skin, with simple tweaks for sauced wings and big trays
Leftover wings can be just as satisfying as the first round if you reheat them the right way. The goal is simple: heat the meat through without steaming the skin, then finish with enough dry heat to bring the crisp back.

This guide walks you through the best methods for every common setup, from a single snack portion to a full sheet pan. If you want to avoid surprise leftovers next time, run your numbers with the Wing Calculator and cook the amount you actually need.
Where this guidance comes from: Heather and I have cooked wings for home gatherings for years, so the crispness tips come from what works in a real kitchen. I built the methods here from trusted cooking references and appliance guidance, and I checked the food-safety guardrails against public recommendations. I link the key temperatures where they come up, and the full source list is below.
Jump to Food safety guardrails or Sources.
Best way to reheat leftover wings so they're crispy again
If you only read one section, read this one. Start with the quick answers, then use the list below to choose the best method for your setup and the amount you’re warming up.
Quick answer
- Best overall (oven): Spread wings in a single layer on a wire rack over a sheet pan. Warm at 350°F for 10–15 minutes, then finish at 425°F for 3–5 minutes (or a brief broil) until the skin crisps. Confirm at least 165°F internal in the thickest meaty part (not touching bone).
- Small-batch shortcut (air fryer): 360–380°F for 8–12 minutes in a single layer, shake or flip halfway, to 165°F internal.
- If wings were stored in sauce: Choose your goal. Just heat them sauced: warm gently in the sauce to 165°F. Want some crispiness: lift wings out of the sauce, remove excess sauce (quick scrape across edge of container could work), re-crisp in dry heat, then toss in warmed sauce at the end (see how).
Assumption: These time ranges assume fridge-cold wings in a single layer. If they’re colder or stacked, plan on a few extra minutes.
Quick picks by situation:
- Best all-around (and best for batches): oven
Use a warm-through phase, then a short hot finish for crisp skin. - Fastest crispy result (small batches): air fryer
Great crispness quickly, but capacity is limited. Single layer beats speed every time. - Decent backup for small batches: toaster oven
Think “small oven.” You still want airflow and a hot finish. - Good for a few dry wings: skillet
Crisp skin is possible fast, but it’s hands-on and not friendly to heavy sauce. - Last resort: microwave
It warms the meat, but the skin usually turns soft. If you must use it, warm first, then crisp in the oven or air fryer.
Next, use the decision tree to pick the best method based on what you have on hand, how many wings you’re warming up, and whether they’re sauced.
Decision tree to choose the best reheating method
This is built for real life. Start at the top and work down. When you hit the best “Yes” for you, that’s your method.
Decision tree: pick your wing reheat method
- Do you need to reheat a lot of wings (sheet pan, party tray, multiple servings)?
- Yes → Use the oven (best capacity, best even heating).
- No → Keep going.
- Do you have an air fryer?
- Yes → Reheat in the air fryer for the quickest crisp finish (best for small batches).
- No → Keep going.
- Do you have a toaster oven?
- Yes → Use it like a small oven: single layer + airflow + hot finish.
- No → Keep going.
- Are the wings dry-rubbed or only lightly sauced?
- Yes → A skillet can crisp them quickly if you keep them in one layer.
- No (heavily sauced/glazed) → Prefer the oven and re-sauce after.
- Only option available is a microwave?
- Microwave to warm the meat, then finish with dry heat (hot oven/toaster oven/air fryer/skillet) to bring back crispness.
Crispness comes from dry heat and airflow. Pick the method that lets wings sit in a single layer and finish hot.
If you want a quick side-by-side comparison before you commit, the table below makes the tradeoffs easy to see.
Wing reheating methods compared
This table helps you choose based on crispness, speed, and capacity. Use it as a quick reference, then jump to the step-by-step method you picked.
| Method | Best for | Typical settings | Time range | Texture outcome | How to keep the skin crisp |
|---|---|---|---|---|---|
| Oven | Medium to large batches; most leftovers | Warm through at 350°F, then finish at 425°F or with a brief broil | About 10–15 minutes to warm through, plus 3–5 minutes to crisp the skin | Very close to fresh when the wings are spaced out | Use a wire rack for airflow and finish with higher heat |
| Air fryer | Small batches when you want speed | 360–380°F | About 8–12 minutes total | Very crisp skin fast | Keep the wings in a single layer and flip or shake halfway through |
| Toaster oven | Small to medium batches without heating a full oven | 350–375°F, then a short hot finish | Often similar to oven timing, sometimes slightly faster | Crisp results if the wings are not crowded | Use a wire rack or perforated tray, then finish hot |
| Skillet | A few dry-rubbed or lightly sauced wings | Medium heat | About 6–10 minutes, turning once | Crisp exterior, but more hands-on | Use a single layer and avoid heavy sauce that can stick or scorch |
| Microwave | Only when time is tight and your options are limited | Short bursts instead of one long run | Roughly 2–3 minutes total, depending on power and portion size | Hot meat, soft skin | Microwave just to warm, then crisp with dry heat in the oven or air fryer |
If you’re reheating a tray or feeding a group, start with the oven method. If you’re reheating a small batch and want quick crispness, start with the air fryer method. Once you’ve picked a method, the next sections help you run it with fewer “why are these soggy” surprises.
Best-practice checklist for crispy reheated wings
These are the habits that deliver crisp skin and juicy meat no matter how you reheat them. You’ll see a few of them repeated on purpose because they’re the difference-makers.
Best-practice checklist
- Give wings space so they crisp instead of steam.
- Use airflow when you can (a wire rack over a pan is ideal).
- Warm through, then finish hot to bring the skin back.
- Flip or shake halfway so both sides re-crisp evenly.
- Hit 165°F inside so the thickest part is hot and safe.
- Reheat only what you’ll eat so you’re not cycling the same wings over and over.
- Serve soon after reheating because crispness fades as steam builds and the wings cool.
Optional help: a light mist of neutral oil can boost crisping if the skin looks dry.
Step-by-step methods
This is the “do it now” section. Each method below is written to protect juiciness first and follows the same game plan: warm the wings through first, then finish hot so the skin crisps without drying out the meat. Pick the method that matches your setup and your batch size, then follow the steps as written.
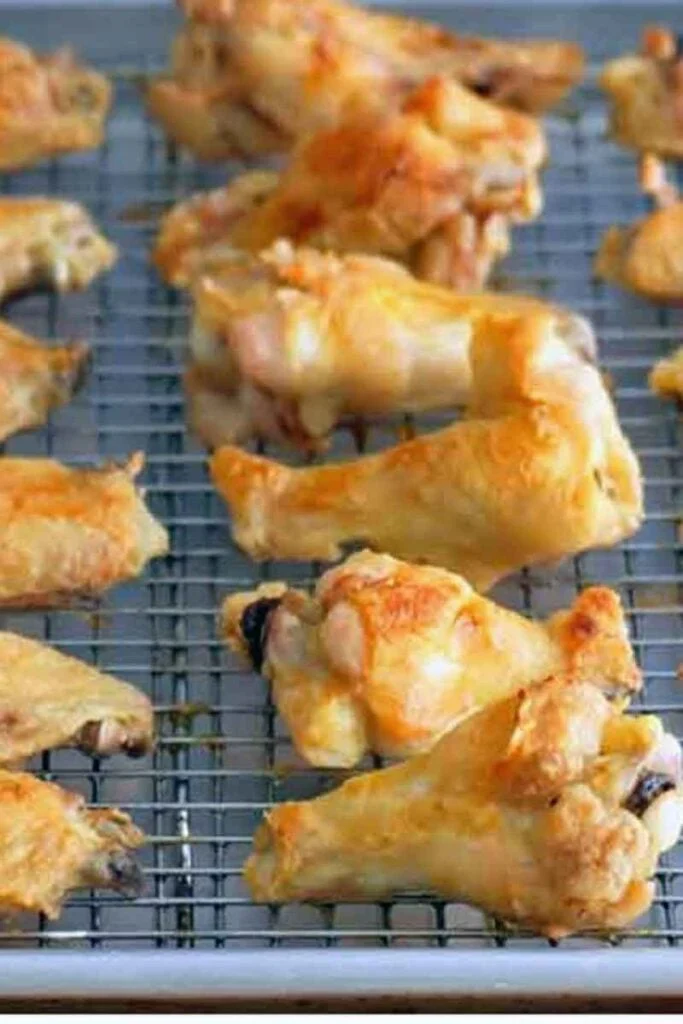
Reheat wings in the oven

The oven is the most reliable option for crispy leftovers because it handles volume and gives you an easy crisp finish. If you want wings that feel closest to fresh, start here.
Oven reheat (best all-around)
- Best for: Medium to large batches and most leftover wings
- Set to: 350°F to warm through, then 425°F to finish (or a brief broil)
- Time: About 10–15 minutes to warm, plus 3–5 minutes to crisp (depends on size and starting temp)
- Crispness move: Use airflow (wire rack over a sheet pan), then finish hot so the skin tightens
- Sauce note: For heavily sauced wings, reheat first and toss in warm sauce after so the finish stays crisp
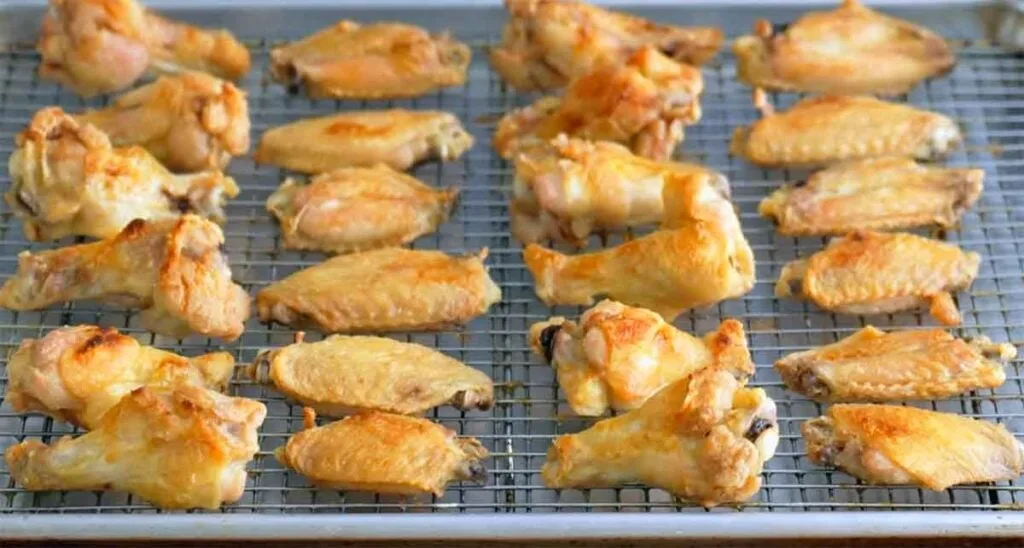
- Preheat to 350°F so the wings warm evenly without drying out.
- Set up airflow with a wire rack over a sheet pan. If you do not have a rack, space wings extra well on a pan.
- Arrange wings in a single layer with gaps so they crisp instead of steam.
- Warm through for 10–15 minutes, flipping once halfway.
- Finish hot for crispness: raise to 425°F for 3–5 minutes, or broil briefly while watching closely.
- Confirm 165°F internal in the thickest part, then serve right away for best texture.
Tip: if sauce contains sugar, keep the broil short and watch closely.
Once the wings are hot to the bone and the skin looks tight and crisp, serve them right away while they are at their best.
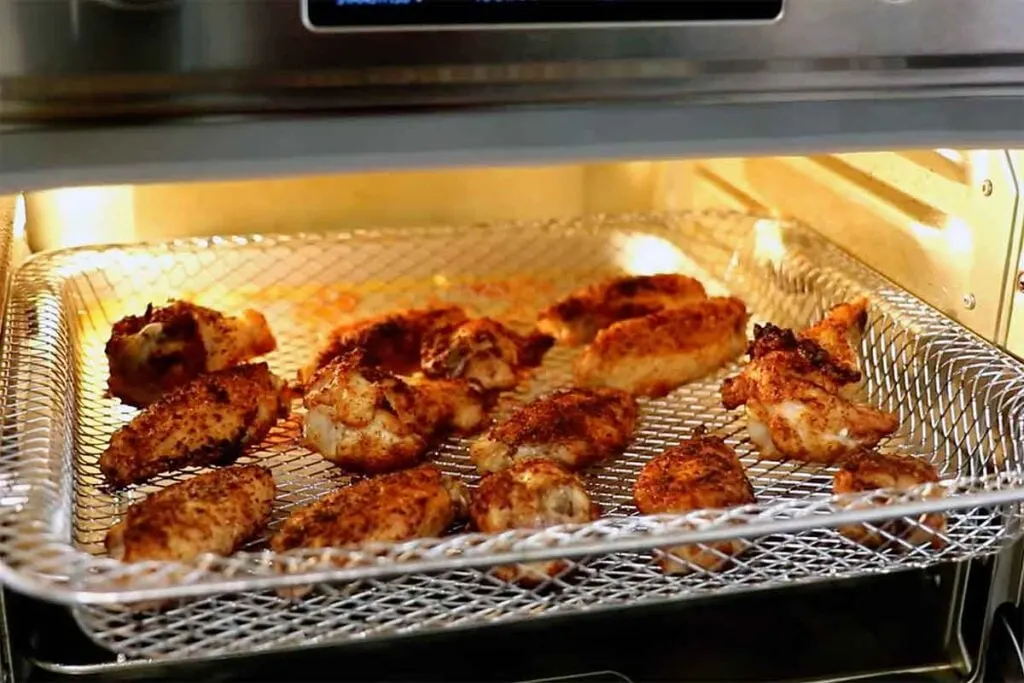
Convection and oven “Air Fry” settings
If your oven has convection, you can often get crispier results a little faster because a built-in fan circulates hot air around the food, as GE Appliances explains. Some ovens also include an “Air Fry” mode, which uses a convection-fan-driven approach and optimized heating to deliver a crispier exterior than traditional oven cooking (see GE’s No Preheat Air Fry guidance).
A few practical rules keep this simple:
- Start checking earlier. Convection can brown faster, especially during the crisp finish.
- Keep the same two-phase plan. Warm through first, then finish hot for crispness.
- Use the right setup. A wire rack or air-fry basket helps because airflow is what does the work.
One helpful reality check: countertop air fryers often feel faster because the cavity is small and the airflow is concentrated. A full-size oven can still do an excellent job, especially for larger batches, but it may need a little more time to match the same snap you get from a countertop unit.
Reheat wings in an air fryer

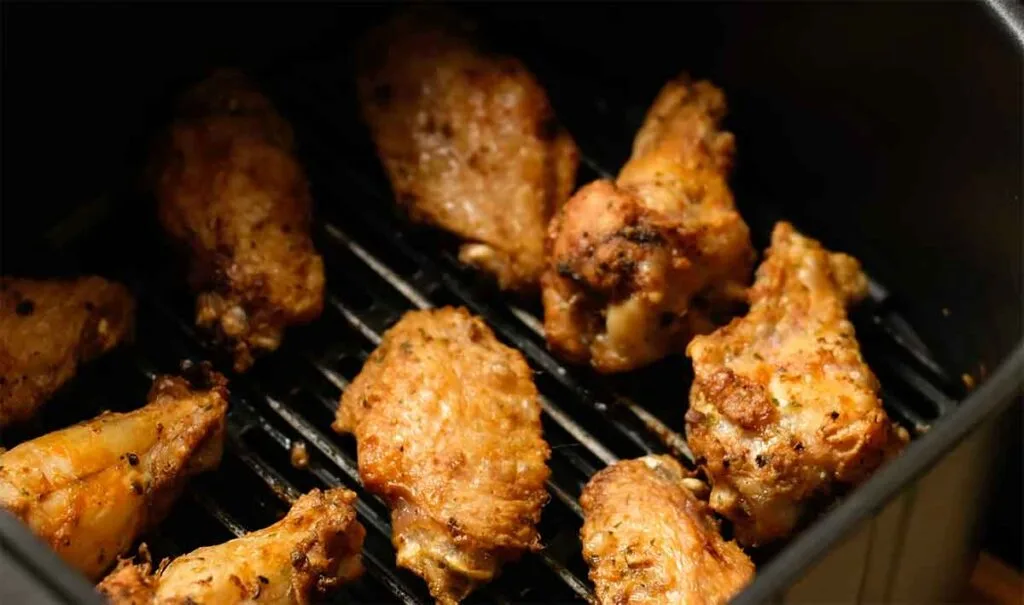
Air fryers are great for small batches when you want quick crisp skin without heating up the whole kitchen. Exact results vary by model, but the same principles still win: single layer, airflow, and a hot finish. Many air fryers even include a dedicated Reheat program meant to “bring the crisp and crunch back to leftovers” (see the Instant Vortex Plus Dual manual).
Air fryer reheat (fastest crisp finish for small batches)
- Best for: A few wings at a time, snack portions, quick reheat
- Set to: 360–380°F
- Model note: If your air fryer has a Reheat preset, use it as your baseline (manual ranges vary by brand).
- Time: About 8–12 minutes total
- Crispness move: Single layer and a flip or shake halfway
- Sauce note: Reheat first, then toss in warm sauce after for the best texture
- Preheat if your model does, so wings hit real heat right away.
- Arrange wings in a single layer with space between pieces.
- Heat for several minutes, then flip or shake so both sides crisp evenly.
- Continue until crisp and hot, then confirm 165°F internal.
- Serve right away so the skin stays crisp.
If wings look close but not quite crisp, add 1–2 minutes at the end rather than crowding the basket.
If you are reheating more than one basket’s worth, run batches and keep each batch in a single layer so every wing gets airflow.
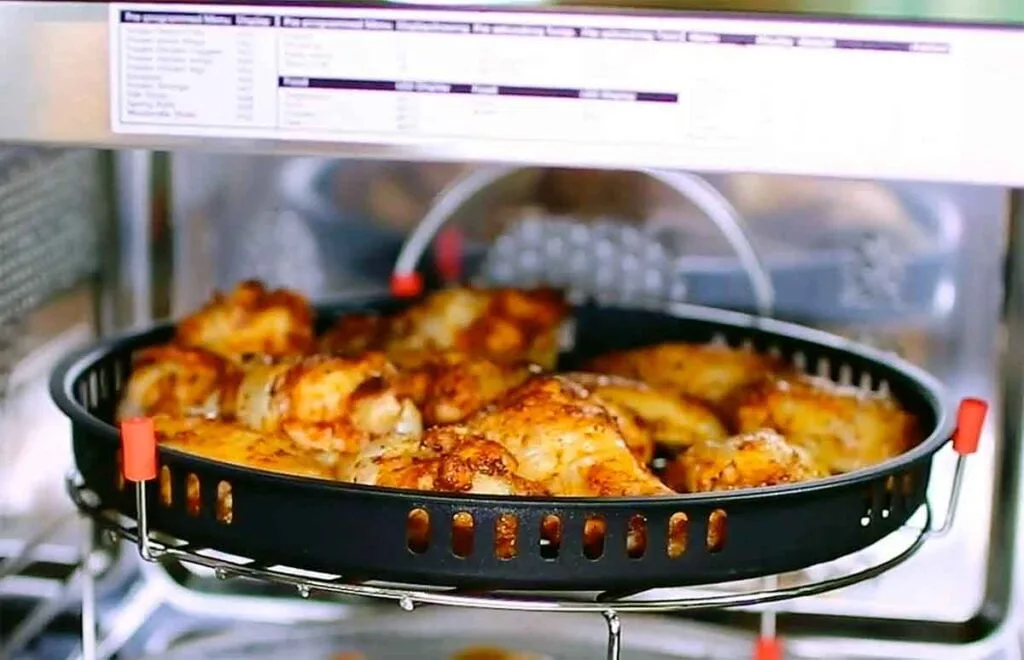
Reheat wings in a toaster oven

A toaster oven can deliver oven-like results on a smaller scale. It’s a strong option when you want crispness but don’t need a full sheet pan. It’s often the sweet spot for reheating wings because it heats fast and many models have a convection or roast fan. “I’ve found that the best way to get them is from my toaster oven, which heats quickly and has a convection fan for roasting,” writes Alton Brown.
Toaster oven reheat (small oven results)
- Best for: Small to medium batches without heating a full oven
- Set to: 350–375°F, then a short hot finish if needed
- Time: Often similar to oven timing, sometimes slightly faster
- Crispness move: Wire rack or perforated tray, then finish hot near the end
- Sauce note: Thick or sugary sauces can brown quickly, so watch the finish
- Preheat so the wings start crisping instead of slowly steaming.
- Use a wire rack or perforated tray if possible for better airflow.
- Arrange wings in a single layer with space between pieces.
- Warm through, turning once if needed.
- Finish hot briefly to tighten the skin, then confirm 165°F internal.
If your toaster oven runs hot, shorten the finish step rather than lowering airflow.
Toaster ovens do their best work when you resist crowding and let hot air reach every wing.
Reheat wings in a skillet


A skillet is a quick, hands-on method that works best for dry-rubbed wings or wings with only a light coating of sauce. It can crisp beautifully, but it is less forgiving with sticky glazes.
Skillet reheat (quick and crisp for a few wings)
- Best for: A small number of wings that are dry-rubbed or lightly sauced
- Set to: Medium heat
- Time: About 6–10 minutes total (3–5 minutes per side)
- Crispness move: Single layer and a steady medium heat so the skin crisps without burning
- Sauce note: Heavily sauced wings tend to stick and scorch, so use oven reheat and re-sauce after
- Heat a heavy skillet over medium heat, then add a thin slick of oil.
- Pat wings dry if they are wet on the surface, so the skin browns instead of steaming.
- Place wings in a single layer with space between pieces.
- Cook 3–5 minutes, then flip and cook another 3–5 minutes until crisp and hot.
- Confirm 165°F internal, then serve.
If the pan is smoking or sauce is darkening fast, lower the heat and finish in the oven instead.
A skillet is a great way to reheat a few wings fast, as long as you keep the batch small enough to give every wing contact and space.
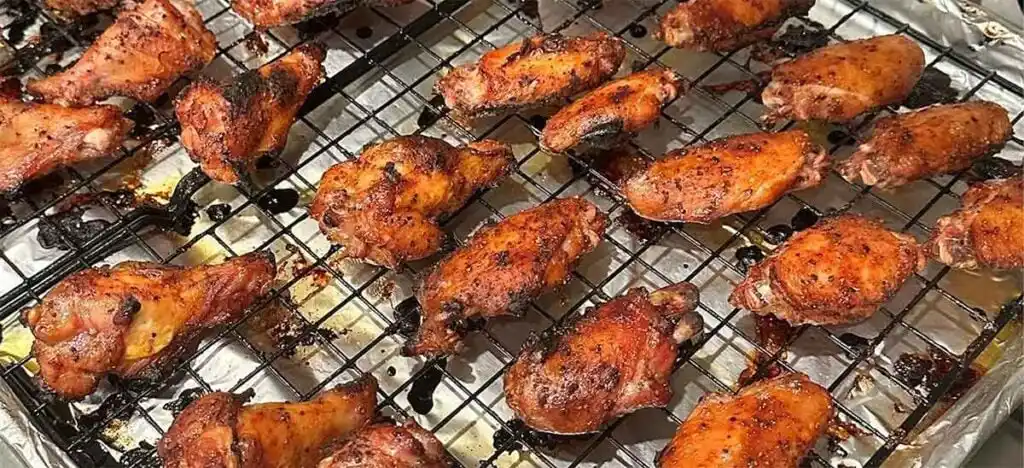
Reheat wings on the grill or smoker

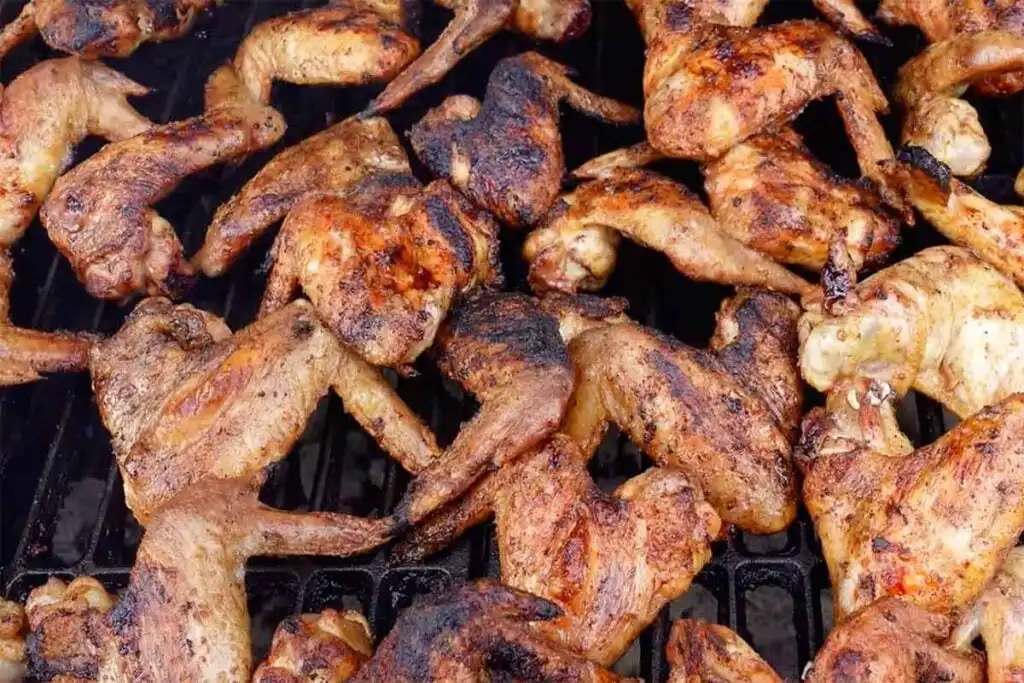
Most people will not fire up a grill just to reheat leftovers, so this is more of a bonus method than a default. That said, if your grill is already going, or if the wings were grilled or smoked the first time, this is a great way to bring back crisp skin and a little char without drying the meat. Pair with the right wood, and you can add another layer of flavor
Grill or smoker reheat (optional, great if you are already outside)
- Best for: Wings that were grilled or smoked, or anytime the grill is already hot
- Set to: Medium heat, about 350°F, with a 2-zone grilling setup if possible
- Time: About 5–10 minutes indirect, then 2–5 minutes direct to crisp (turn often)
- Crispness move: Warm through on indirect heat with the lid closed, then finish briefly over direct heat
- Sauce note: Brush sauce on only in the last 1–2 minutes so it sets without burning
- Preheat the grill to medium heat, around 350°F.
- Set up two zones so you have an indirect side (cooler) and a direct side (hotter).
- Warm the wings on indirect heat with the lid closed for about 5–10 minutes, turning once or twice.
- Move wings to direct heat to crisp for 2–5 minutes, turning frequently so they brown without scorching.
- Confirm 165°F internal in the thickest part, then pull them while the skin is crisp.
- If saucing, brush sauce on during the last 1–2 minutes so it sets and stays punchy.
If flames are licking up, move wings back to indirect heat and keep turning. Crisp comes from controlled heat, not flare-ups.
Once the wings are hot through and the skin has tightened, serve them right away. Grill-reheated wings are at their best while they are still fresh off the heat. Next time you're making wings, try this smoked chicken wing recipe which is first smoked and then deep fried for crispy, smoky bite.
Optional note: deep frying leftover wings
We don’t recommend deep frying wet or heavily sauced leftover wings. Extra moisture can cause aggressive splatter (messy at best, a burn risk at worst). If you insist, remove excess sauce, pat very dry, and fry only small batches. For most leftovers, an oven or air fryer re-crisp is the safer, lower-stress move.
Reheat wings in the microwave

Microwaves heat the meat quickly but soften the skin because steam builds around the wings. If crispness matters, the best microwave plan is a two-step approach.
Microwave reheat (warm the meat, then crisp with dry heat)
- Best for: When speed matters and reheating options are limited
- Set to: Short bursts, not one long run
- Time: Varies widely by microwave and portion size
- Texture outcome: Hot meat, soft skin unless you finish with dry heat
- Crispness move: Microwave to warm, then finish in oven, air fryer, toaster oven, or skillet
- Spread wings in a single layer on a microwave-safe plate.
- Heat in short bursts, turning between bursts so they warm more evenly.
- Stop once the wings are hot and confirm 165°F internal.
- Crisp finish: move wings to a hot oven, toaster oven, air fryer, or skillet for a short dry-heat finish.
If wings are sauced, consider re-saucing after the crisp finish so the skin does not turn soft again.
If the microwave is your only option, this warm-then-crisp approach gives you the best chance at wings that still have some bite.
At this point you’ve got the core methods. Next, let’s cover the situations that usually trip people up: sauce, takeout containers, and frozen leftovers.
Sauced vs dry wings
Sauce changes everything because it adds moisture, and moisture is the enemy of crisp skin. The win is learning when to reheat “as-is” and when to re-sauce after.
Dry-rubbed or plain wings

These are the easiest leftovers to revive.
- Reheat with airflow (oven or air fryer works best)
- Use a short hot finish to re-crisp the skin
- Serve soon after reheating for best texture
If you like serving wings with multiple sauces or dips, the how much sauce to plan for wings guide helps you set out the right amount without guessing.
Lightly sauced wings

Light sauce usually reheats fine if you avoid crowding.
- Warm through at moderate heat
- Finish hot briefly for crispness
- Add a small splash of warm sauce at the end only if they look dry
This is the “best of both worlds” category when you keep the wings in a single layer.
Heavily sauced or glazed wings

This is where leftovers most often go sideways. High heat can scorch sauce before the wing is hot, and long reheats can dry the meat. Skip rinsing. It adds water, makes crisping harder, and turns cleanup into a mess.
First decide what you want:
- Just warm and saucy: reheat the wings in the sauce and accept a softer skin.
- Some crisp back: separate the wings from the sauce, crisp the wings first, then toss in warm sauce at the end.
Option 1: Warm in sauce and eat
This is the simplest and often the best choice if the wings are heavily coated. Warm them through gently, turn once or twice, and call it good. Crisp skin is not the goal here.
Option 2: Separate, crisp, then sauce after
Lift the wings out of the sauce, remove excess sauce (a quick scrape across the edge of their container is fine), then blot the surface lightly. Reheat the wings on a wire rack or single layer for better airflow until hot and crisped, warm the sauce separately, then toss right before serving.
Sauce late
If you want sauce baked on, add it near the end so it has less time to burn or glue itself to the pan. Expect a stickier glaze and less crunch than a toss right before serving. For a crowd, it can also work to serve wings plain with sauces on the side, then toss small batches to order.
Restaurant takeout wings and delivery leftovers

Takeout wings have one built-in problem: they often sit in a closed container, and trapped steam softens the skin fast. The good news is you can still get great results if you manage moisture and finish hot.
A simple takeout rescue plan
- Open the container once you know these wings are headed for leftovers, so steam can escape.
- Store wings in the fridge in a way that protects texture (shallow, covered container is fine; crowding is what you want to avoid).
- Reheat with a method that gives airflow: oven, air fryer, or toaster oven.
- If the wings were heavily sauced, reheat first, then re-sauce after so the finish stays crisp.
This takeout approach keeps the focus where it belongs: less trapped moisture, more crisp finish.
Frozen leftover wings
If you froze leftover wings, you can still get a good result, but it’s easier when you thaw first.
- Best result: thaw overnight in the fridge, then reheat normally.
- If you need to reheat wings from frozen: expect longer time and less even heating. A gentler warm-through (lower oven temp) followed by a hot crisp finish helps protect juiciness.
Frozen wings can still crisp nicely, but they reward patience. The warm-through phase matters more here than almost anywhere else.
Next, let’s talk batch size, because most “soggy wing” complaints are really “crowded tray” problems.
Reheating a few wings vs a full tray
The bigger the batch, the more your method needs to protect airflow. Crispness comes from dry heat reaching the surface, not from stacking wings in a warm pile.
Reheating a few wings
- Air fryer is the easiest crisp win
- Skillet works well for dry wings
- Toaster oven is a solid middle option
With small batches, the main job is simply resisting the urge to crowd.
Reheating a sheet pan or party tray
- Use the oven
- Use multiple pans (and wire racks for airflow), if needed, so the wings stay in one layer
- Rotate pans halfway so every tray gets good heat exposure
- If you own an air fryer, think of it as a finishing station for a portion that needs extra crisp
If your real goal is keeping wings hot and crisp for serving over time, that’s a different playbook. The keep wings hot and crispy guide covers holding strategies without turning wings soft.
Now, before troubleshooting, it helps to lock in the safety guardrails that protect both quality and confidence.
Food safety guardrails for leftover wings
This section is here to make the process feel calm, not stressful. A few simple rules keep leftovers safe and keep your results better.
- Within 2 hours: refrigerate leftovers (CDC)
- Within 3–4 days: use refrigerated wings (USDA FSIS)
- Reheat to 165°F internal
- Reheat only what you’ll eat
- If wings smell off or feel slimy, or you’re not sure about them, skip them. It’s not worth it.
Official temperature guidance: FoodSafety.gov’s safe minimum temperature chart lists leftovers as safe when reheated to 165°F on a food thermometer. See the chart. If you’ve wondered why wings are often cooked higher than 165°F the first time, see finish temps for wings.
Note: Reheating in smaller batches helps both safety and texture. If you warm a batch and don’t finish it, refrigerate it again within 2 hours, then reheat to 165°F when you eat it. Bacteria grow fastest in the 40–140°F danger zone, so cooling fast protects both safety and texture.
These guardrails also protect texture, because the longer wings sit, the more moisture and staleness creep in.
Next, let’s fix the most common problems: soggy skin, rubbery texture, and dried-out meat.
Troubleshooting
Most reheating problems come from one of three causes: too much trapped moisture, not enough airflow, or too much heat for too long. The fixes are usually quick once you know what to change.
| Problem | Most common cause | Quick fix right now | Prevent it next time |
|---|---|---|---|
| Soggy skin | Crowding or trapped steam from a container, covered pan, or stacked wings | Spread the wings in one layer, blot moisture, then finish hot for a few minutes in dry heat | Use airflow, such as a wire rack over a sheet pan, and give the wings space so they crisp instead of steam |
| Rubbery skin | Microwave-only reheating or a low, steamy reheat with no hot finish | Switch to a dry-heat finish in the oven, toaster oven, air fryer, or skillet until the skin tightens | Warm the wings through first, then finish hot, and avoid covering them tightly while reheating |
| Meat feels dry | Too much heat, too much time, or repeated warm-ups | Stop as soon as the wings reach 165°F, then re-sauce after reheating if they need moisture | Use a two-phase reheat and warm only what you plan to eat |
| Outside browns before inside is hot | Starting too hot or using the broiler too early | Lower the heat to warm the wings through, then save the hot finish for the last few minutes | Warm through first, crisp the skin last, and check earlier if you are using convection |
| Sauce burns or tastes bitter | Sugary sauce exposed to high heat for too long | Reheat mostly dry, then toss the wings in warm sauce after reheating, or sauce only at the very end | Treat sauce as a finishing step, not something to bake hard during reheating |
| Hot spots and cold spots | Overcrowding, uneven spacing, or not flipping or rotating the wings | Flip the wings, rotate trays, and reheat in batches so heat can circulate | Use a single layer, consistent spacing, and a halfway turn or shake every time |
If the wings are already warm but the skin is soft, use the rescue checklist below to bring the crisp back quickly.
Soggy wing rescue mini-checklist

This is your quick save when wings are already warm but the skin is soft.
Soggy wing rescue
- Get them out of the container so trapped steam stops softening the skin.
- Blot surface moisture (especially on sauced wings) so the finish can crisp instead of simmer.
- Spread in a single layer with space so hot air hits the whole surface.
- Use a short hot finish in an air fryer, toaster oven, or hot oven until the skin tightens.
- Re-sauce after if needed, so you don’t undo the crisp you just rebuilt.
Keep the rescue short and hot. Long reheats fix nothing and dry the meat.
Once the wings are crisp again, serving right away is the easiest way to keep them that way.
Final thoughts
Crispy reheated wings are mostly about good setup: space, airflow, and a short hot finish after the meat is warmed through. Use the oven when you have a tray to manage, use the air fryer when you want fast crispness, and treat the microwave as a warm-up option that benefits from a second step.
If you’re planning a bigger wing night, the how to cook wings for a crowd guide can help you pick a method that scales. If you’re still deciding what to buy next time, the buying chicken wings guide can help you choose wings that match your cooking and reheating style. For more calculators and quick guides like this one, visit the BBQ Tools Hub.
FAQ
No. For both safety and texture, reheat wings straight from the fridge. Letting them sit out longer adds time in the danger zone and does not meaningfully improve crispness. Instead, use a warm-through phase to heat the meat gently, then finish hot to re-crisp the skin. If wings seem extra cold, add a couple minutes rather than resting on the counter.
Cool them fast and avoid trapping steam. If wings are headed for leftovers, open the takeout container or vent it so moisture can escape. Refrigerate in a shallow container and avoid piling wings into a tight stack. The goal is “dry surface, minimal steaming,” which sets you up for a short hot finish that brings back crisp skin.
It’s best to avoid it. Reheating repeatedly dries the meat and increases the risk of temperature mishaps. Reheat only what you plan to eat, and heat that portion to 165°F in the thickest part. If you warmed a batch and did not finish it, refrigerate it again within 2 hours, then reheat to 165°F the next time.
Separate, dry, then re-crisp. Pull the wings out of the sauce, removing excess or blotting dry. Pat the wings dry, then reheat on a wire rack so hot air can dry and re-crisp the skin. Warm the sauce separately and toss or brush it on right before serving. If the sauce is thick or sweet, add it at the end so it doesn’t scorch.
Thawing overnight in the fridge gives the most even, juicy result. From frozen, wings reheat less evenly and take longer, so use a gentler warm-through phase first, then finish hot to restore crispness. Avoid going straight to high heat, which can over-brown the outside while the center stays cold. Always confirm an internal temperature of at least 165°F.
Crispness fades as steam builds. If you need a short buffer (say, 15–30 minutes), keep wings in a single layer with airflow rather than in a covered bowl or closed container. A wire rack over a sheet pan helps. Avoid saucing until the last moment, and skip stacking. If wings soften, a quick hot finish can restore some bite.
Corrections and editorial standards
- Spotted something wrong or outdated? Send a correction here: Corrections & Updates
- How we handle sources, testing, and updates: Editorial Standards
- Media or general notes: Email the publisher
Restaurant owners and authorized reps should use the listing update form: Restaurant Listing Update.
Sources
Safety guidance is sourced from public-health and USDA references. Technique notes are supported by appliance documentation and established cooking references, then checked against our own cooks at home.
- USDA FSIS: Leftovers and Food Safety (storage, reheating, and safe thawing guidance)
- USDA FSIS: Steps to Keep Food Safe (2-hour rule and leftovers window)
- USDA FSIS: Safe Handling of Take-Out Foods (takeout storage and reheating constraints)
- FoodSafety.gov: Safe Minimum Internal Temperatures (165°F leftover reheating target)
Technique and appliance guidance (selected):
- GE Appliances: Convection vs conventional ovens (what convection is and why it can crisp faster)
- GE: No Preheat Air Fry guidance (how oven “Air Fry” mode is intended to function)
- Instant Vortex Plus Dual Air Fryer User Manual (“Reheat” program description and guidance)
- Philips Airfryer User Manual (HD928X series) (keep warm vs reheating notes and crisp-up guidance)
- Ninja Foodi Smart Dual Heat Air Fry Oven Owner’s Guide (SP350 series) (function definitions and operating guidance)
- Serious Eats: Convection explained (why moving hot air can improve browning and crispness)
- Serious Eats: Warmed-over flavor in leftover meats (why leftover poultry can taste different)
- Alton Brown: Toaster oven chicken wings (practical support for toaster-oven + convection crisping)
We cite authoritative references and note when testing is based on first-hand experience.
About the author
James Roller documents South Carolina barbecue for Destination BBQ and authored the SC BBQ cookbook Going Whole Hog. He and his wife, Heather, have cooked and served wings for home gatherings for years. This guide does not reflect formal lab-style testing. It’s a reader-first synthesis of published food-safety guidance and a wide range of reheating technique advice, checked against practical notes from their own cooks.