Learn how a charcoal chimney starter works, how to light it safely, and how much charcoal to use for fast, clean cooks on any grill.
What is a Charcoal Chimney Fire Starter?
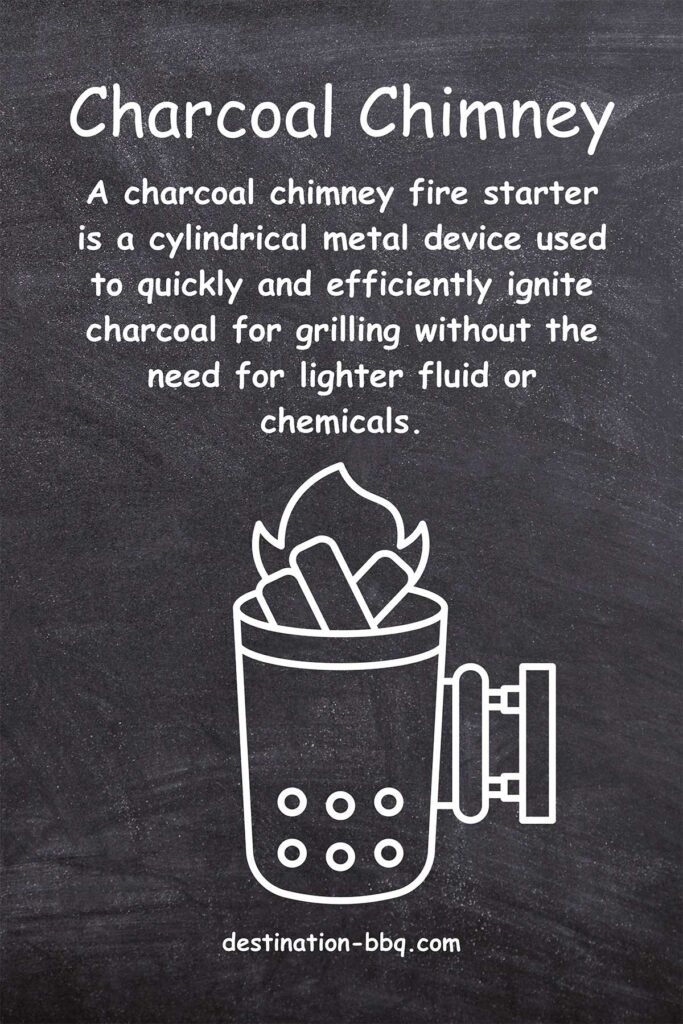
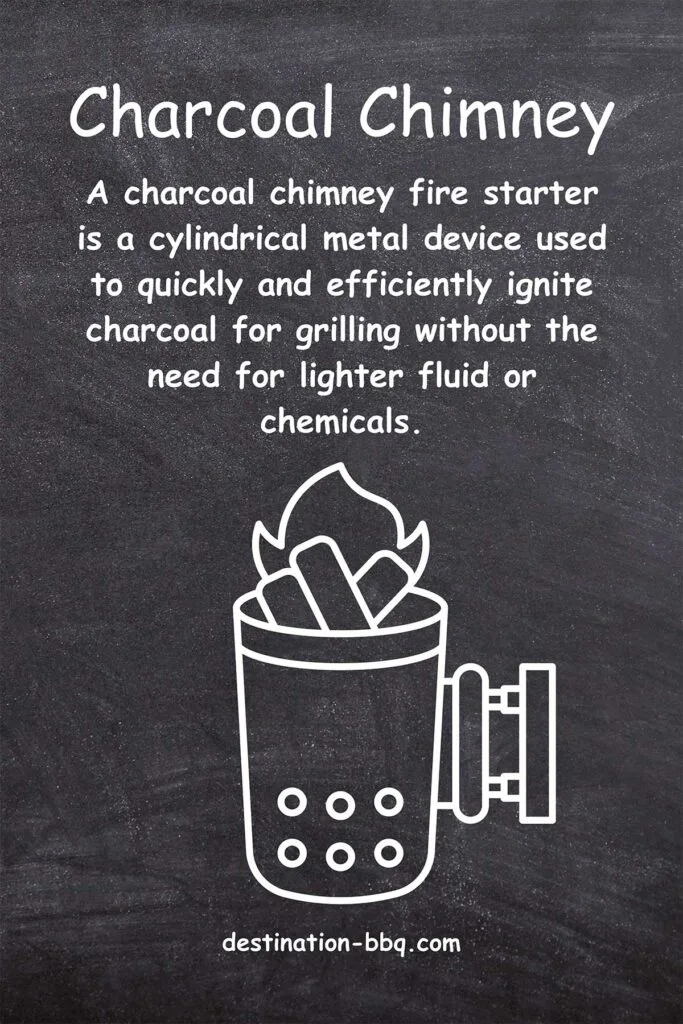
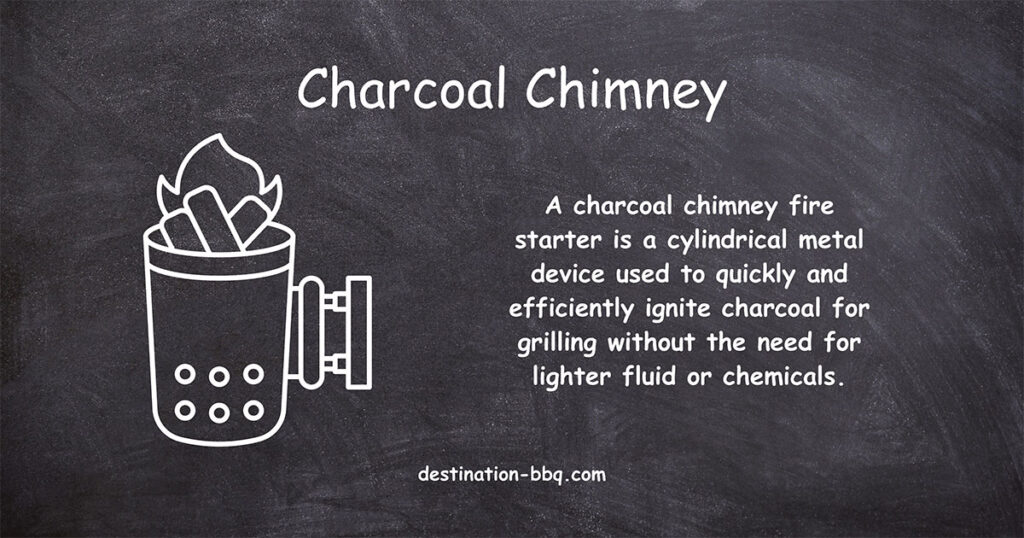
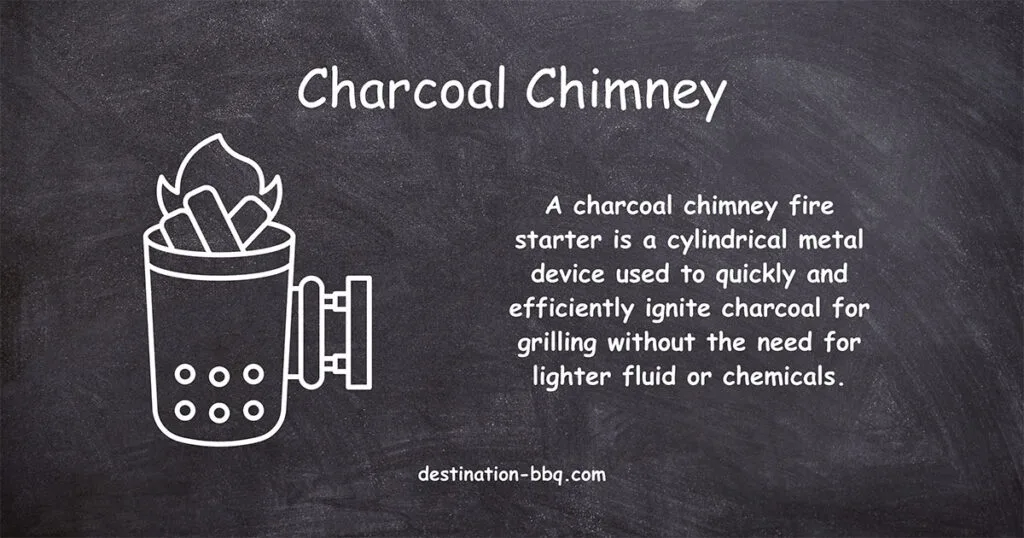
A charcoal chimney, often called a chimney starter or charcoal chimney starter, is a simple metal tube that lights charcoal quickly and evenly without lighter fluid. You pack newspaper or starter cubes in the bottom, fill the top with briquettes or lump charcoal, light the paper, and in about 15 minutes, you have a batch of red-hot coals ready to cook. No petrochemical fumes, no squirting lighter fluid, just charcoal burning clean and hot.
Everything here reflects how I actually use a chimney to start my own grills, refined over time and confirmed using current manufacturer instructions.
Key Takeaways
- Fast, chemical-free fire: A charcoal chimney is a metal cylinder with a grate and vents that ignites charcoal using only paper or starter cubes, so you can skip lighter fluid and any off flavors.
- Even, controllable heat: The chimney’s tall shape and ventilation create a strong draft that lights the whole load evenly, giving you a steady bed of coals and clean, thin blue smoke instead of thick white clouds.
- Safer and more sustainable: Used outdoors on a stable, non-flammable surface, a chimney avoids flare-ups from lighter fluid and cuts the VOC emissions that come with burning petroleum-based starters.
- Everyday BBQ workhorse: From weeknight burgers to long cooks using the snake method or an offset firebox, a good chimney becomes the basic tool you reach for anytime you fire up charcoal.

“One day, only because it was on a clearance shelf, I got a charcoal chimney starter; I didn’t even know how to use it at the time. But it changed my grill from a piece of lawn furniture into something I could use every week.”
— Noah Kaufman, writing for Epicurious
Understanding the Charcoal Chimney Starter
A charcoal chimney starter is essentially a stovepipe-shaped metal canister with a shelf or grate partway up. The lower section holds your tinder, usually crumpled newspaper, a paper towel lightly oiled, or a paraffin lighter cube. The upper section holds the charcoal itself.
The sides and bottom of the chimney are punched with holes. When you light the paper, fresh air is drawn in through those vents and races upward through the charcoal column. That rising hot air creates a strong draft, much like an old wood stove, which quickly brings the entire load of coals to life.
Most chimneys include:
- A heat-resistant main handle with a metal shield between your hand and the hot body
- A helper handle or wire loop on the front for better control when you pour
- Heavy-gauge steel or aluminum walls designed to withstand repeated high heat
The beauty of the design is that it runs on nothing more than paper and airflow. No lighter fluid, no cords, and nothing to leak in the trunk. Once you get used to how your chimney behaves, it becomes one of those tools you do not think about; you simply reach for it whenever you want to cook over charcoal.
Lighting is just the start. Once the coals are going, pairing them with the right smoking wood finishes the job, so explore our smoking wood and meat pairings to dial in flavor on your next cook.
Why Use a Chimney?
Here are a few reasons this fire starter earns a permanent spot next to the grill:
- Faster heating: A full chimney of briquettes or lump usually reaches cooking-ready in about 10–20 minutes.
- Even lighting: Because the coals are stacked in a tight column, they tend to ignite more uniformly than when scattered in the grill.
- No chemical taste: With no lighter fluid, there is nothing to leave a kerosene note on the meat. You taste charcoal and food, not fuel.
- Eco-friendlier: Newspaper and natural cubes avoid the volatile organic compounds (VOCs) that lighter fluids release as they burn.
- Better heat control: You can measure fuel by how full the chimney is, which makes it easier to repeat cooks from one weekend to the next.
- Less mess and cost: One sturdy chimney can last for years. You are not buying bottles of lighter fluid or spilling it across the patio.
- Works on almost any charcoal grill: Kettles, barrels, ceramic cookers, and offsets all benefit from a clean batch of lit coals.
During my own years of lighting chimneys for everything from kettles to whole-hog pits around South Carolina, the patterns above hold up weekend after weekend.
A Brief History
The basic idea behind a chimney starter has been around for more than a century. Patents from the early 1900s describe “portable fireboxes,” metal boxes with grates and handles meant to start coal fires more efficiently.
As backyard grilling exploded in the 1950s and 1960s, home cooks improvised their own versions. Folks punched holes in empty coffee cans, wired on makeshift handles, and built “kindle cans” to avoid soaking briquettes in lighter fluid. Those homemade rigs were rough, but they showed how much demand there was for a cleaner way to light charcoal.
In the 1970s and 1980s, manufacturers refined those ideas into the familiar cylindrical chimneys we use today. George Stephen’s Weber-Stephen Products Co. helped popularize the modern chimney starter and made it a standard companion to the Weber kettle. By the early 2000s, you could find chimneys in big-box stores and hardware aisles everywhere, often alongside lighter fluid that many grillers were starting to avoid.
Today, the charcoal chimney feels like old-school gear, but the design lines up nicely with modern concerns about flavor and air quality.
How to Use a Charcoal Chimney: Step-by-Step

“Charcoal chimney starters are surprisingly simple to use,” write the folks at SmokeGears. “You place flammable material, like newspaper, at the bottom, and then charcoal on the top. Light the bottom, wait ten-to-fifteen minutes and your charcoal will be nice and hot. No fluids, no electricity, just heat doing the work for you.”
Quick-Start: Lighting a Charcoal Chimney
- Set the empty chimney on your grill grate or a fire-safe surface.
- Fill the chimney with charcoal to the level you need.
- Place newspaper, a tumbleweed, or a starter cube under the chimney.
- Light the starter through the bottom vents and let the flame catch.
- Wait about 10–20 minutes, until the top briquettes are ashed over.
- Carefully pour the hot coals where you want direct or indirect heat.
Always wear heat-resistant gloves and keep kids and pets clear while you handle a lit chimney.
Tools and Materials
- Chimney starter
- Charcoal briquettes or lump charcoal
- Newspaper, scrap paper, or lighter cubes
- Grill
- Heat-resistant gloves
Step 1: Fill the Chimney
Set the empty chimney on your grill’s charcoal grate or another solid, heatproof surface. Fill the top section with charcoal. For a standard 22-inch kettle, a full chimney (roughly 90–100 briquettes) usually gives you a hot direct-grilling fire; half a chimney works well for more moderate cooks.
Step 2: Add Starter Material
Tuck crumpled newspaper, a strip torn from the charcoal bag, or a lighter cube under the bottom grate. Pack paper loosely so air can move through it. A paper towel lightly coated in cooking oil will burn longer than dry paper if you need a little extra insurance.
Step 3: Light It Up
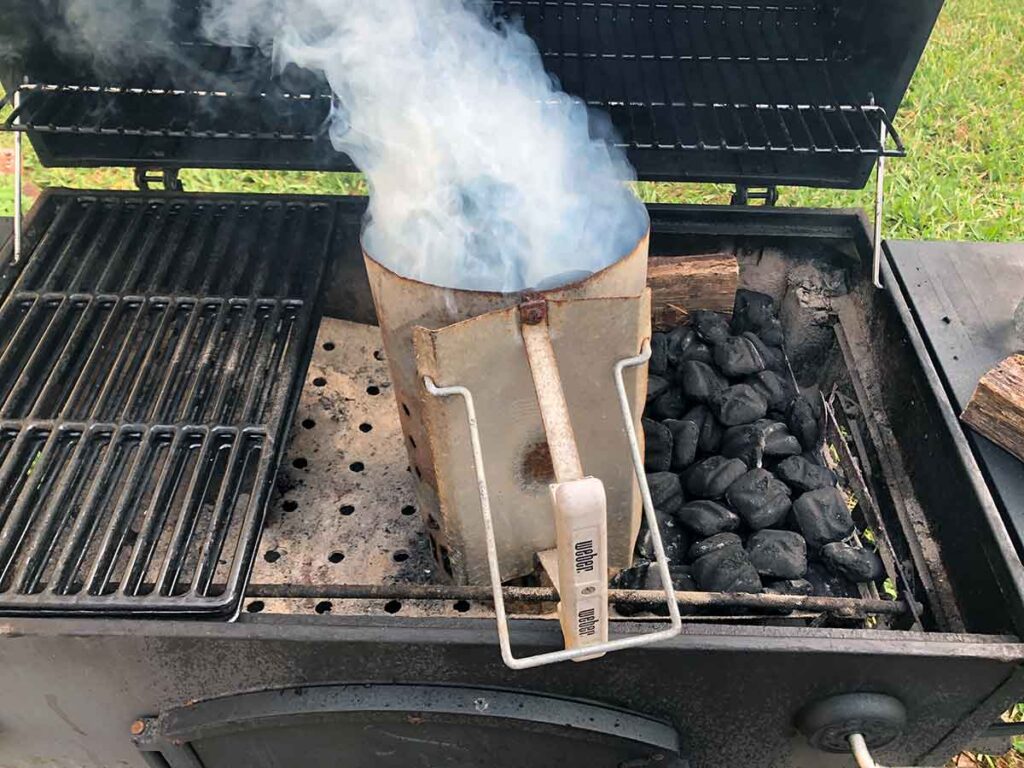
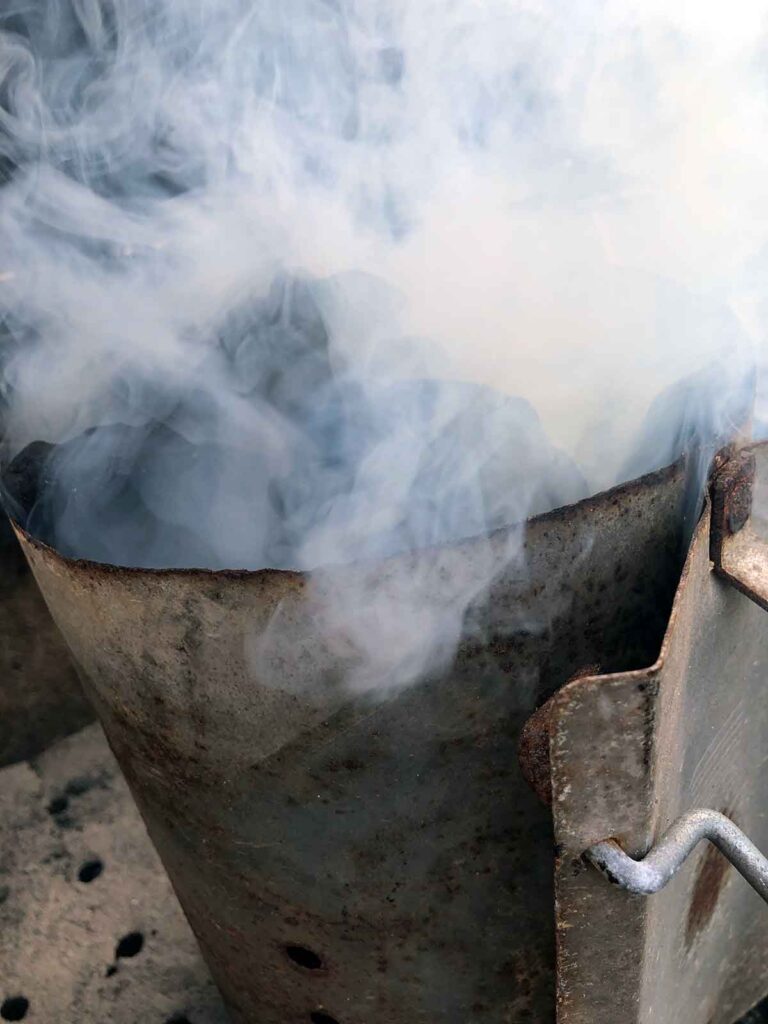
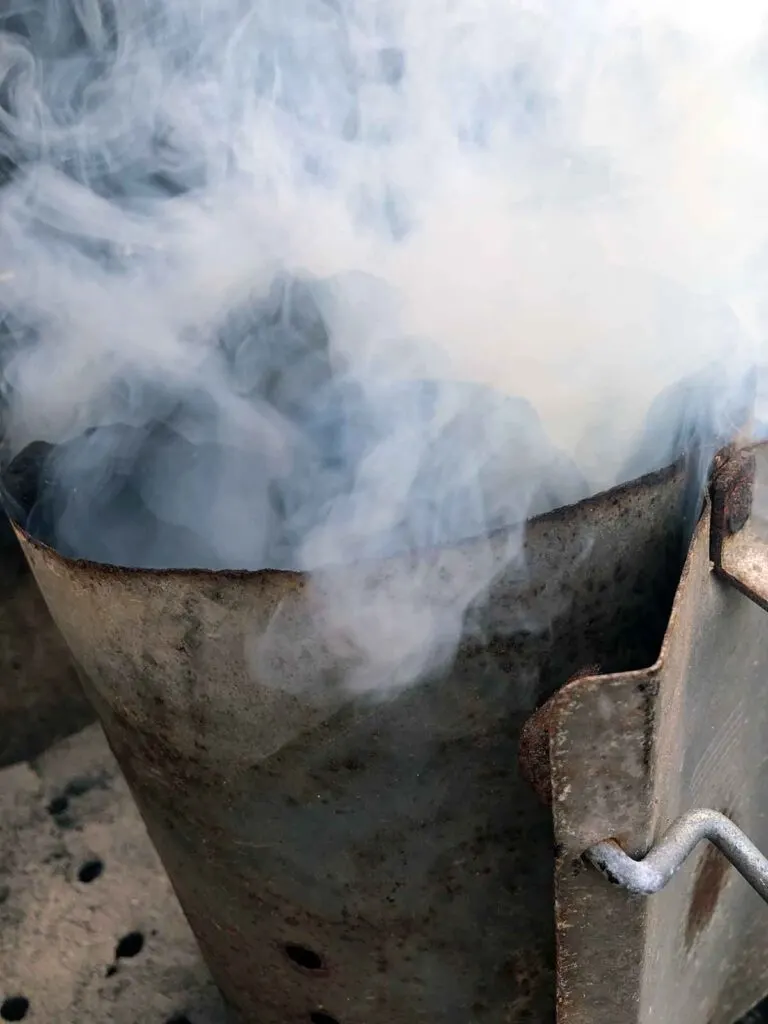
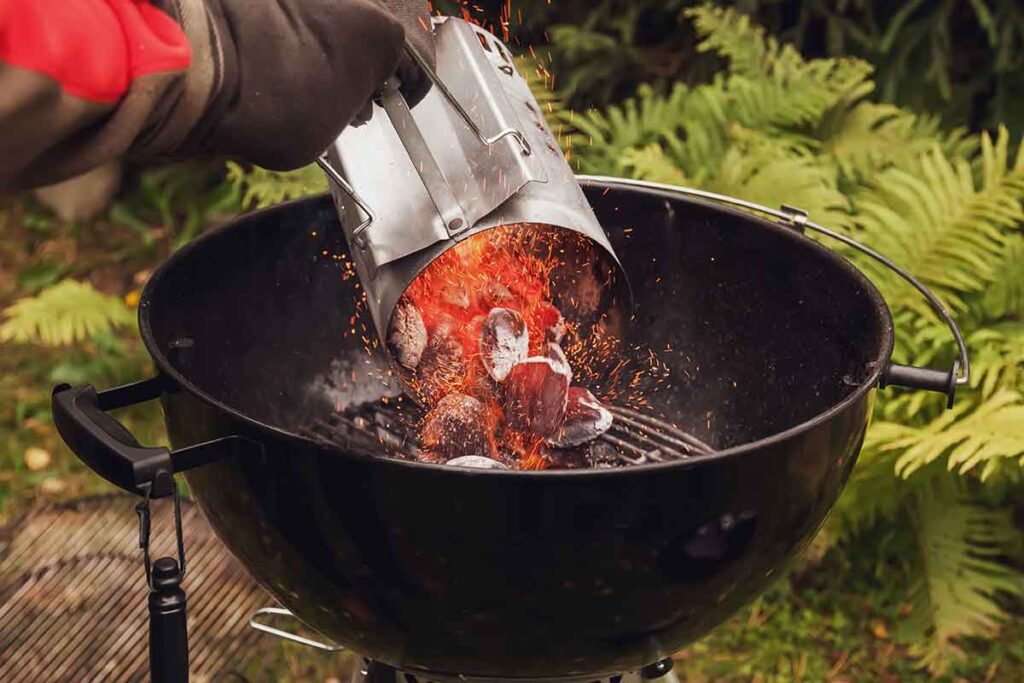
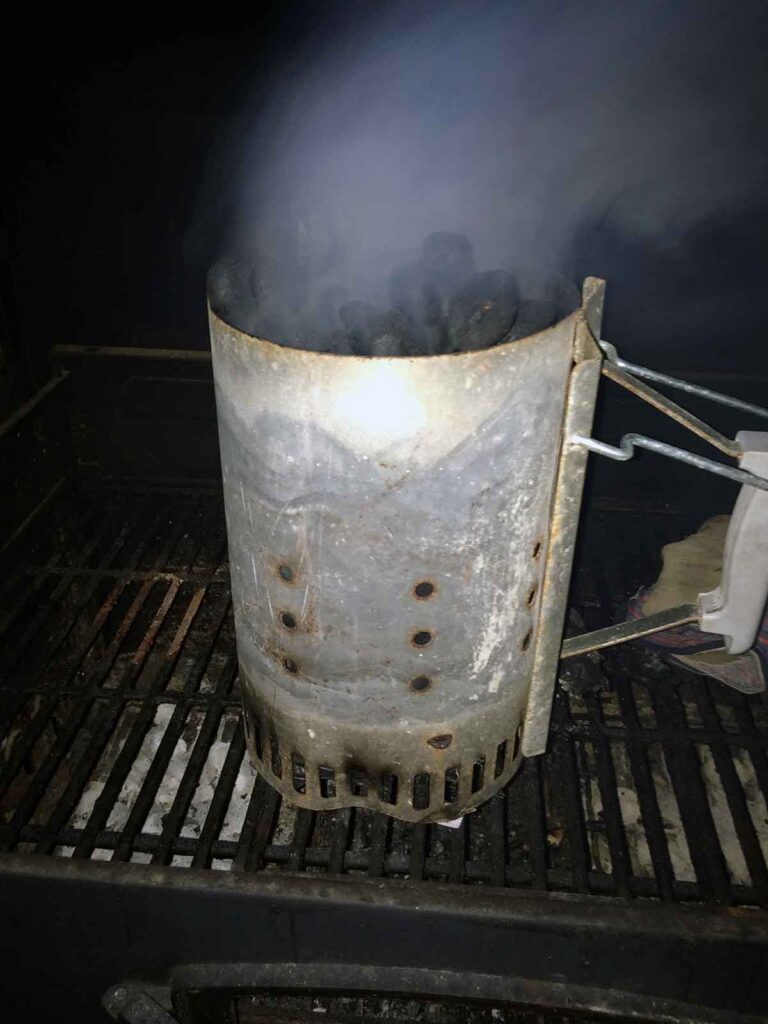
Using a long match or grill lighter, light the paper through the holes in the bottom. Flames will lick up into the charcoal as the draft builds. Keep your face and hands to the side while it gets going.
Step 4: Wait for the Coals to Heat
Over the next 10–15 minutes, the bottom coals will glow red and the top layer will begin to show gray ash around the edges. That is your cue. You do not have to wait for every briquette to be completely gray. Dustin Green, head grillmaster for Weber, told Epicurious, “If you wait until they’re all the way ashed over, you’re going to lose half your chimney when you go to dump it. It’s already burnt up and done.”
When you pour, the fully lit coals from the bottom land on the ones that are just starting to ash on top. In short order, that pile evens out into a hot bed of coals.
Step 5: Pour the Coals onto the Grill
Put on heat-resistant gloves. Grasp the main handle and the helper handle, then slowly pour the coals into your grill. Arrange them as needed: banked to one side for two-zone cooking, spread evenly for a uniform direct-heat fire, or piled at one end of a charcoal snake for a low-and-slow session. Set the empty chimney back on a safe surface to cool before you touch it again.
Safety Tips
Important Fire & CO Safety Note
- Use charcoal chimneys and grills only outdoors in open, well-ventilated areas.
- Keep hot chimneys and live coals away from buildings, decks, and anything that can burn.
- Never use a lit chimney in a garage, tent, camper, or other enclosed space because of carbon monoxide risk.
- Always follow your grill and chimney manufacturer’s instructions and local fire regulations.
Using a chimney is straightforward, but it does involve open flame and very hot metal. A little care goes a long way.
- Always set the chimney on a stable, non-flammable surface, ideally the charcoal grate inside your grill.
- Wear heat-resistant gloves when the chimney is lit or still hot. The body and handles can reach painful temperatures quickly.
- Keep children and pets well back while the chimney is burning and while you pour the coals.
- Have a plan for ash and coal disposal. When the cook is over and the coals are completely cool, transfer ashes to a metal bucket or other fire-safe container.
- Keep a hose, bucket of water, or fire extinguisher handy anytime you are working around live coals.
For broader grill fire safety, agencies like the U.S. Fire Administration recommend using charcoal grills only outdoors, keeping them well away from siding and deck railings, and placing cooled ashes in a metal container with a lid. And, of course, always follow local fire codes and any rules from your landlord, campground, or HOA about where and how you can use charcoal and chimney starters.
Treat the chimney with the same respect you give any live-fire tool and it will serve you well for years.
This article reflects how I use a chimney on my own grills and is for general information only. Always follow your grill and chimney manufacturer’s instructions and local fire codes.
Troubleshooting and Weather Tips
Most of the time, a well-made chimney lights without drama. When it does not, the fix is usually simple.
- If the paper burns up but the bottom layer of charcoal never really catches, add a second sheet of newspaper or another cube and relight. Make sure the paper is not packed so tightly that it blocks airflow.
- In windy conditions, a light breeze helps the draft and can speed things along. Strong gusts, however, may chew through your paper too quickly or even push the chimney off balance. Turn the grill so the wind hits the chimney from the side and consider shielding it with the lid or a windbreak.
- In rain and damp weather, everything slows down. Keep your charcoal and tinder dry, and if needed, move the chimney just under an overhang to light it, then slide it back out into the open as soon as the coals are going.
Solid fuel starters and electric coils can be useful backups if you frequently cook in tough weather, though most grillers still prefer the sound and feel of a chimney when conditions allow.
Advanced Techniques
Once you are comfortable with basic lighting, the chimney can do more than simply prepare coals for the grill.
- Direct cooking over the chimney: Place a small grate or cast-iron skillet on top of a lit chimney for intense searing. It is a handy way to put a deep crust on a single steak, blister peppers, or get wok-like heat on a pan.
- Jump-starting smokers and kamados: In an offset smoker, a chimney of hot briquettes makes a quick base fire for adding wood splits. In a ceramic kamado, pouring in a partial chimney can speed preheating, though you will want to watch temps closely to avoid overshooting. On larger stick-burners and whole-hog pits, a chimney still helps you get that first coal bed going, but many pitmasters also use a burn barrel to pre-burn wood splits into clean, shovel-ready coals.
- Feeding the snake method: When you set up a charcoal snake for low-and-slow cooking, a handful of lit coals from the chimney are often used to start one end of the chain. The chimney gives you a controlled, repeatable way to do that. For long cooks using the snake method or an offset firebox, especially for big cuts like the ones in our brisket guide, start with a full, evenly lit load in the chimney so your fire runs clean from the first hour.
- Camp and tailgate cooking: On a campsite or tailgate where charcoal is allowed, a chimney saves you from carrying lighter fluid. Set a small pot or pan on top and it can even pinch-hit as a compact camp stove, as long as you are careful with balance and heat.
Let the chimney cool completely before packing it away, and never dump hot coals on the ground. Use approved fire pits or metal containers, and douse thoroughly when you are done.
Charcoal Types and Measuring Fuel
The chimney works with both briquettes and lump charcoal, but each behaves a little differently.
Briquettes are uniform, predictable, and designed to burn at a steady rate. A full chimney of standard briquettes usually produces a hot grill in the 450–550°F range, half a chimney puts you more in the 350–450°F sweet spot, and a quarter chimney gives gentle heat for smaller cooks.
Lump charcoal is simply carbonized wood. It lights fast and burns hotter, but the pieces are irregular. Very small chunks may fall through the grate or burn out before the larger ones are fully engaged. You can mix a few briquettes at the bottom as “kindling” for larger lumps, or just be mindful of how the pieces stack.
Think of the chimney itself as your measuring cup:
- Full chimney: high heat for searing steaks, chops, or burgers.
- Half chimney: medium heat for chicken, veggies, and most everyday grilling.
- Quarter chimney: lower heat or a starter load for the snake method or small smokers.
If the cook runs long, you can always light a second partial chimney and add coals instead of tossing in unlit charcoal and waiting on it to catch.
Environmental Benefits
Beyond flavor and convenience, a chimney is simply a cleaner way to light charcoal. Lighter fluid is a petroleum product, and when it burns it releases extra fumes and can leave a harsh smell around the grill. A chimney starter avoids that by relying on paper or natural fire starters instead of liquid fuel.
The Illinois Sustainable Technology Center has pointed out that chimney starters require little to no liquid fuel at all, while Hillside Woodfuels notes that skipping petroleum-based lighter fluids reduces VOC emissions that contribute to local air pollution. You also cut down on plastic bottles and packaging over time.
One well-built chimney and a stack of old newspaper can carry you through years of cookouts. But if you don't have newspaper, do what I do: light the coals using the paper from your charcoal bag, tearing it off as you empty it. By the time you've emptied your bag, you have almost no bag left to dispose of.
Chimney vs. Lighter Fluid vs. Electric Starter
There are several ways to light charcoal. The chimney sits alongside lighter fluid and electric starters as the most common.
There are three common ways home cooks light charcoal. Here is how a chimney starter compares at a glance:
| Method | Speed to hot coals | Flavor impact | Safety notes | Environment | Portability / setup |
|---|---|---|---|---|---|
| Chimney starter (paper or cubes) | Roughly 10–20 minutes for a full chimney, depending on fuel and weather. | No added fuel on the charcoal, so you taste the food and smoke, not petroleum. | Hot metal and open flame; needs a stable, non-flammable surface and heat-resistant gloves. | Uses paper or natural starters, no lighter-fluid VOCs, no plastic bottles to throw away. | Works anywhere you can strike a match; no outlet needed, packs easily for camping or tailgates. |
| Lighter fluid | Coals light quickly, but you often have to wait longer before cooking so fumes burn off. | Easy to pick up a kerosene note if you over-pour or rush food onto the grill. | Liquid fuel can flare, spill, or be misused; never add to lit coals or hot embers. | Burning petroleum-based fluid releases extra fumes and adds another disposable bottle to the mix. | No extra hardware and no power required, but you are always buying, hauling, and storing fluid. |
| Electric starter (heat coil or wand) | Can get coals going quickly once preheated, especially in small, concentrated piles. | Neutral, similar to a chimney, since you are not soaking the charcoal in liquid fuel. | Element gets extremely hot; cords and plugs must be kept away from water and trip hazards. | No lighter fluid, but you do rely on electricity, which is not always available outdoors. | Needs an outlet or generator and a safe place to run the cord; less practical for remote sites. |
In practice, many grillers lean on the chimney as their everyday method, then keep an electric coil or propane torch in the wings for rough weather or special setups. The chimney remains the best all-around option when you care about flavor, portability, and keeping fuel simple.
Choosing the Right Charcoal Chimney


Selecting the right fire starter is mostly about size, build quality, and how comfortable you feel pouring a load of hot coals.
Material and Build Quality
Most chimneys are made from steel or aluminum. Steel models tend to be sturdier and hold up to repeated high-heat cycles, though they are a bit heavier. Aluminum chimneys are lighter and resist rust but can feel flimsier if the metal is thin. Look for rolled edges, solid rivets or welds, and a body that does not flex easily in your hands.
Size and Capacity
Match the chimney size to your grill. A standard “large” chimney holds enough charcoal for a full-size kettle or barrel. Compact chimneys are handy for camping, tailgating, or small grills. As Jess Pryles told Business Insider, “The bigger the chimney, the better. Bigger chimneys mean you can light more coals, and that means more heat, [along with] more flexibility and control over grill temperatures.”
Handle and Safety Features
Look for a heat-resistant main handle with a sturdy heat shield and, ideally, a second helper handle for two-handed pours. Pitmaster Rodney Scott likes the Weber Rapidfire for exactly that reason, telling Business Insider that the extra grip and handle protection make the pour more accurate and help keep heat off your hand.
Ventilation and Extra Features
Good chimneys have generous vent holes around the base and lower sides to feed the fire. Some models add bells and whistles like removable bottoms, built-in top grates for direct cooking, or fan attachments that turbo-charge airflow. Those features can be useful, but they are secondary to solid construction and safe handles.
Brand, Price, and Example Models
Brands like Weber, Kingsford, and BBQ Dragon have earned reputations for reliable chimneys. You can find basic models for well under twenty dollars, while heavy-duty or feature-rich options cost a bit more. In most cases, it is worth spending a little extra for the one you feel confident using with a full load of glowing coals.
To give you a sense of what this looks like in the real world, here is a quick comparison of three popular options you will see at most retailers:
| Brand | Material | Capacity | Handle & build | Best for | Price / link |
|---|---|---|---|---|---|
| Weber Rapidfire | Steel | Large | Heat-resistant main handle with shield, sturdy body. | Everyday use on full-size kettles and barrel grills. | $$ – Amazon |
| Kingsford | Aluminum | Medium | Basic handle with heat shield, lighter overall weight. | Budget-friendly option for smaller grills or occasional cooks. | $ – Amazon |
| BBQ Dragon | Steel | Extra large | Two-handed pour with 90-degree elbow design for easier dumping. | High-volume cooks who want to light a lot of charcoal at once. | $$$ – Amazon |
While there are any number of them on the market, these chimneys are models I have used personally or seen widely recommended by pitmasters I trust. The links above are affiliate links that help support Destination BBQ at no extra cost to you.
Choose the one that fits your grill and your comfort level. Once you get used to lighting with a chimney, it becomes one of those tools you barely have to think about. If you want help planning full cooks around it, our BBQ tools & calculators can walk you through timelines, brines, and wood choices.

Frequently Asked Questions
You can light charcoal without a chimney, but a chimney makes the process faster, more consistent, and cleaner. It avoids lighter fluid, cuts down on waste, and gives you a repeatable way to measure fuel and start a fire. Many grillers consider it an essential tool once they have used one a few times.
Dump the coals when the top layer is mostly ashed over around the edges and glowing, but before every briquette turns completely gray. At that point the bottom coals are fully engaged and you still have plenty of fuel left to cook. Waiting too long lets a lot of that heat burn off in the chimney.
Once lit, most chimneys take about 10–20 minutes before the coals are ready to pour. Those time ranges match typical manufacturer guidance. The exact time depends on how full the chimney is, the type of charcoal, and the weather. Watch the coals, not the clock: when the top pieces just begin to ash and the chimney is roaring, you are there.
If you do not have a chimney, you can still light charcoal with solid fire starters, an electric coil, a propane torch, or, as a last resort, lighter fluid. Those methods work, but they each come with trade-offs in flavor, cost, or safety. For most home cooks, picking up an inexpensive chimney is the simplest long-term fix.
A full chimney of lump charcoal, poured into a typical grill, usually gives you 45 minutes to an hour of high heat before it begins to taper off. Larger chunks and good airflow can stretch that window a bit; smaller pieces and tight vents will shorten it. For longer cooks, plan to light a second partial chimney and add coals as needed rather than relying on one load alone.
Sources
- Epicurious – “Why You Should Be Grilling With a Charcoal Chimney Starter” — background on chimney benefits and timing, including Dustin Green’s advice on when to dump the coals.
- Illinois Sustainable Technology Center – “Charcoal vs. Gas – A Sustainability Question” — supports your discussion of lighter fluid, emissions, and why chimneys are a more sustainable option.
- Hillside Woodfuels – “Lighting Lumpwood: The Art of Achieving the Perfect Charcoal Burn” — reinforces the point that skipping petroleum based lighter fluids reduces VOCs and off smells around the grill.
- Business Insider – “The Best Charcoal Chimney Starters, According to Grill Experts” — source for Jess Pryles’ and Rodney Scott’s comments on chimney size, handle design, and safety features.
- U.S. Consumer Product Safety Commission. Charcoal (Carbon Monoxide Information Center) . Confirms that burning charcoal produces carbon monoxide and should only be used outdoors, never in enclosed spaces.
- U.S. Fire Administration – Outdoor Fire Safety — basis for your grill safety note about outdoor only use, clearances, and safe ash disposal.
We cite authoritative references and note when guidance is based on first-hand testing on our own grills.
About the author
James Roller documents South Carolina barbecue for Destination BBQ and authored Going Whole Hog. He researches techniques, interviews pitmasters, creates tools, and curates reliable sources so home cooks can cook barbecue safely and confidently at home.
More about James.See something that needs a tweak? Send a correction.
« See All BBQ Terms