
Banking the coals sets up two-zone heat for steadier temps, fewer flare-ups, and longer burns, with simple steps to arrange briquettes or lump
What Is “Banking the Coals”?
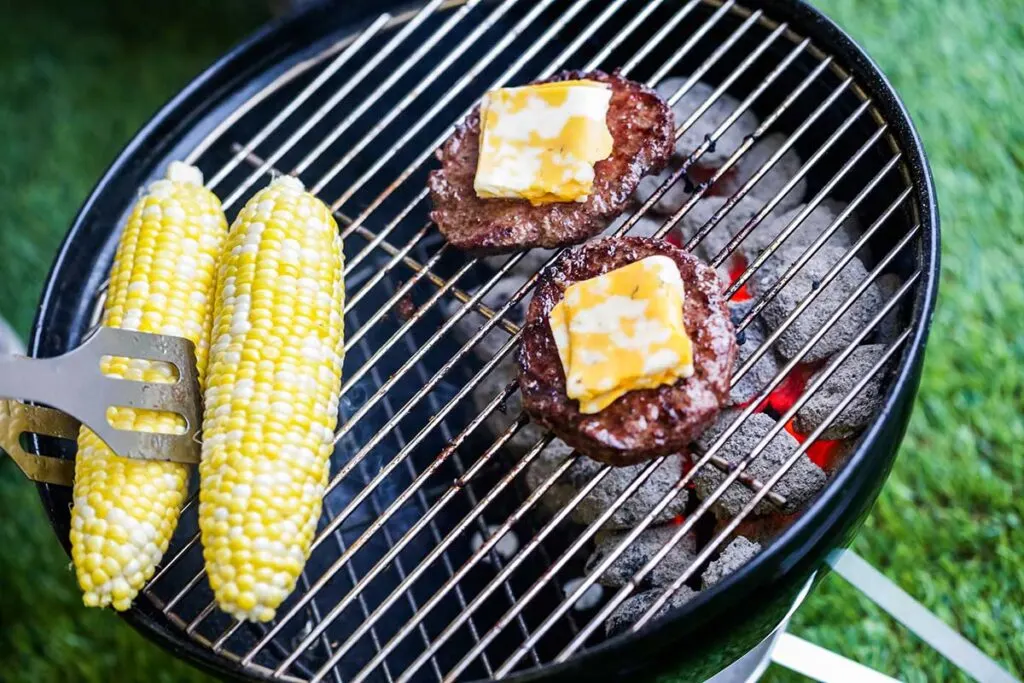
Banking the coals means pushing lit charcoal to one side of the grill to create two distinct cooking zones: one hot for direct heat, the other cooler for indirect heat. This setup gives you flexibility to sear foods quickly over the fire, then finish them gently away from it. By dividing the grill into hot and cool zones, you gain precise control over temperature, flare-ups, and cooking times.
Ready to cook? Use this quick setup to create clean heat for two-zone grilling.
Quick-Start: Bank Coals in 5 Steps
- Step 0: Choose fuel and amount (see fuel choice): briquettes for steadier burns, lump for faster heat; use about ½ chimney for 250–300°F cooks and ¾ chimney for higher heat or windy/cold conditions.
- Step 1: Prep the kettle: open both vents fully, clear ash, set a drip or water pan on the cool side (add hot water if using); consider using charcoal baskets or a foil wall to define the hot side.
- Step 2: Light charcoal in a chimney starter until fully ashed over (see our Charcoal Chimney Guide).
- Step 3: Bank the lit coals tightly on one side of the charcoal grate (or in a basket), about 2–3 briquettes deep; add one or two wood chunks at the edge (oak or hickory for backbone, apple, cherry, or peach for a sweeter profile) (see our BBQ Wood Pairing Guide).
- Step 4: Stabilize: install the cooking grate, set the lid so the top vent sits over the food, start with the bottom vent 25–50% open and the top vent mostly open, then wait 5–10 minutes for temps to settle and smoke to run clean.
- Step 5: Cook: sear over the hot side if needed, then move food to the cool side to finish; make small bottom-vent tweaks and allow 5–10 minutes for changes to settle.
- Refuel cleanly: Pre-light a handful of charcoal in the chimney, add gently to the coal bank, then give the grill a few minutes to re-stabilize.
“The key to success in any grilling project is control over time and temp… the best way is a 2-zone setup — a hot direct heat zone and a cooler indirect zone to gently warm the interior.”
~Meathead Goldwyn, BBQ author and pitmaster
Key Takeaways
- Banking the coals creates a true two-zone fire so you can sear over the coals, finish gently on the cool side, control flare-ups, and cook more consistently on one grill.
- Use it for short to medium cooks like thick steaks, chops, bone-in chicken, sausages, and delicate seafood; for long low-and-slow on a kettle, switch to the Snake Method or a two-zone split with a water pan.
- Stay safe and steady by managing airflow with the intake, keeping the exhaust mostly open over the food, using gloves and long tongs, and refueling with pre-lit coals from a chimney.
- The setup adapts across kettles, offsets, kamados, and gas grills; place food on the indirect side, add only a chunk or two of hardwood for thin blue smoke, and leave room on the grate to move food as the fire changes.

Understanding "Banking the Coals"
While the concept is simple—push charcoal to one side—successful "banking" requires understanding how fuel placement, vent control, and airflow work together. Once you grasp these fundamentals, you'll move from following steps to reading your fire and adjusting as conditions change.
How It Works
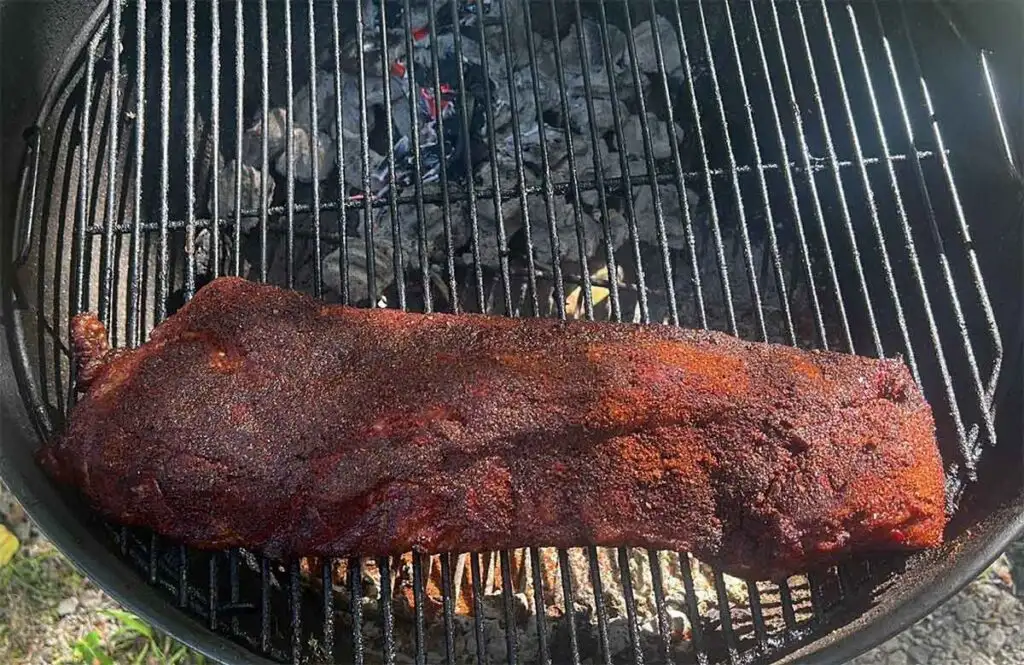
Banking means corralling your fuel. When coals are pushed to one side, one half of the grill roars with direct heat while the other side becomes an oven-like zone. That contrast lets you start food hot and finish slow. Steaks, chicken quarters, even pork chops all benefit from a sear-and-shift approach.
Steven Raichlen reminds us why: “One common mistake at the grill is people let the fire control them rather than them controlling the fire. One of the first steps to becoming a good griller is learning how to control the fire.” Banking coals is where that lesson begins.
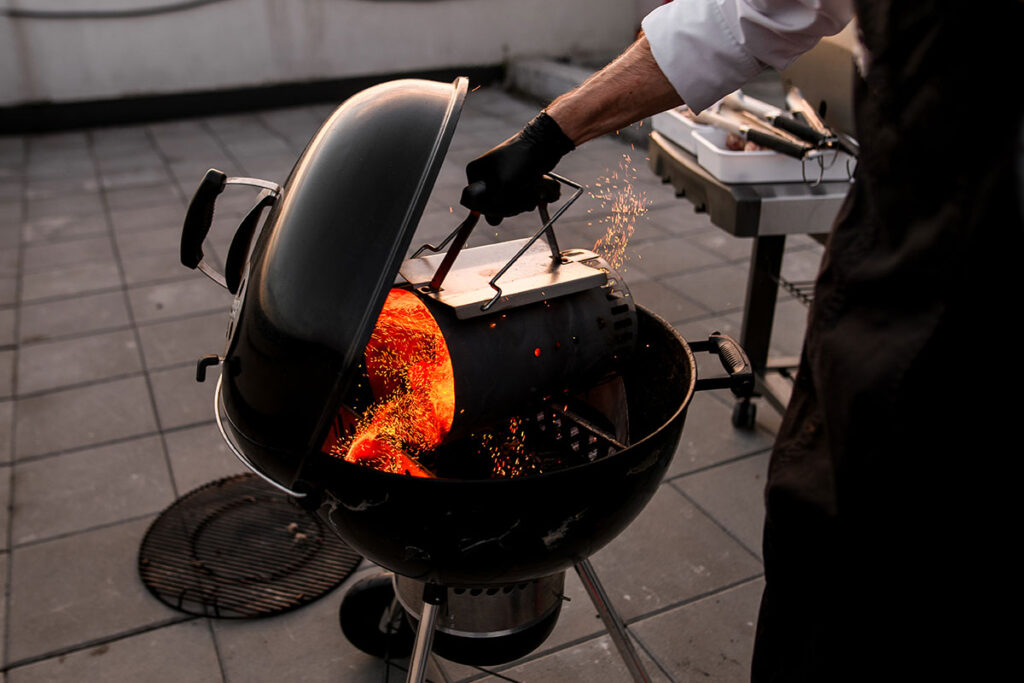
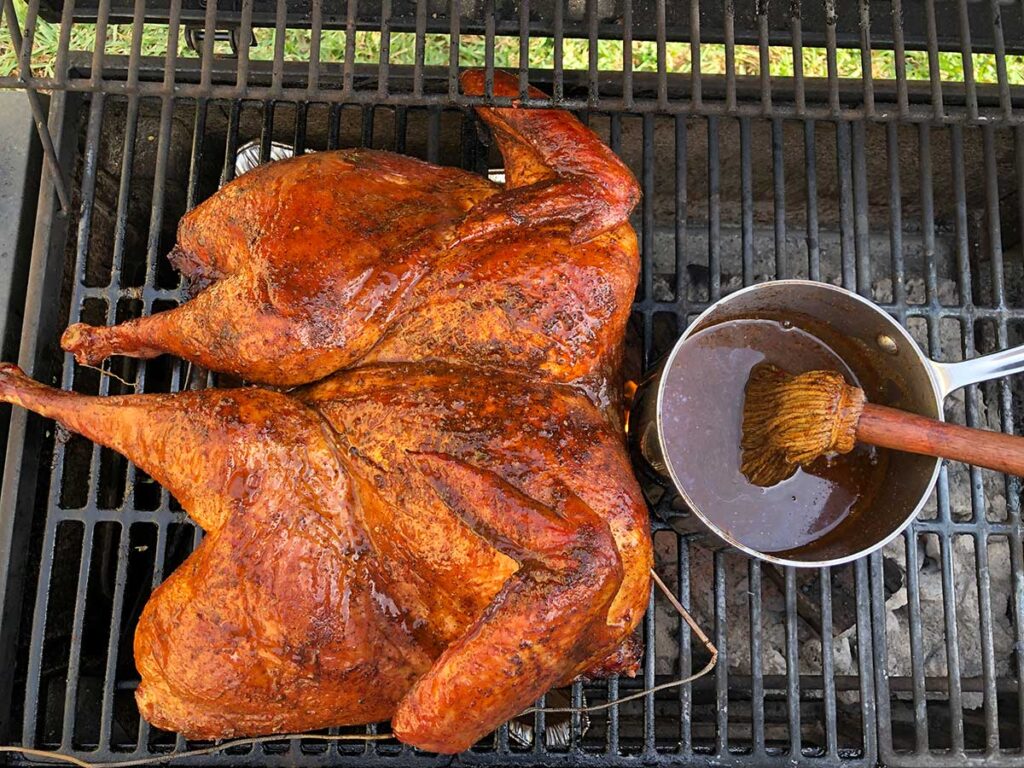
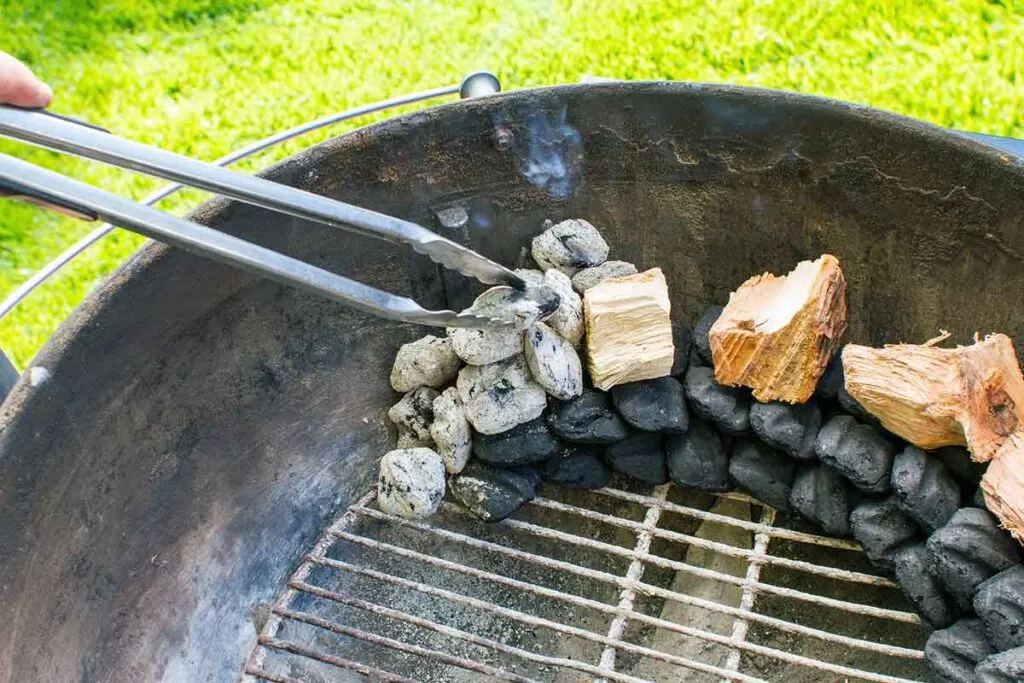
To bank the coals, you will need a small metal rake or shovel to move the hot coals to one side of the grill or smoker. We suggest starting your coals in a charcoal chimney starter. That way, when the coals are ashen, you can simply pour them along one side of your grill.
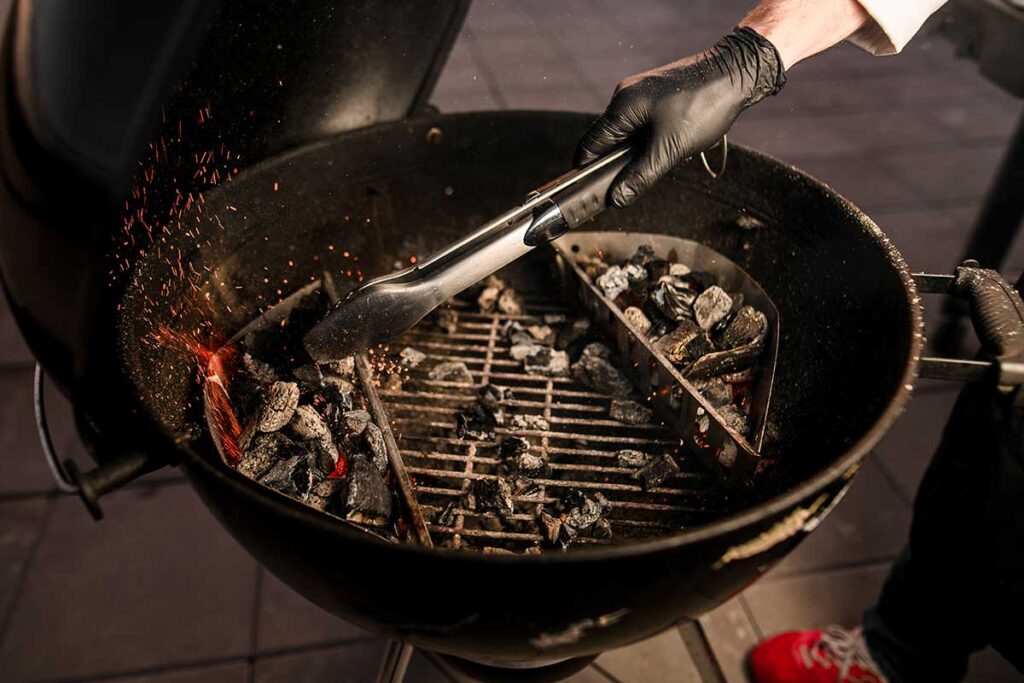
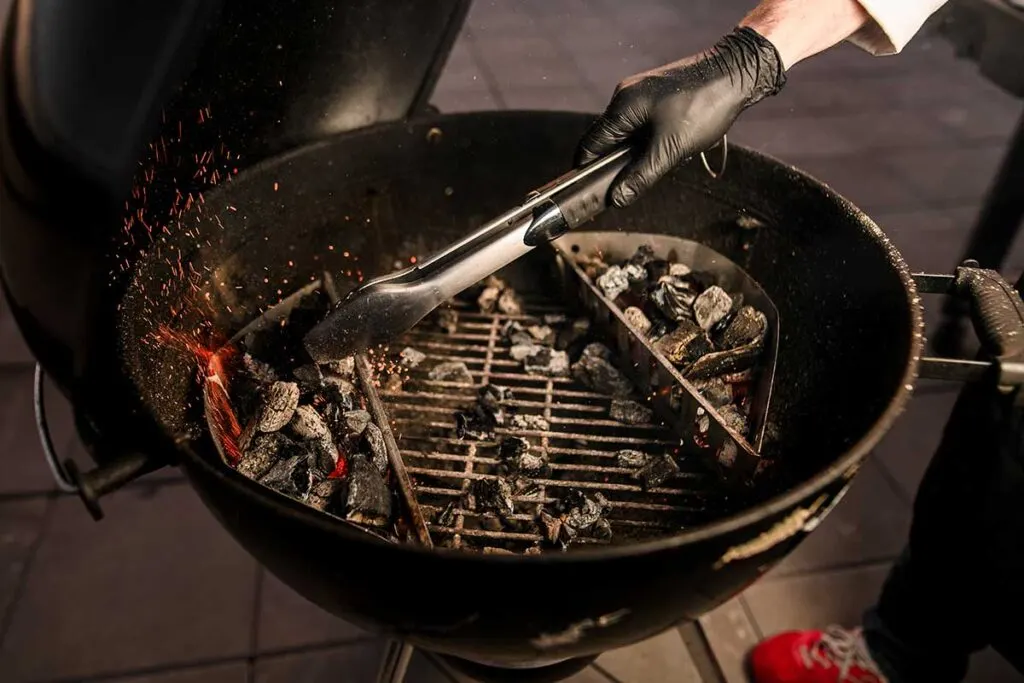
Note: we highly recommend using heat and fire-resistant gloves when doing this, unlike our friend in the photos below.

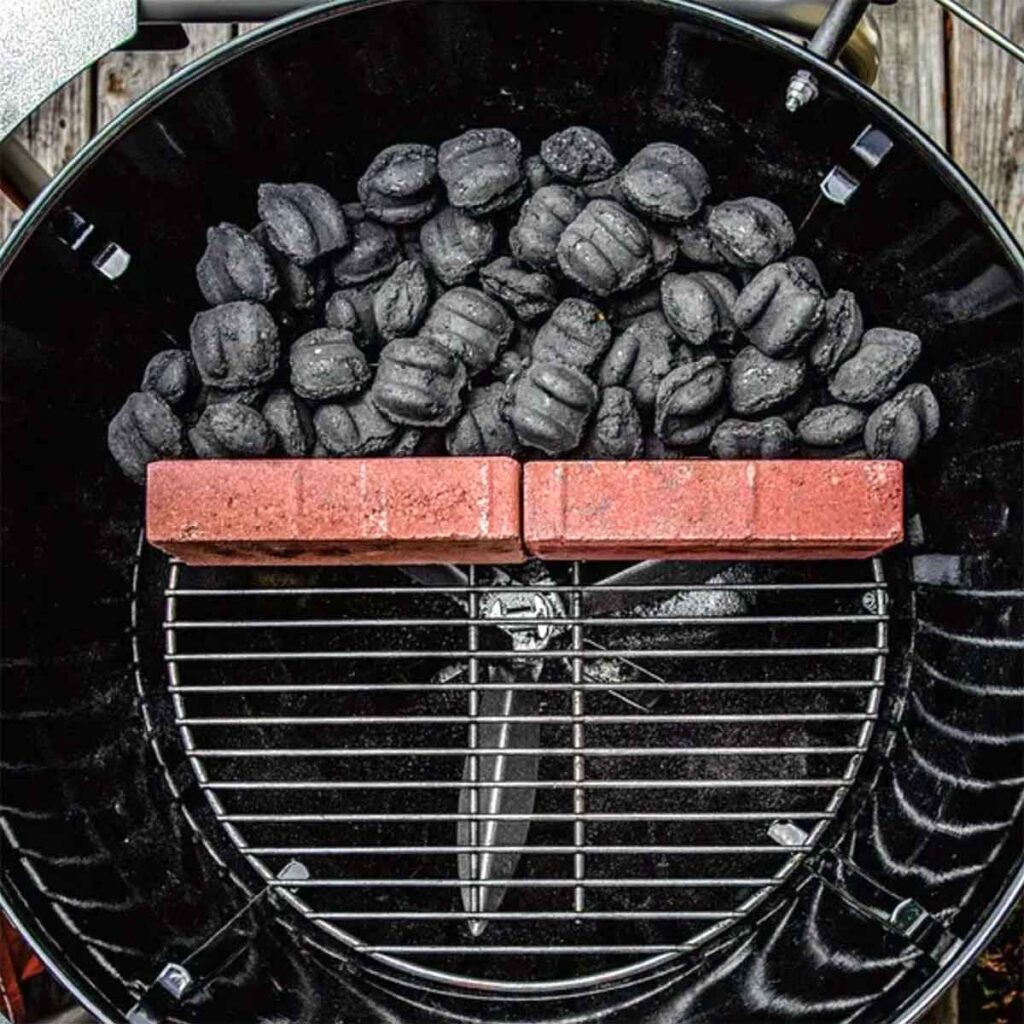
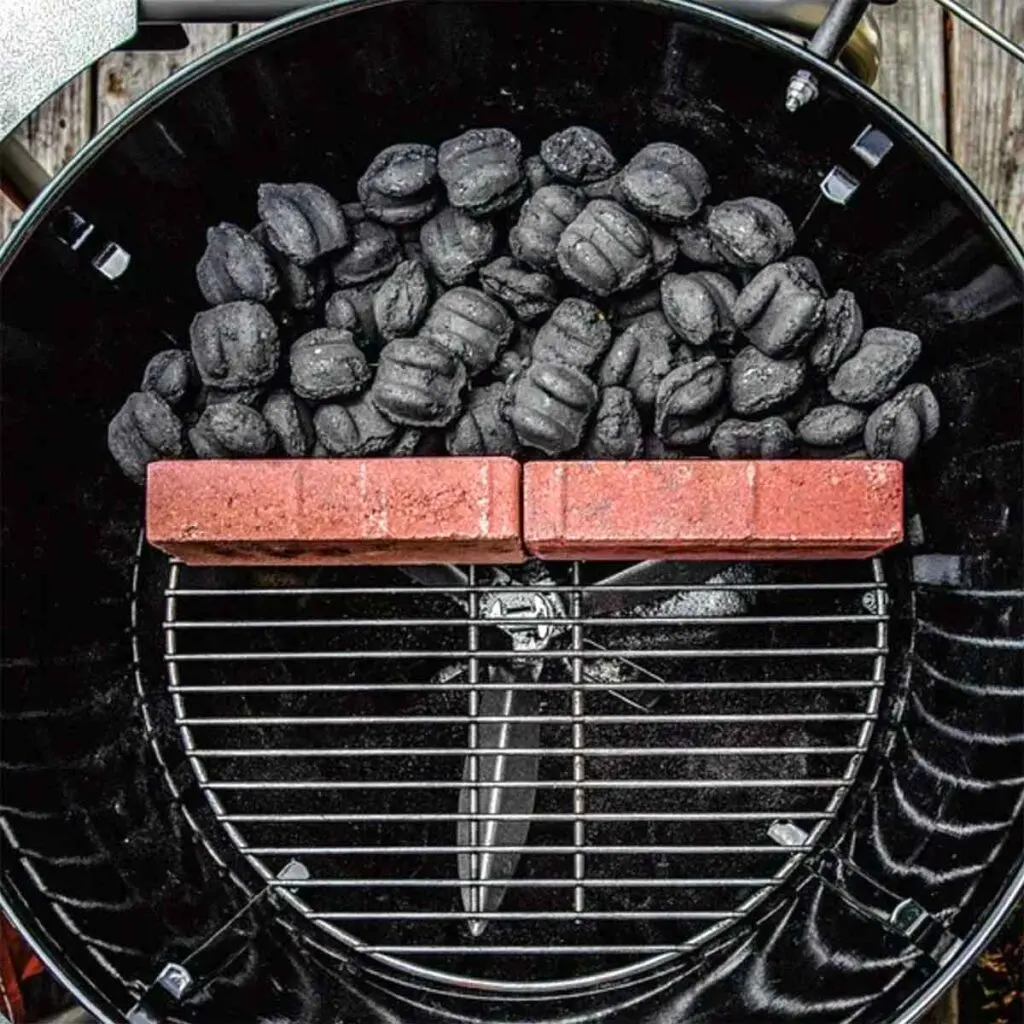
You can also create a barrier using aluminum foil or heat-resistant bricks to keep the coals contained on one side. Additionally, you can use different amounts of charcoal to create different heat zones. A popular option is the Slow 'N Sear-type of insert available for many grills.
As Meathead calls the Slow ’N Sear "The Single Best Accessory For The Weber Kettle Ever. For about $100 you can easily convert a standard Weber Kettle into a much better grill as well as a smoker capable of making restaurant quality smoked ribs, pulled pork, beef brisket, turkey, salmon, or whatever you want to smoke."
- Briquettes: Uniform size stacks neatly, holds a stable 225 to 300°F for longer, and responds predictably to vent tweaks; trade-offs are more ash and slower light-up.
- Lump: Lights fast, runs hotter for searing, and makes less ash; trade-offs are irregular shapes that leave gaps and a shorter burn unless you top off.
Tip: With lump, pick similar-size pieces and nest them snugly. Close the bottom vent a bit earlier to avoid overshoot. For long cooks, choose briquettes; for sear-then-finish, lump excels.
Wood note: many cooks blend a base of hardwoods like oak or hickory with fruitwoods such as apple, cherry, or peach for color and rounder smoke.
Benefits
The big draw of banking the coals is how many problems it solves for an everyday griller. Here are the highlights:
- Better fire control: Establish a hot zone and a cooler zone so you can move food as needed.
- Gentler cooking: Finish thick cuts slowly without scorching the outside.
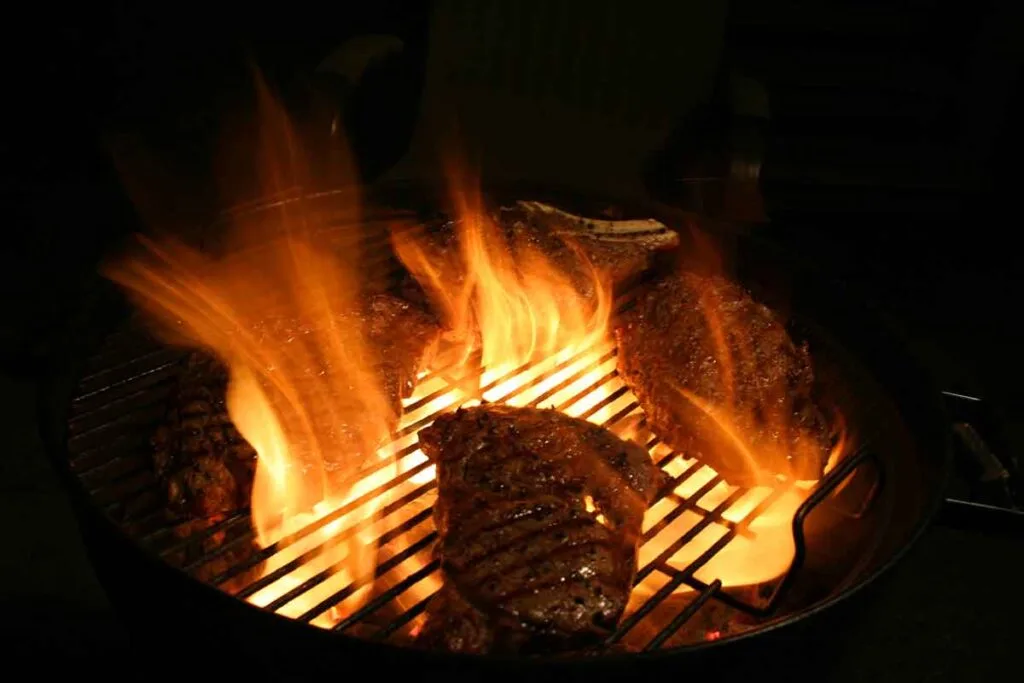
- Built-in safety valve: A cool side gives you somewhere to move food when flare-ups strike.
- Flavor flexibility: Add a chunk of hardwood to the hot side to layer in smoke while food rests off the fire, helping the dry rub set and bark develop.
- Fuel efficiency: Concentrating coals on one side stretches burn time and uses less charcoal.
Taken together, these advantages make banking one of the easiest ways to gain confidence and consistency at the grill.

Best Uses for Banking the Coals
Banking the coals shines when you want both direct high heat and a cooler zone in the same cook. Here are the situations where it works best:
- Thick steaks and pork chops — hard sear over the coals, then slide indirect to finish evenly.
- Bone-in chicken — crisp the skin, then move to the cooler side so it cooks through without burning.
- Sausages — set the snap over the fire, then hold indirect to keep them juicy.
- Fish fillets or shrimp — give them a quick char before finishing gently so they don’t fall apart.
But note: for larger cuts that need many hours at low heat, like brisket, pork shoulder, or ribs, banking alone won’t stay steady long enough. On a kettle, use the Snake Method or a two-zone split; add a water or drip pan on the cool side to catch drips and smooth temps.
Handled this way, banking becomes your go-to setup for shorter to medium cooks, with built-in flexibility and a fire escape when things get too hot.
For ribs such as spare ribs, St. Louis ribs, or baby back ribs, a steady low-and-slow is easier with the Snake Method or a two-zone split.
How to Bank Coals on Kettles, Offsets, Kamados, and Gas Grills
The idea behind banking coals is the same no matter what you’re cooking on: create a hot zone and a cooler zone. The way you set it up just changes with the type of cooker.
How banking looks on different cookers:
- Kettles & barrels — The classic setup. Push all the coals to one side and adjust the vents so heat moves evenly across the grate. A charcoal basket helps keep the fire tidy.
- Offsets — The side firebox keeps the fire separate, but pitmasters still rake and “bank” coals inside the box to keep a steady stream of heat and smoke flowing into the cook chamber.
- Kamados — These ceramic cookers hold heat so well that accessories come in handy. Half-moon heat deflectors or charcoal dividers mimic the two-zone effect.
- Gas grills — The same principle with different fuel: run one burner on high and leave another low or off to create a cooler zone.
However you fire your pit, banking is about building flexibility into the fire so you can move food around instead of fighting flare-ups.
Common Pitfalls and Risks of Banking Coals
While banking the coals has a lot going for it, no technique is without its trade-offs. Here are a few potential downsides to be aware of before you fire up the grill:
- Uneven heat: Because the fire is concentrated on one side, the cooking surface can have hot spots and cooler patches. That can mean one steak sears perfectly while another lags behind.
- Tight space: On smaller kettles or hibachis, the indirect zone can be cramped, making it harder to juggle multiple items at once.
- Balance takes practice: Dialing in just the right split of hot vs. cool coals isn’t automatic. Beginners may need a few tries to avoid scorching one side or undercooking the center.
- Extra tending: As coals on the hot side burn down, you’ll need to add fuel or reposition them to keep temperatures steady over a long cook.
- Handling hot coals: Raking and moving lit coals increases the chance of burns — always use proper tools and heat-resistant gloves.
With those points in mind, you can plan around the limitations and still take advantage of what banking does best: giving you flexibility and control.
Safety and Heat Management for Two-Zone Fires
Whenever you’re playing with fire, safety matters. The good news is that banking coals, when done right, can actually make grilling safer and more controlled. You have a built-in escape zone for foods that flare up, which helps prevent charring and those sooty flare-up flavors on your meat.
The University of Illinois Extension specifically advises grillers to “move coals to one side of the grill and cook foods on the other side” to reduce flare-ups and burnt food.
Best practices:
- Use the right tools. Long tongs, a rake, and fire-resistant gloves keep you safe when moving coals.
- Control airflow. Keep the exhaust vent over the food. Use the intake to control fire strength, and keep the exhaust mostly open so smoke stays clean.
- Refuel smart. Add pre-lit coals from a chimney. Don't dump fresh lighter-fluid soak coals mid-cook.
- Catch drips. A water pan stabilizes heat and prevents fat-fueled flare-ups.
- Snuff it out. Close vents fully when done; coals can smolder longer than expected.
Use a reliable food thermometer and cook to temperature, not color; verify temperature targets with the USDA's Safe Minimum Internal Temperature chart.
By following these guidelines, you’ll harness the benefits of banked coals while staying safe and in control. Grilling should be fun and a little bit exciting, but never truly dangerous. Respect the fire, and it’ll reward you with great barbecue.
If temperatures drift or smoke turns thick, run through this quick fix list.
- Running hot: Bottom vent too open, coal bank spread too wide, top vent over coals, wind. Fast fix: Close bottom vent slightly, rotate lid so the top vent is over the food, tighten the coal bank, place or refill a water pan, use a wind break.
- Running cool or stalling: Not enough lit fuel, ash choking the intake, bottom vent too closed, cold ambient temps. Fast fix: Open the bottom vent a bit, clear ash, add a few pre-lit briquettes, keep the lid on.
- Harsh white smoke or bitter flavor: Exhaust restricted, adding unlit coals directly, fat dripping onto the hot side. Fast fix: Keep the top vent mostly open, pre-light any fuel before adding, use a drip pan, trim excess fat, wait for thin blue smoke before cooking.
For long, steady cooks, switch to the Snake Method or add a water pan under the food for stability.
Do’s and Don’ts

Every pitmaster has learned a few lessons the hard way—usually with a flare-up or a dried-out rack of ribs. Keeping a short list of best practices and common mistakes in mind makes banking the coals less stressful and a lot more rewarding.
Do:
- Start with fully lit coals so the heat is steady from the beginning.
- Leave at least one-third of the grate coal-free to create a reliable safe zone.
- Rotate large cuts regularly so the side closest to the fire doesn’t overcook.
- Keep the grate clean and lightly oiled for smooth movement when sliding food between zones.
- Pre-light a small batch in the chimney before refueling a bank.
Don’t:
- Crowd the grill. Packing it full eliminates the cool zone you just created.
- Lift the lid too often, which dumps heat and fans the fire.
- Forget the “cool” side still gets hot over time—especially inside a ceramic cooker.
- Dump unlit, lighter-fluid-soaked fuel mid-cook.
- Overload with wood. A chunk or two for thin blue smoke is plenty.
Handled with care, banking the coals becomes less of a trick and more of a habit. Once these basics are second nature, you’ll find yourself calmer at the pit, confident that you can handle whatever the fire throws your way.
Alternatives to Banking: Two-Zone Split and Snake Method

Banking is the simplest way to create a two-zone fire. When you need longer runtime, a wider indirect zone, or more hands-off control, one of these setups may fit better:
- Two-Zone Split: Charcoal on both sides with a pan in the center. Creates a large, even indirect zone that’s great for whole chickens or multiple steaks finishing at once. Easy to add fuel; less direct blast than a tight bank.
- Snake Method: A curved row of briquettes around the edge, lit at one end. Delivers steady 225 to 250°F for hours with minimal tending. Best for ribs and pork shoulder; direct searing is limited without a separate hot spot. (Use the Texas Crutch if you need to push through the stall.)
- Baskets/Inserts (variation of banking): Charcoal baskets or a dedicated insert keep the bank tidy, improve airflow, and simplify refueling. Useful when you want banking’s flexibility with a bit more stability.
Next up: The table below compares Banking, Two-Zone Split, and the Snake Method at a glance so you can pick the right setup for your cook.
Banking vs Two-Zone Split vs Snake Method (Comparison)
Banking the coals is one way to create a two-zone fire, but it’s not the only game in town. Barbecue enthusiasts also talk about the “Snake Method” and other techniques for managing charcoal burn. How do these compare? The table below gives a quick side-by-side:
| Technique | Setup & Method | Best For |
|---|---|---|
| Banking the Coals | Push all lit coals to one side to create two zones: hot (direct) over the coals and cooler (indirect) on the empty side. | Weeknight control. Sear then finish thicker cuts (steaks, chops, chicken pieces). Quick flare-up escape. |
| Two-Zone Split | Divide coals into two smaller piles on opposite sides with a drip or water pan in the middle to catch drips and even out heat. | Indirect roasting and light smoking. Whole poultry, ribs, and larger roasts that like gentle, even heat. |
| Snake Method | Lay unlit briquettes in a long semicircle along the kettle wall and light one end so the fire burns slowly along the “snake.” | Hands-off low-and-slow. Pork shoulder, brisket, or ribs at a steady 225–250°F for hours. |
As you can see, banking coals is the simplest route to a two-zone setup on a charcoal grill, just push the coals to one side. The two-zone split fire method (sometimes recommended by grill manufacturers) banks coals on both sides with the food in the middle, which can be useful for more even indirect heat when smoking or roasting. Meathead notes that while the two-side method works, banking all coals to one side gives you a larger cool zone and is often more practical for most grilling needs.
Meanwhile, the Snake Method is a clever variation for long-duration cooks: it effectively banks unlit coals in a fuse so they ignite slowly over several hours. This method has earned praise for turning a typical kettle grill into a capable smoker.
"Using one of the smartest charcoal techniques out there — the charcoal snake method — you can transform a basic kettle grill into a surprisingly effective, hands-off smoker that holds a steady temperature for hours, with almost no effort,” writes food editor Leah Collins of Serious Eats.
No matter the method, the goal is similar: control the burn.
Historical Roots and Regional Traditions
Banking coals isn’t a new idea, it’s how our BBQ forebears tamed the flames. In traditional open-pit barbecue, especially in the American South, pitmasters have long used this method to regulate heat.
Whole-hog barbecue in the Carolinas is a great example. Pit cooks burn hardwood logs down in a separate burn barrel, then shovel the glowing embers under the hog strategically instead of directly building a big fire under the meat.

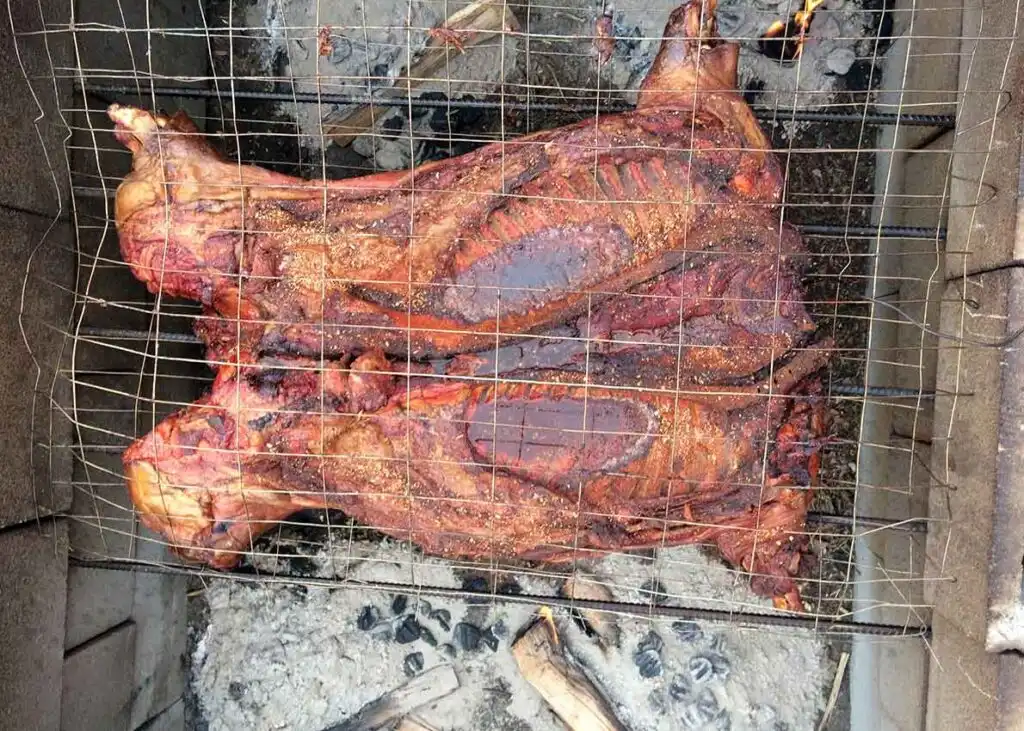
This effectively banks the coals around the perimeter or to the sides of the pit so that the hog cooks slowly and evenly. As renowned whole-hog pitmaster Rodney Scott describes, “We burn the wood down to glowing coals that get shoveled under the meat.” By adding fresh coals periodically and mounding them where needed, Carolinians could roast a whole pig for hours without scorching it.
Regional styles of barbecue have their own twists on fire management, but the principle of moving coals to control heat is common. In Texas, traditional offset smokers use a firebox to keep flames away from the meat, essentially a form of banking the fire to one side (in this case, one chamber is hot, the other is cooler).
In simpler backyard terms, people have been raking campfire coals to one side to create gentle cooking heat for as long as folks have been grilling over fire. It’s a technique born of practicality: whether you’re on a ranch or at a weekend cookout, you learn to push coals around to avoid burning dinner.
Banking the Coals: FAQ
Place the top vent over the food so heat and clean smoke are drawn across the indirect zone. Start with the exhaust mostly open and use the bottom vent to control temperature. If heat drifts, rotate the lid to keep the vent over the food while you make small intake adjustments.
On a kettle, half a chimney usually holds about 250 to 300°F for moderate cooks. Use three-quarters of a chimney for colder or windy days and for finishing hotter. After any vent change, give the grill five to ten minutes to settle so temperature and smoke quality stabilize.
A tightly packed briquette bank at 250 to 300°F on a 22-inch kettle often runs 60 to 90 minutes before topping up. Lump may run shorter because of irregular pieces. Weather and frequent lid opening shorten runtime. Charcoal baskets or an insert can extend stability and make refueling easier.
Pre-light a small batch of briquettes in the chimney and add them gently to the coal bank. Avoid dumping unlit, lighter-fluid-soaked fuel into the fire, which can create thick white smoke and harsh flavors. After adding fuel, close the lid and let the grill stabilize for a few minutes.
Choose the Snake Method when you need steady 225 to 250°F for several hours on a kettle. Banking is ideal for short to medium cooks where you sear over the hot side and finish indirect. The snake’s slow-igniting chain provides hands-off stability for ribs, pork shoulder, and similar cuts.
- Manufacturer overview of two-zone charcoal setup: Weber
- Safe Minimum Internal Temperature chart: USDA FSIS
- Snake Method background and how-to: Serious Eats
- Indirect heat and flare-up reduction guidance: University of Illinois Extension
- Charcoal grill setup fundamentals: AmazingRibs
Last reviewed: September 15, 2025
About the author
James Roller documents South Carolina barbecue for Destination BBQ and authored Going Whole Hog. He researches techniques, interviews pitmasters, creates tools, and curates reliable sources so home cooks can cook barbecue safely and confidently at home.
More about James.See something that needs a tweak? Send a correction.
« See All BBQ Terms