
Brisket can be simple once you understand the cut, key temps, and doneness feel, plus how to choose grades and slice it right for juicy, tender results
Brisket intimidates lots of folks at first glance. It’s big, it’s stubborn, and it only becomes magical when you give it time and attention. Think of this as a calm walk through what brisket is, how it behaves on the pit, and the handful of choices that make the most difference at home or in competition.
What is Brisket?
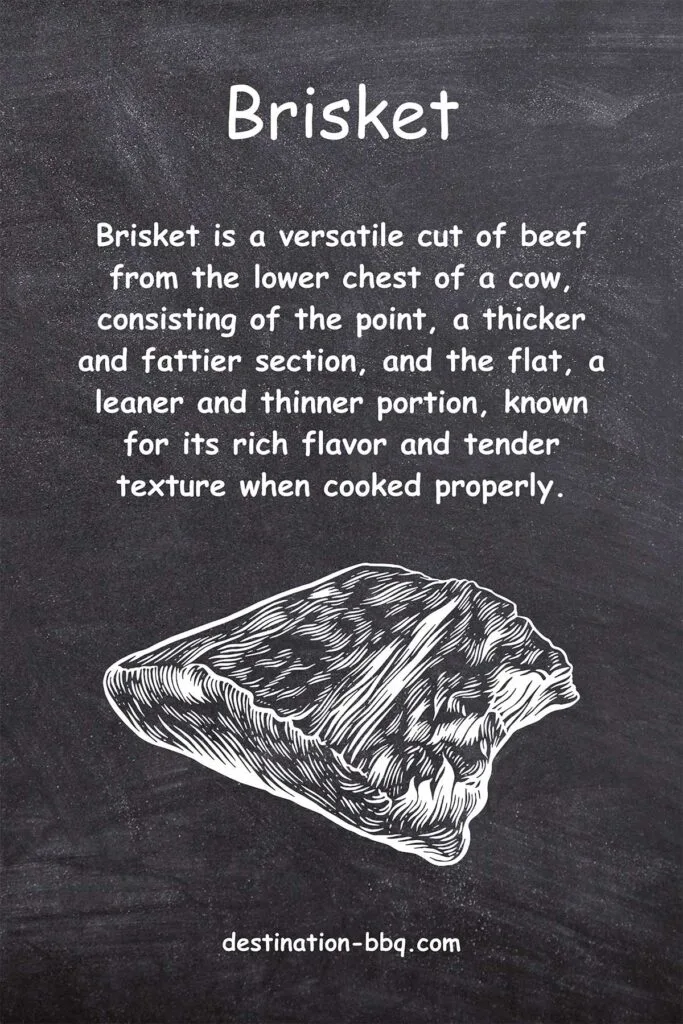
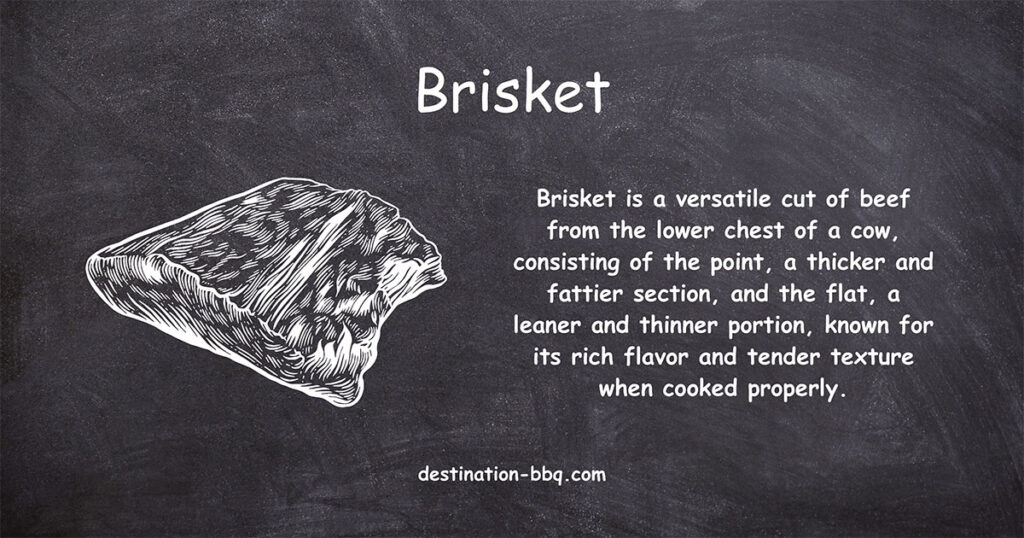
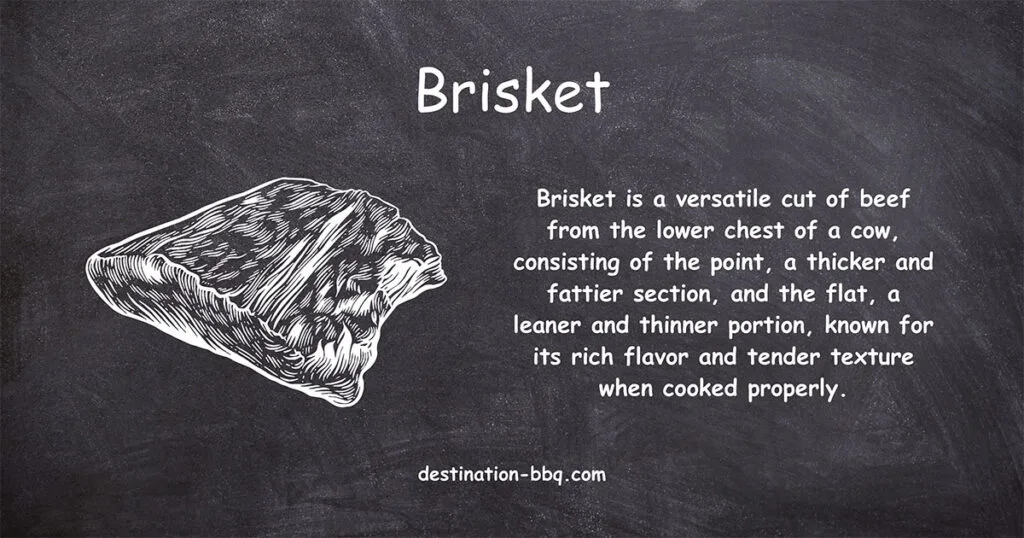
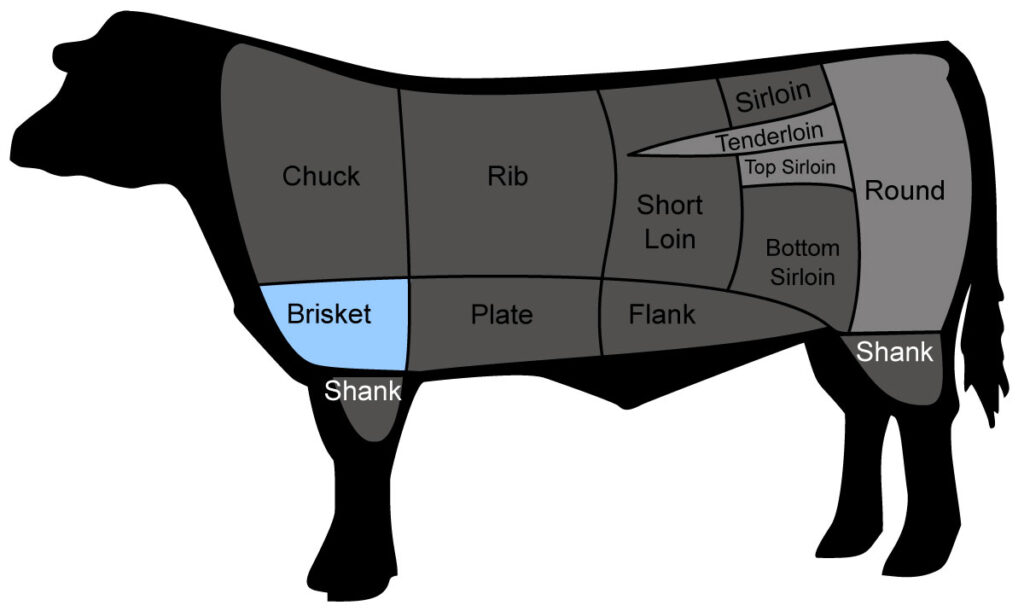
Brisket is a beef primal from the steer's breast/lower chest, just above the front legs. It’s actually two muscles—the leaner flat and the fattier point—held together by a seam of dense connective tissue. On the cow, these muscles do hard work, which is why the meat starts tough; in barbecue, that same collagen is your secret weapon once it melts into gelatin during a long, gentle cook.

JoeSmack, Public domain, via Wikimedia Commons
Key Takeaways
- Two muscles, two textures: the flat slices lean; the point delivers rich, marbled bites.
- Cook to feel: steady heat, manage the stall, and pull when probe‑tender, not just at a given temp.
- Rest pays dividends: a long, insulated rest is where juices settle and texture turns silky.
- Buy by code when possible: asking for IMPS 120 helps you get the right cut anywhere.

“You can’t fake patience… sometimes the brisket decides when it’s ready, not you.”
~ Aaron Franklin, pitmaster, as quoted in Lone Star Plate
Bottom line: brisket isn’t cooked by the clock. You’re coaxing tough muscle to relax, not forcing it on a schedule.
- Run steady: 225–250°F (or 275°F to shorten the day).
- Expect the stall: ~150–170°F internal as evaporation cools the surface.
- Decide on wrap: paper (bark) • foil (speed) • naked (thickest bark).
- Check feel: pull when the thick flat is probe-tender (often ~200–205°F).
- Rest well: wrap and insulate 1–4 hours before slicing.
Want a precise start‑to‑serve timeline for your pit and wrap choice? Open our Brisket Cook Time Calculator and get a paste‑ready schedule.
Understanding Brisket
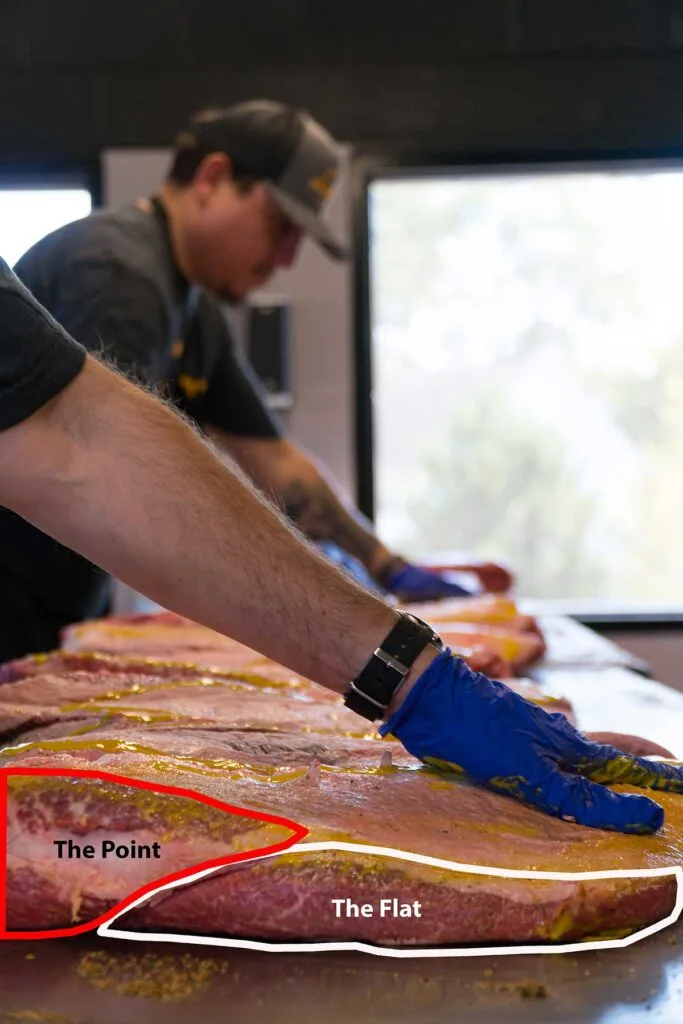
Packer brisket meaning? A whole brisket with both flat and point attached. It helps to picture the brisket as a matched pair.

Original photo courtesy of Lewis Barbecue. ProBros, photographer.
The point (superficial pectoral) sits atop the flat at one end; it’s thicker and richly marbled, the source of those succulent cubes we call burnt ends. The flat (deep pectoral) is wide and relatively lean, prized for neat slices. When both are intact under a fat cap, you’ve got a whole “packer” brisket.
At-a-Glance: Brisket
- Cut codes: Packer = IMPS 120; Flat = 120A; Point = 120B.
- Typical weights: 10–16 lb (12–15 lb is a sweet spot).
- Muscles: Flat (lean, neat slices) and Point (more marbled; great for burnt ends).
- Trim: Fat cap to about ¼ inch; tidy edges; remove hard deckle fat.
- Serving plan: ~½ lb raw per adult (¾ lb if brisket is the main event); expect ~35–50% cook loss.
Quick reference for shoppers and planners.
Want the fuller guest-count chart? Start with our brisket serving guide, then use the Brisket Calculator for your exact plan.
Buying by the numbers (IMPS/NAMP)
Butchers and packers use standardized codes. Knowing them prevents mix-ups at the counter and helps when you’re ordering sight-unseen.
Buying by the Numbers (IMPS/NAMP Codes)
| Cut (common name) | IMPS/NAMP | What you get |
|---|---|---|
| Whole brisket (packer) | 120 | Flat + point together; deckle removed; fat cap usually intact |
| Brisket flat half | 120A | Lean, uniform flat; ideal for neat slices, corned beef, pastrami |
| Brisket point half | 120B | Fatty, marbled point; forgiving on the pit and perfect for burnt ends |
Buying by the numbers: For a full “packer” brisket, ask for IMPS 119 (deckle-on, boneless, whole) or IMPS 120 (deckle-off, boneless, whole). The flat is 120A, the point is 120B, and the 2-piece set is 120C. Source: USDA IMPS 100 (Fresh Beef), pp. 40–41.
Bottom line on IMPS 120 vs 120A: For classic barbecue results, ask for code 120 (“packer brisket”). 120A is the flat only.
Flat vs point (and that “deckle” confusion)
Cooks sometimes call the point the “deckle.” Strictly, the deckle is the hard fat and connective tissue between the flat and point that gets trimmed away; the point is the muscle itself, as noted by Texas A&M Meat Science. Keep that straight and trimming makes more sense.
On the plate, the flat gives you clean slices; the point gives you juicy chunks or “moist” slices with visible marbling. Many of us separate the two muscles after the rest so we can find each grain and slice both correctly.
Bottom line: one brisket, two personalities; slice each against its own grain and you’ll taste the difference.
Brisket Science: Collagen, the Stall & Gelatin
Brisket is loaded with collagen, the same stuff that makes a pot roast silky when it’s done right. As the internal temp spends time in roughly the 160–190°F range, collagen unwinds and dissolves into gelatin, which is what makes slices juicy and tender.
The dreaded stall is just physics. It isn’t fat or collagen melting; it’s evaporative cooling. Surface moisture evaporates and cools the meat as fast as your cooker heats it. Expect a brisket stall temp around 150–170°F internal. Wrapping traps moisture and heat so you push through sooner; this is called the Texas Crutch. Cooking “naked” takes longer but builds a thicker bark. For evaporative-cooling stall and Texas Crutch, see Serious Eats and AmazingRibs.
Tenderness still needs time at elevated temps: collagen dissolves with both temperature and time, so even when you hit the “done” range you may need more cook or a longer rest. See ThermoWorks’ brisket guides.

Texas A&M explains the key conversion clearly: collagen turns to gelatin only at higher internal temperatures and with time (that’s why brisket can feel tough until it doesn’t). Texas A&M Meat Science.
A chemist puts it even plainer: “Hardworking muscles tend to have a lot of collagen… Collagen is also what makes meat tough if it isn’t cooked right,” Dr. Jeremiah Gassensmith said in UT Dallas Magazine. Give it time in the zone, then give it a proper rest.
Bottom line: tenderness isn’t a single number; it’s collagen spending enough time at the right temperatures and a calm rest to settle the juices.
Smoking Brisket: Trim, Temp, Wrap, Rest, Slice
Brisket Cook Flow
- Hold steady fire — 225–250°F. Kettles → Snake Method. Bullet smokers → Minion Method. Offsets → small, clean wood fire. Kamados → small fire with heat deflector. Pellet grills → set temp and avoid peeking.
- Face fat to heat — Down on kettles/pellets to shield the flat; up on classic offsets where heat rides the top/side.
- Choose your wrap — Paper keeps bark, foil is fastest, no wrap makes the deepest bark (but takes longest).
- Rest on purpose — Pull at probe‑tender, then wrap and hold warm so juices settle and texture turns silky.
- Slice across grain — Separate flat and point after the rest; slice the flat ~¼‑inch; point can be sliced or cubed.
Skim here, learn below. Card = the moves; sections explain the why.
There are a hundred little opinions about brisket, but a handful of choices move the needle more than the rest.
Hold steady fire
A steady 225–250°F beats any number you chase with constant lid-lifting. If you’re running a kettle, the Snake Method is a simple way to keep a calm fire for ten-plus hours. It creates a long-burning, two-zone fire by banking the coals along the edge. Add wood chunks atop for smoke flavor, then light a chimney starter and pour on some hot coals at one end of your snake to start the process.
Fat cap up or down? Face fat to the heat
If you’re deciding fat cap up or down, face the fat toward the heat source to shield the flat. In a kettle or many pellet cookers where the heat is mostly below, run fat‑cap down to shield the flat. In a classic offset where heat comes more from the side/top, fat‑cap up can make sense. Keep about a quarter-inch on the flat for protection.
Brisket Temperature Cheat Sheet
- Pit: 225–250°F (275°F if you need speed).
- Stall: Often 150–170°F internal.
- Wrap cue: Bark set & ≈160–170°F internal.
- Pull cue: Probe-tender in the thick flat (~200–205°F ref).
- Rest & hold: Rest 2–4 hours; hot-hold ≥140°F.
- Slicing: ~¼″ across the grain.
Hot & Fast Brisket (275–300°F): When Time Is Short
Running a hotter pit can still produce tender slices if you manage airflow, wrapping, and the rest. It suits pellets, kettles, kamados, and offsets when you need a shorter cook.
- Pit temperature: Hold 275–300°F with clean, thin blue smoke and steady airflow.
- Good candidates: Even 12–14 lb packers, thicker flats, weeknight cooks, competition timing, bad-weather windows.
- Set up: Face the fat toward the heat source (down on kettles/pellets; up on classic offsets). Trim to about ¼″.
- Wrap earlier: When the bark is set and color is right, often around 160–170°F internal. Paper keeps bark; foil is fastest.
- Don’t chase a number: Finish when the thick flat is probe-tender. Many land near 200–205°F, but feel decides.
- Rest longer: Give it 2–4 hours wrapped and insulated so connective tissue finishes and slices stay juicy. Hot-hold at ≥140°F if needed.
- Tradeoffs: A touch less smoke depth and a narrower tenderness window. Manage the rest to avoid a tight, under-rendered flat.
Bottom line: Hot & fast works when time is tight. Keep airflow clean, wrap on look, and invest in the rest.
Should You Inject Brisket? When and How
Injection adds moisture and flavor inside the meat. It helps lean flats, hot-and-fast cooks, and competition slices. Many backyard cooks skip it on well-marbled packers with a long rest.
- Pros: Moisture insurance, deeper seasoning, can improve slice juiciness on lean flats.
- Cons: Extra prep, needle tracks, and a risk of “hammy” or oversalted notes if the mix is heavy. Keep it light.
- When to use: Choice-grade or thinner flats, hot & fast schedules, or when you want a bolder slice profile.
- When to skip: Prime/Wagyu packers cooked at 225–250°F with a long insulated rest, or when you prefer pure beef flavor.
- Simple injection (about 2 cups for a 12–15 lb packer): 1¾ cups low-sodium beef broth, 1 tablespoon Worcestershire, 1 teaspoon kosher salt (Diamond; use ½ teaspoon if Morton), 1 teaspoon sugar (optional), ½ teaspoon MSG (optional). Chill before use.
- Technique: Inject the flat in a 1–1½″ grid at a 45° angle, pressing while withdrawing the needle to avoid pockets. Use just enough to gently plump the meat. Blot dry, then season lightly on the surface.
- Timing & safety: Mix cold and keep refrigerated. Inject 30–60 minutes before the cook (or up to 4 hours in the fridge). Sanitize the injector between uses.
- Alternative: Dry brine instead (about 0.8–1% salt by meat weight) for deep seasoning without added liquid.
Bottom line: Injection is optional. Use it as a tool for lean flats or tight timelines; keep the mix mild and the surface seasoning modest.
Wrapping Brisket: Paper vs Foil vs Naked
Choosing to wrap in butcher paper vs foil is a tradeoff. Pink butcher paper breathes, so your bark survives while the cook speeds up. Foil is faster still and very moist but softens the crust. Cooking unwrapped takes the longest, and the bark will be deepest. All three work; choose based on your pit, your timeline, and your bark obsession.
Wrap Options Quick Compare
| Wrap | Speed | Bark | Moisture | Best when… |
|---|---|---|---|---|
| Butcher Paper | Faster | Preserved | Moderate | You want bark + time savings. |
| Foil | Fastest | Soft | High | You’re racing the clock. |
| No wrap | Slowest | Deepest | Lower | You want max bark and smoke. |
Choose based on pit behavior and timeline; paper balances bark and speed, foil is fastest, no wrap yields the deepest bark.
Rest on purpose
After you hit probe‑tender, wrap tight, towel it, and let it relax in a dry cooler or warm oven. Plan brisket rest time of 1–4 hours; hold wrapped in towels in a cooler to keep the meat safely above 140°F. As famed pitmaster Wayne Mueller told the Dallas Observer, he likes the meat to rest “at least two hours,” settling into that gelatinous stage, “the unmistakable jiggle when it’s perfect,” he said.
Food-safety note: If you hold brisket in a warm oven or “faux-Cambro” cooler, keep hot holds at ≥140°F; if internal temp drops into 40–140°F “danger zone,” refrigerate within 2 hours (1 hour above 90°F), per FoodSafety.gov. A leave-in probe makes this easy; otherwise use a quick check before slicing.
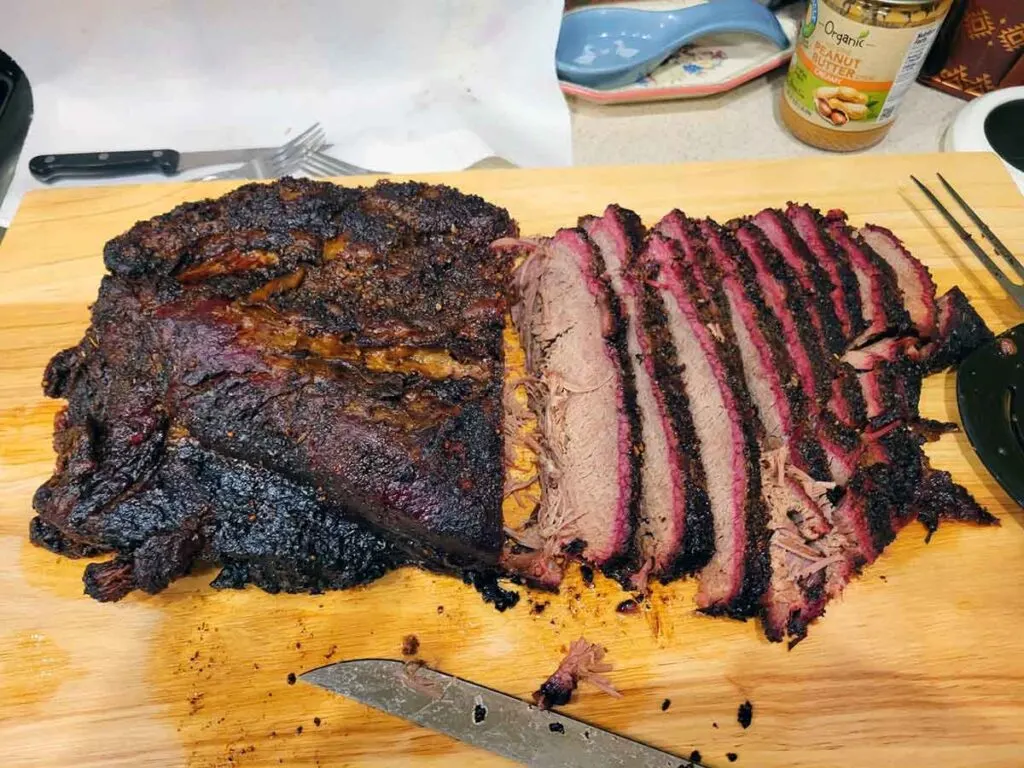
Slice across the grain
Separate the muscles after the rest, find each grain, and slice against the grain. You may see a pink smoke ring under the outer bark, a good sign. It will likely be there if you used wood, but don’t use it to judge doneness. Similar to the Maillard reaction, it's created naturally during the smoking process.
Flat slices about a quarter-inch thick are a sweet spot. The point gets rotated for across-grain slicing, or cube it for burnt ends.
Bottom line: pick a wrap strategy, protect the flat from the heat, hold steady through the stall, and rest longer than feels necessary. The slicing step is where you cash the check.
Quick Gear Picks
- Leave-in probe thermometer: Monitor pit and meat temps during the cook and the hold without lifting the lid.
- Instant-read thermometer: Verify doneness and slice timing; check for probe-tender feel.
- Pink butcher paper (24"): Breathes and preserves bark when wrapping.
- Heavy-duty foil (18"): Speeds the stall and softens bark when you need to push through.
- Curved boning/trimming knife: Safer, controlled fat trimming; aim for a ~¼-inch cap on the flat.
- Insulated cooler/Cambro: Holds a 1–4 hour rest safely above 140°F with towels.
- Heat-safe gloves (nitrile + cotton liners): Grip hot wrapped brisket and trays with confidence.
- Optional: Meat injector: If you inject, it helps distribute broth evenly without pockets.
Links may earn us a commission at no cost to you. We recommend gear we trust.
Brisket Time & Weight Matrix (Planning Windows)
Use these as planning ranges to set your start time. Finish early and hot-hold at ≥140°F. Always pull when the thick flat is probe-tender.
| Weight | 225°F | 250°F | 275°F |
|---|---|---|---|
| 10 lb packer | No wrap: 12–16 hr Paper: 10–14 hr |
No wrap: 10–14 hr Paper: 9–12 hr |
No wrap: 8–12 hr Paper: 7–10 hr |
| 12 lb packer | No wrap: 14–18 hr Paper: 12–16 hr |
No wrap: 12–16 hr Paper: 10–14 hr |
No wrap: 9–13 hr Paper: 8–11 hr |
| 15 lb packer | No wrap: 16–22 hr Paper: 14–20 hr |
No wrap: 13–19 hr Paper: 11–17 hr |
No wrap: 10–15 hr Paper: 9–13 hr |
Notes: Ranges vary with grade, thickness, pit dynamics, and weather. Paper typically saves ~1–3 hours; foil can be even faster but softens bark. Add a 2–4 hour rest/hold to your plan.
Cooking at elevation? Try our brisket Altitude Adjustment Calculator.
History & tradition (how it became the star)
Brisket in BBQ: A Brief Timeline
- Early 1900s: Jewish delis in Texas popularize brisket as smoked, cured, and braised dishes.
- Mid-20th century: Central-Texas meat markets adopt brisket for weekend smokes; Lockhart becomes a hub.
- 1960s: Wider Texas adoption as “the BBQ beef cut,” helped by boxed beef and high-profile events.
- Modern era: Craft BBQ elevates brisket (Prime/Wagyu, butcher paper wraps, long holds) and globalizes Texas methods.
A condensed, representative timeline; dates/events vary by source.
Brisket didn’t start life as the darling of the smokehouse. Central Texas meat markets, shaped by German and Czech butchers, learned to make a tough cut sing with salt, pepper, post oak, and time. Jewish cooks leaned on the flat for holiday roasts, corned beef, and pastrami. In Kansas City, the fatty point’s charred trimmings evolved into burnt ends, which went from scraps to a sought-after side.

One voice worth hearing here is Tootsie Tomanetz of Snow’s BBQ. She learned on old brick pits and remembers a time when “brisket wasn’t popular back then, so you wouldn’t find it on the menu,” she said, reflecting on earlier market days in a profile highlighted by Eater Austin.
And bringing it back to today’s craft wave, “Brisket is the toughest piece of meat… it takes a long time at a really low temperature to break down all those connective tissues… into a silky juicy piece of beef,” pitmaster John Lewis (5:44) told Eater, underscoring why patience and steady heat remain the soul of great brisket.
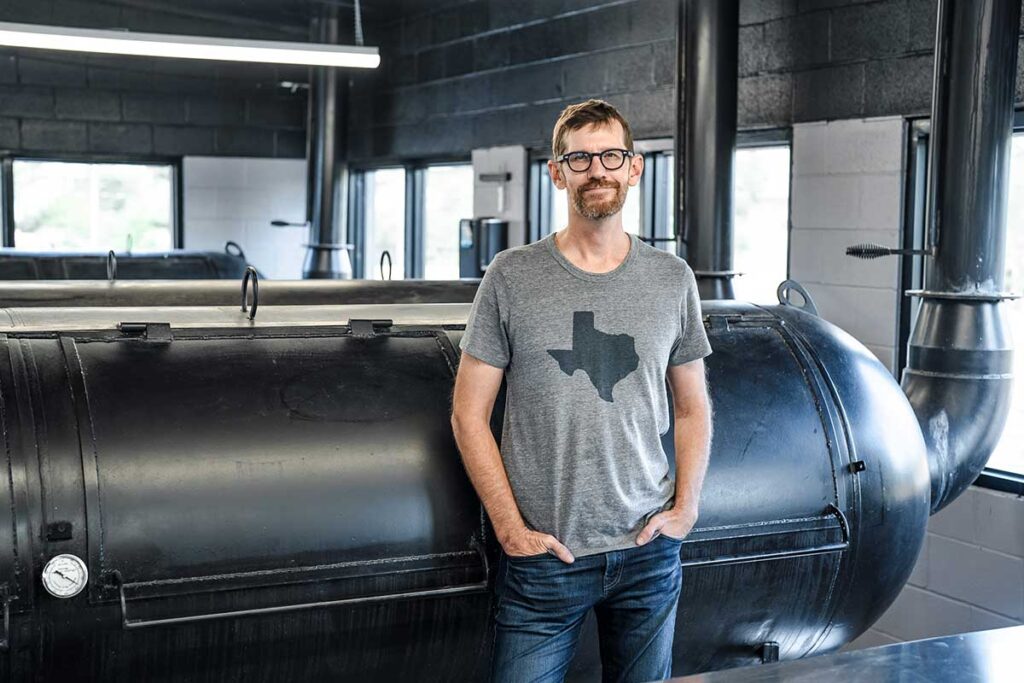

Photo courtesy of Lewis Barbecue. Savannah Bockus, photographer.
Bottom line: today’s “simple” Texas brisket stands on a century of market-pit pragmatism and a lot of learning by fire.
Competition vs backyard
Both camps chase the same endpoint—clean bite, juicy slice, deep beef flavor—but they prioritize differently. Competitors trim aggressively for symmetry, often inject for insurance, run hotter pits to hit their window, and manage color before a tight wrap. Turn-ins favor uniform flat slices and sometimes a little box of point cubes.
“The bite and mouthfeel are the primary governing factors when determining tenderness… There should be some firmness without being tough or chewy; the meat should not be mushy or dry,” the Kansas City Barbeque Society’s Board Quick Notes said, clarifying what judges are taught to look for. Backyard cooks keep the playbook simpler: moderate trimming, a straightforward salt-and-pepper rub, patience through the stall, and a long rest timed to dinner, not a 1:30 p.m. turn-in.
Bottom line: the craft is the same; the pressure is different. Cook like a competitor if you enjoy the precision, but remember that a relaxed cook with steady fire makes mighty fine slices.
Buying & handling

Start with the right piece and the rest is easier. For barbecue, a whole packer (IMPS 120) gives you both muscles so you can serve lean and “moist.” Look for an even, thicker flat (paper-thin edges dry out) and some visible marbling in the cross-section. Choice grade can be excellent; Prime buys you a little forgiveness with extra intramuscular fat.
Brisket Grades at a Glance
| Grade / Type | Marbling | Forgiveness | Flavor / Texture | Best Use | Notes |
|---|---|---|---|---|---|
| Choice | Moderate marbling. | Moderate forgiveness with a good rest. | Beefy, clean bite when cooked to probe-tender. | Backyard cooks, first brisket, budget-friendly practice. | Pick an even, thicker flat; manage the rest to keep slices juicy. |
| Prime | Higher marbling. | More forgiving; wider tenderness window. | Richer flavor and smoother texture; holds heat well. | Entertaining, longer hot-hold, “safe bet” for big events. | Trims nicely; tends to hot-hold without drying as quickly. |
| Wagyu (American) | Very high marbling. | Most forgiving if rested well. | Extremely rich with a soft bite; better in smaller portions. | Competitions, special occasions, smaller servings for richness. | Go lighter on surface salt; plan a long insulated rest so the fat sets up nicely. |
Tip: Whatever the grade or type, choose an even, thick flat and cook to probe-tender, then rest well.
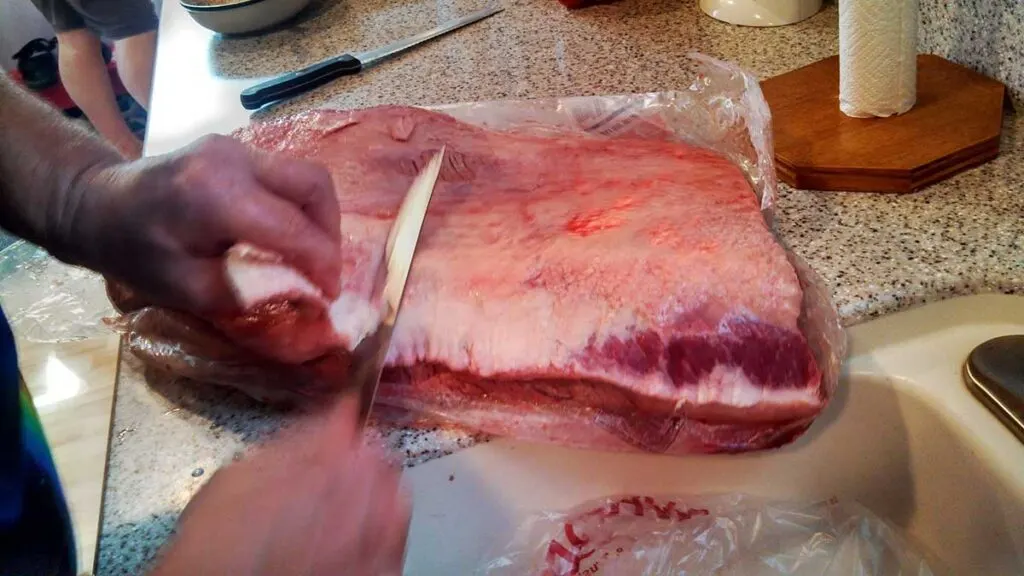
How to Trim a Brisket (Flat & Point)
Take the fat cap on the flat down to roughly a quarter-inch and remove hard deckle fat that won’t render. Square ragged edges. Season simply: coarse salt and 16-mesh pepper let the meat lead.

Franklin on Trimming (at a glance)
When you trim, the goal is simple: protect the flat, expose clean meat to smoke, and leave an even ¼-inch fat cap for the cook. As Aaron Franklin said in BBQ with Franklin: The Brisket (2:01), “If you don’t trim the fat off of it, it’s likely gonna end up too fatty after you cook it, or if you trim too much off, and then you try to cook it it’s gonna run out of fat, and it’s gonna be dry.”
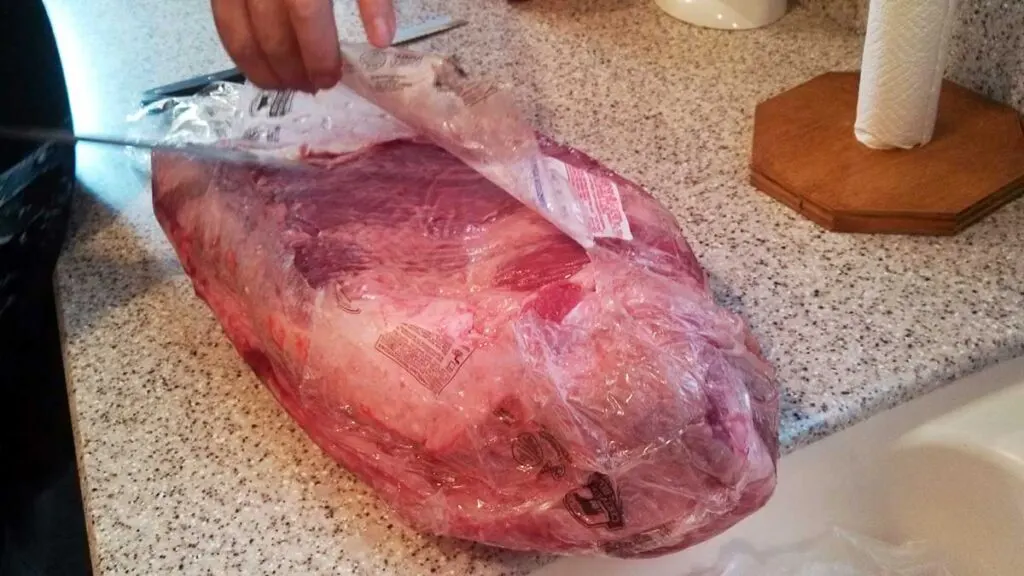
- Open safely: On a cold brisket, slit the vacuum bag with the blade up from the fat side so you won’t nick the meat.
- Use the right knife: A curved boning knife (flexible tip, stiffer near the hilt) makes controlled, shallow passes.
- Trim cold: Cold fat cuts cleanly; warm fat gets sticky and fights you.
- Fat cap target: Leave ~¼-inch over the flat to balance protection and rendering.
- Expose the seam: Lightly reveal the line between flat and point so fat there renders and you can “turn” the slice later.
- Deckle out: Remove the hard deckle (fat/gristle between point and flat); it won’t render.
- Clean the bottom: Shave silver skin and stray hard fat so surfaces cook evenly.
- Tidy thin edges: Square wispy tips and flaps that would burn or dry early.
- Shape for flow: Aim for an “aerodynamic” shape, no ledges or pockets, so heat and smoke move evenly.
Bottom line for trimming: short, shallow strokes on a cold brisket, an even ¼-inch cap, and a tidy, aerodynamic shape.
Seasoning the brisket
Seasoning brisket isn’t fussy, but it pays to be deliberate. Salt sets the stage; pepper and any extras are supporting players. Keep the surface dry so smoke sticks, aim for an even coat, and remember: you can’t rescue under-seasoned slices at the carving board.
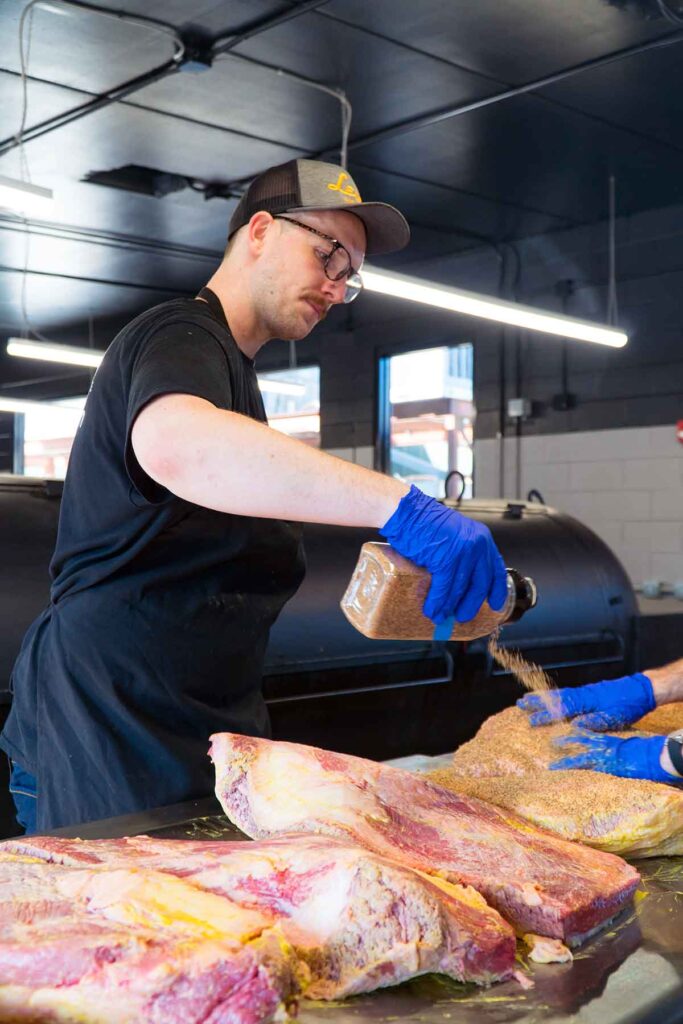
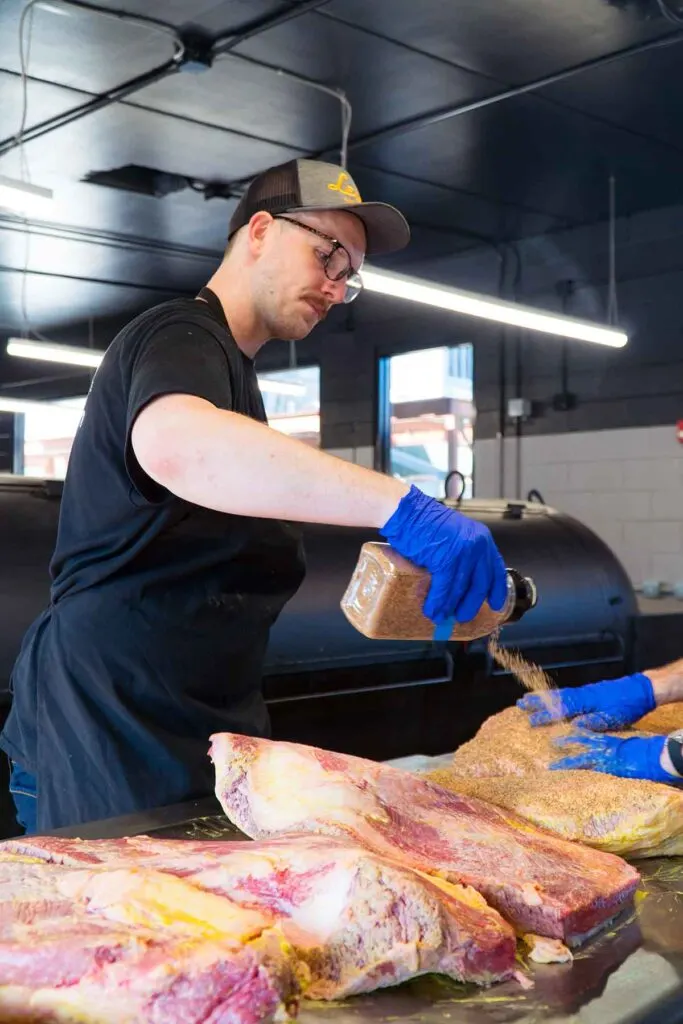
Photo courtesy of Lewis Barbecue. ProBros, photographer.
The simple default (Texas market style)
- Salt first: Use ~1.5–2.0% salt by meat weight (example: 10 lb brisket → 68–90 g salt; see brining math explained). Applied a few hours, or up to a day, before the cook, this doubles as a light dry brine.
- Pepper next: Add 16-mesh black pepper to taste (common range 0.5–1.0% by meat weight). The coarse grind helps build bark and that familiar peppery bite.
- Timing: If you salted early, add pepper (and any extras) right before the brisket goes on so it doesn’t get soggy. If you’re seasoning just before the cook, mix salt and pepper and apply in one pass.
- Binder? Optional. If the surface is dry, you don’t need one; a light application (water, beef tallow, or mustard cut thin) is fine if you struggle with adhesion, just don’t paste it on.
Seasoning binders (optional)
John Lewis Method: mustard + pickle juice
John Lewis (4:45) uses a thin mix of mustard and pickle juice as a binder before seasoning. “Pretty much all our meat gets mustard on it… It’s mustard and pickle juice. Mustard on its own is a little bit too thick… So we cut it in half with pickle juice,” he said. It’s not about flavor after a long cook— it’s about even rub adhesion without a pasty bark.
- How: Whisk equal parts yellow mustard and pickle juice; rub on a thin, even coat over the surface.
- Why: Helps the dry rub stick uniformly; stays thin enough to keep bark from turning pasty.
- Don’t overwork: No massaging, just coat and season. Heavy rubbing can smear the surface and muddy bark.
Beyond salt & pepper (when and why)
- Garlic/onion powder: Small additions (½–1 teaspoon per pound of rub) add savory depth without hijacking beef.
- Paprika/chiles: Mostly color at low-and-slow temps; use lightly.
- Sugar: Generally skip for brisket; long cooks can darken or bitter the crust.
- MSG: A tiny pinch for umami is optional, not required.
- Competition twists: Layering (salt, then S&P, then a light finishing dust) is common; keep layers thin so you don’t cake the surface.
Grind, coverage, and consistency
- Grind size: Coarse 16-mesh pepper and a medium-coarse kosher salt “tile” the surface evenly; ultra-fine pepper can muddy bark, extra-coarse can fall off.
- Coverage: Aim for freckled, even coverage, no bare spots, no drifts. The point can carry a touch more seasoning than the flat.
- Moisture: Pat the meat dry before seasoning; wet surfaces dilute the rub and slow bark formation.
If you wrap (Texas Crutch)
Foil softens bark and concentrates juices; paper preserves bark while speeding the cook. Either way, do your seasoning before the wrap; don’t add salt inside the wrap where it can taste harsh.
Prep temperature (practical & safe)
Let the brisket warm while you trim and season (about 20–30 minutes, max), then get it on a stable pit. Focus on steady cooker temp rather than “bringing meat to room temp,” which isn’t needed and can brush up against food-safety windows.
Best Wood for Brisket (Post Oak, Hickory, Pecan)
For brisket, the best all-around wood is oak (ideally post oak) because it burns steady and delivers balanced smoke that lets beef shine. Hickory runs stronger and more savory. Pecan is a gentler cousin of hickory with a subtle nutty note. If you’re choosing post oak vs hickory for brisket, pick oak for balance and hickory for a stronger, savory profile. Fruitwoods like apple or cherry add a soft sweetness that works well as a blend.
Wood Quick Picker: Brisket
- Default: Post oak for clean, steady smoke.
- Bolder: Hickory for a stronger, savory profile.
- Softer: Pecan for mild, nutty smoke on long cooks.
- Blend: Oak with a touch of fruitwood for gentle sweetness.
- Use sparingly: Mesquite can turn bitter on long cooks; keep it as a small accent.
Aim for clean, thin blue smoke with seasoned hardwood sized to your pit.
Whatever you burn, you wantblue smoke. Use seasoned hardwoods (not green) and size the fuel to your pit: splits for offsets, chunks for kettles and ceramics, and quality pellets for pellet grills. Pellet cookers run cleaner and lighter; choose oak or hickory pellets if you want more smoke character. For pairings by protein and more nuance, see our BBQ Wood Selector.
Leftovers keep well
Plan ahead. Save any juices in the wrap. Unsliced pieces reheat more gently than thin slices; a low oven with a splash of broth under a tight cover brings brisket back without drying it out.
Bottom line: buy a good packer, trim for even cooking, season with confidence, and treat smoke like another ingredient—clean, not heavy-handed.
Brisket Troubleshooting: Quick Fixes
If a cook drifts off course, use this quick triage: match the symptom, apply the fix now, and note what to change on the next brisket.
| Symptom | Likely cause | Fix it now | Prevent next time |
|---|---|---|---|
| Dry slices | Over the target or very lean flat edges dried out | Slice a bit thinner and warm with reserved jus or broth under a cover | Wrap a touch earlier, trim paper-thin flat edges, consider paper instead of no wrap |
| Tough / rubbery | Collagen didn’t finish melting; pulled before probe-tender | Return to heat; keep wrapped and cook until a probe slides in with little resistance | Be patient through the stall; focus on feel over a single internal temp |
| Falling apart | Overshot tenderness (overcooked) | Serve chopped or as burnt ends; sauce lightly if desired | Start probing earlier; shorten the wrapped phase or lower pit temp a touch |
| Pit temp crash / fire died | Fuel ran out, ash choked airflow, pellets bridged, or wind/rain cooled the pit. | Wrap tight (foil for speed). Move to a 275–300°F oven and finish until the thick flat is probe-tender. Add a small splash of warm broth if edges feel dry. | Start with enough fuel; clean ash before long cooks; use a windbreak; keep pellets dry and stir the hopper; set alerts on a leave-in probe. |
| Behind schedule | Late wrap, low pit temp, very thick flat, or oversized packer. | Raise pit to 275–300°F. Wrap in foil to power through the stall. Check every 20–30 minutes and pull when the flat probes like soft butter. | Start earlier with a planned hold. Use the Brisket Cook Time Calculator; target finishing early and hot-hold ≥140°F in a pre-warmed cooler/Cambro. |
| Finished early | Cook ran faster than expected. | Keep wrapped. Hot-hold at ≥140°F in a pre-warmed cooler/Cambro for hours. If bark softens, unwrap and set at 275°F for 5–10 minutes before slicing. | Plan a buffer and hold by design; avoid slicing until ready to serve. |
Bottom line: brisket is forgiving if you adapt; there’s always a way to serve it well.
Got questions about your specific brisket? Ask in the comments!
Brisket FAQs (Quick Answers for Common Questions)
For mixed plates with sides, plan about ½ pound of raw brisket per adult. If brisket is the star or you have hearty eaters, plan ¾ pound. Expect 35–50% loss from trimming and cooking, so you’ll typically serve ¼–½ pound cooked per person. Scale up a bit for leftovers.
Prime buys you more marbling and a bit more forgiveness. Choice can still be excellent if you trim, season, and cook with care. Look for an even, thicker flat and visible marbling in the cross-section. Spend on grade if budget allows; otherwise focus on selection and technique.
Ask for a whole brisket, IMPS 120, which has the deckle removed. If you only want the flat, request 120A; the point is 120B. For barbecue, choose a packer with an even, thicker flat and visible marbling. That shape helps moisture management and yields neater slices after the rest.
Most cooks leave a packer whole for simpler handling and balanced rendering. Consider separating only if space is tight or the flat is much thinner than the point. Cooking them apart lets you pull each at its best. After the rest, separating also makes it easier to find the grain for clean slices.
Wrap when the bark is set and deep in color and the cook reaches the stall, often around 160–170°F internal. Judge by bark feel and appearance rather than time. If it still smears when touched, wait. For planning the full timeline, use the Brisket Cook Time Calculator
Hold wrapped brisket above 140°F for 1–4 hours; use a leave-in probe and an insulated cooler or a low oven. If the internal temperature drops into the 40–140°F “danger zone,” carve and refrigerate within two hours (one hour if ambient is above 90°F), per USDA guidance.
If sliced, add a splash of broth, cover, and warm in a 250°F oven until slices reach about 140°F. For whole or big chunks, vacuum-seal and reheat in 150–165°F water until hot. Avoid high heat and microwaving, which drives out moisture. Re-slice across the grain right before serving.
How we verify: We synthesize primary sources (USDA/FSIS, TAMU) and lab-style explainers (SeriousEats, AmazingRibs, ThermoWorks), plus timestamped pitmaster quotes.
Sources
- USDA AMS — IMPS 100: Fresh Beef — primary specs for brisket codes (119/120/120A/120B/120C).
- Texas A&M Meat Science — 120 Beef Brisket — anatomy, deckle vs. point, cut details.
- Serious Eats — Texas-Style Brisket — clear explanation of the stall and wrapping.
- AmazingRibs — Understanding the BBQ Stall — deeper evaporative-cooling science.
- ThermoWorks — Smoked Brisket: A How-To Primer — probe-tender guidance, monitoring practices.
- FoodSafety.gov — 4 Steps to Food Safety — hot-holding guidance (≥140°F) used in the safety note.
We cite authoritative references and note when testing is based on first-hand experience.
About the author
James Roller documents South Carolina barbecue for Destination BBQ and authored Going Whole Hog. He researches techniques, interviews pitmasters, creates tools, and curates reliable sources so home cooks can cook barbecue safely and confidently at home.
More about James.See something that needs a tweak? Send a correction.
« See All BBQ Terms