Compare brining methods side by side so you can pick the right approach for your meat, avoid oversalting, and get juicier results on the grill or smoker

Quick-Start
- Dry brine: start around 2% of the meat weight
- Wet brine: a basic flavor brine is often around a 5% salt solution
- Equilibrium brine: start around 1.5%, with 1.2–1.8% as a practical range for many flavor brines
- Keep meat at or below 40°F (4°C) and use grams for accuracy
What is Brining?
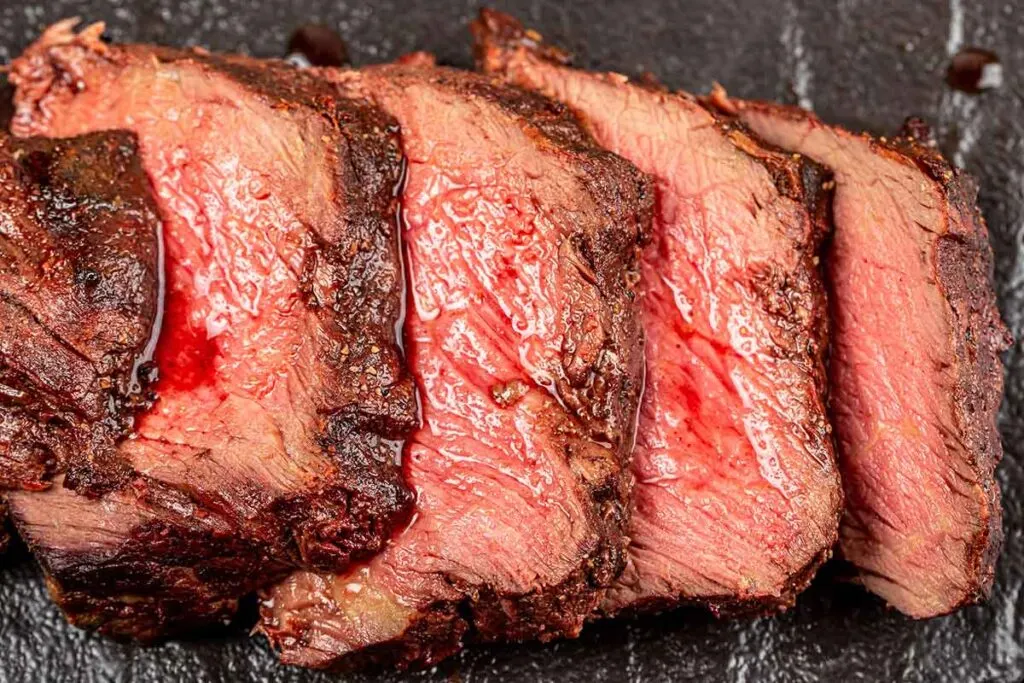
Brining means salting meat ahead of cooking, either by soaking it in a saltwater solution (wet brine) or by pre-salting the surface (dry brine), so it cooks up juicier and better seasoned. In barbecue, brining shines on lean cuts (chicken, turkey breast, pork chops, fish) that face long, drying cooks. It lays a seasoned foundation so bark sets cleanly, blue smoke tastes sweet, and your rub doesn’t have to carry all the flavor.
Once you understand the basic idea, the next decision is which method fits your cook. For a fuller look at bark, skin, juiciness, timing, and fridge space, see our guide to choosing wet, dry, or equilibrium brining. The quick takeaways below give you the short version.
Key Takeaways
- Dry brine for bark; wet brine for forgiveness: Dry brine (~2% salt by meat weight) keeps skin crisp and bark clean, while wet brine (~5% solution) adds margin for error on lean cuts.
- Measure by weight for repeatable results: Brand-to-brand volume varies, so weigh salt to hit your target (common picks: 2% dry, 5% wet, 1.2–1.8% equilibrium).
- Time ranges depend on thickness: Use the low end for thin or pre-enhanced meats and the high end for thick, lean roasts or long cooks.
- When timing’s uncertain, go equilibrium: Combine meat+water weights and let diffusion stop right at your goal salinity.
Food Safety at a Glance
- Keep brining at ≤ 40°F (4°C) in the refrigerator or in an ice-cold solution. Never brine at room temperature.
- If you want to baste or make a sauce, reserve a clean portion of brine before it touches raw meat. Discard used brine.
- Use a food-grade, non-reactive container or sealed bag. Fully submerge the meat and keep it covered.
- For meats labeled “contains X% added solution” or kosher, reduce added salt and shorten brine time.
- Practice hygiene: sanitize injectors and tools, wash hands and surfaces, and keep a dedicated fridge thermometer.
Sources: USDA FSIS: Poultry Basting, Brining, and Marinating • FoodSafety.gov • 9 CFR §317.2 / §381.117
"When it comes to keeping foods moist on a smoker or grill, few techniques rival brining. A soak in a saline solution makes turkeys tender and succulent and pork chops plump and moist. Add a curing salt and brine gives pastrami its pinkish color and poultry or ham its umami richness."
~Steven Raichlen, Barbecue Bible
Brining Methods Compared (Times, Ratios, Trade-offs)
These charts make brining simple: compare wet vs. dry, set your salt ratio by weight, and use the time ranges by cut to plan your cook. Open the calculator to fine-tune exact salt grams.
Brining at a Glance
Use this quick brining guide to compare wet vs. dry methods, set your salt ratio by weight, and match brining time by cut. Then open the calculator for exact salt grams.
Wet Brine vs. Dry Brine
Wet adds water and forgiveness; dry concentrates flavor and favors bark/skin.
Editor’s guideline ratings (1–5) for common BBQ goals.
Golden Ratios (by weight)
~3 tablespoon Morton / qt (or ~¼ cup Diamond / qt) · Best: 50–60 g/L
~½ teaspoon kosher / lb · Best: 20 g/kg
Volume varies by brand; use a scale for accuracy.
Brining Timetable
Use these ranges as a starting point; thicker cuts need the high end.
Pick a target (1.2–1.8% is common), enter weights, get exact salt grams.
Brining Methods Compared
| Method | Best for | Why choose it | Salt guide | Watch-outs |
|---|---|---|---|---|
| Wet brine | Chicken parts, whole poultry, pork chops | Forgiving moisture boost and even seasoning for lean cuts | ≈5% salt by water weight | Needs fridge space and a container; over time can soften texture |
| Dry brine | Poultry skin, ribs, brisket, roasts | Cleaner bark and crisp skin with focused flavor | ≈2% salt by meat weight | Plan ahead for time; account for salt in the rub |
| Equilibrium | Roasts or birds when timing is uncertain | Set-it-and-forget-it target salinity; less risk of oversalting | Target 1.2–1.8% of (meat + water) by weight | Requires weighing meat and water; allow extra time to diffuse |
| Injection | Thick cuts on a deadline: brisket flat, pork shoulder, turkey breast | Takes seasoning to the center fast | 0.5–1.5% salt solution; 8–15% pump by meat weight | Lower salinity if you also dry brined; avoid pooling and patchy shots |
Measure salt by weight for consistency. If a label says “contains up to X% solution,” reduce or skip added salt.
How Brining Works (the short version)
Here’s the simple way to think about it: salt moves inward slowly, loosening muscle proteins so the meat holds on to more moisture as it cooks. It’s diffusion, not magic, and sugar’s role, if you use it, is mostly to round out salinity and boost browning, not to lock in juices.
Once inside, salt changes the meat’s structure just enough to help it stay juicy.
Iowa State University explains it this way: “At concentrations of 0.8 to 1 M, salt serves to solubilize myofibrillar proteins in meat by causing them to swell.”
That swelling helps those proteins bind water instead of squeezing it out during cooking.
Ohio State’s Meat Science program confirms the same effect: “Salt increases the amount of water absorbed by proteins, allowing more water to be bound and reducing fluid loss upon cooking.”
Cooks have seen this for generations. As America’s Test Kitchen puts it in The Science of Brining, “Salt allows the protein myosin to hold on to water so the muscle fibers stay moist as they cook.”

That slow inward travel of salt is why brining takes time. Research published through OhioLINK found that “the time course for brine equilibration is lengthy and governed by the rate of diffusion into the tissues.”
Equilibrium brining simply works with that natural pace. It stops right at your target salinity, no matter how long it sits.
Tip: You can even feel the difference. Brined meat feels tacky, not wet, a sure sign the proteins are holding on to moisture instead of letting it escape.
Quick-start guide: wet vs dry brining
This quick comparison of dry brine vs wet brine explains when to choose each method for bark, juiciness, and timing.
Quick-Start: Wet vs Dry
- Wet brine: Mix a ~5% salt solution (50–60 g/L water). Keep meat fully submerged and ≤ 40°F. Best for poultry, pork chops, and fish.
- Dry brine: Use ~2% salt by meat weight (≈ 20 g per kg; ~½ teaspoon kosher per lb, brand-dependent). Refrigerate uncovered for deeper seasoning and better skin/bark.
- Pat dry before cooking. Dry surfaces brown and crisp; wet surfaces steam.
- “Enhanced” meat? If the label says “contains up to X% solution,” reduce or skip brining to avoid over-salting.
Safety: Always brine cold (≤ 40°F/4°C). Keep foods at or below 40°F. Discard used brine.
Volume varies by brand; use a scale
Brining won’t guarantee a smoke ring, that comes from combustion gases, so focus on clean fire and proper airflow. Set up gentle heat by banking the coals to one side and placing meat on the cool zone for steady brining carryover into the cook.
The Golden Ratios: How Much Salt to Use
Once you’ve chosen a method, get the salt right. Too little and the brine can’t do its job; too much and you slide from seasoning into curing. The key is to measure by weight so results are repeatable.
Whether you’re mixing a wet brine or applying a dry one, salt concentration—not just time—is what determines how deep the seasoning goes and how the meat behaves during the cook. Here’s the short list that experienced pitmasters rely on:
- Wet brine: Use about 5% salt by water weight (50–60 g/L of water).
- Dry brine: Use about 2% salt by meat weight (roughly 20 g per kilogram).
- Equilibrium brine: Combine meat and water weights, then add 1.2–1.8% salt (about 1.5% for most cooks).
- Injection brine: Use a 0.5–1.5% solution, adding 8–15% of the meat’s weight in liquid.
These ratios (your Golden Ratios) are flexible enough for everyday barbecue yet precise enough for competition cooks. They give you a consistent baseline that works across cuts and cooking styles.
Volume vs Weight: Why Grams Win
Salt brand and crystal size change spoon weights significantly. A level tablespoon of Diamond Crystal averages about 9 g, while Morton averages about 12 g. Two cooks using “1 tablespoon per cup” end up at different salinities. Weighing in grams locks your target (for example, 2% dry, 5% wet, 1.5% equilibrium) and delivers repeatable results. Use the table below only when you must measure by volume.
Salt conversion (volume fallback by brand)
If you must measure by volume, use these kosher-salt conversions and always specify the brand.
| Salt type | Approx. grams per Tbsp | Notes |
|---|---|---|
| Diamond Crystal kosher | ~9–10 g tablespoon | Large, airy flakes. Our default for dry-brine ratios. |
| Morton kosher | ~12–13 g tablespoon | Denser than Diamond. Reduce volume if a recipe assumes Diamond. |
| Iodized/table salt | ~18 g tablespoon | Very dense. Use less by volume or switch to grams. |
Always weigh salt when possible. Brand and crystal size change spoon measures; grams keep brines consistent.
Swipe to see more →
Quick math: Salt (g) = target % × (meat g + water g). Example: 1.5% of 3,000 g total = 45 g.
Brining Calculator (Get Exact Grams)
If you’d rather skip the math, use our Brining Calculator to dial in your exact salt dose. Select your target percentage, enter meat and liquid weights, and the calculator instantly gives you precise gram totals, no conversions, no surprises. Use the low end of each ratio for enhanced or thinner cuts and the high end for thick, lean roasts or long cooks.
(If you'd like to understand the math, see our brining math explainer.)
Brining vs. Marinating: Know the Difference
Brining uses salt to season throughout and improve water holding, which is great for juiciness and even seasoning. Marinating is mostly about surface flavor (acid/oil/aromatics) and doesn’t add internal moisture. If you want both, brine first, then a short marinade or rub.
When to Use Each Brining Method
A good brine is simple: salt, time, cold, and patience. Pick the method to fit the cut. If dryness is your main enemy, reach for water; if bark or crisp skin matters most, keep it dry. When timing is uncertain, use equilibrium and let the math protect you.
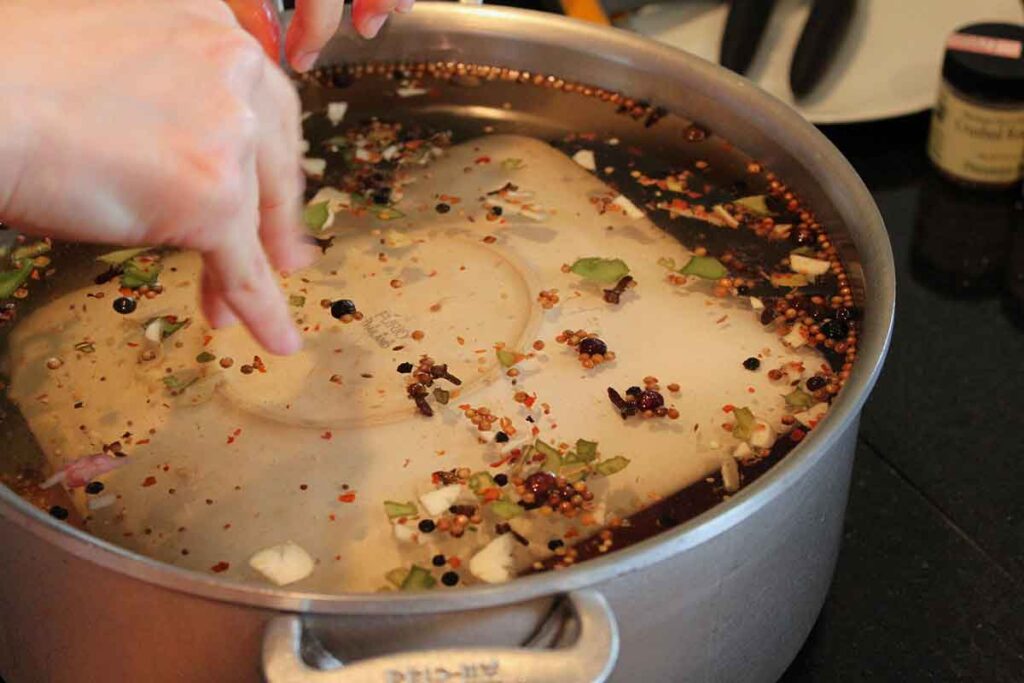
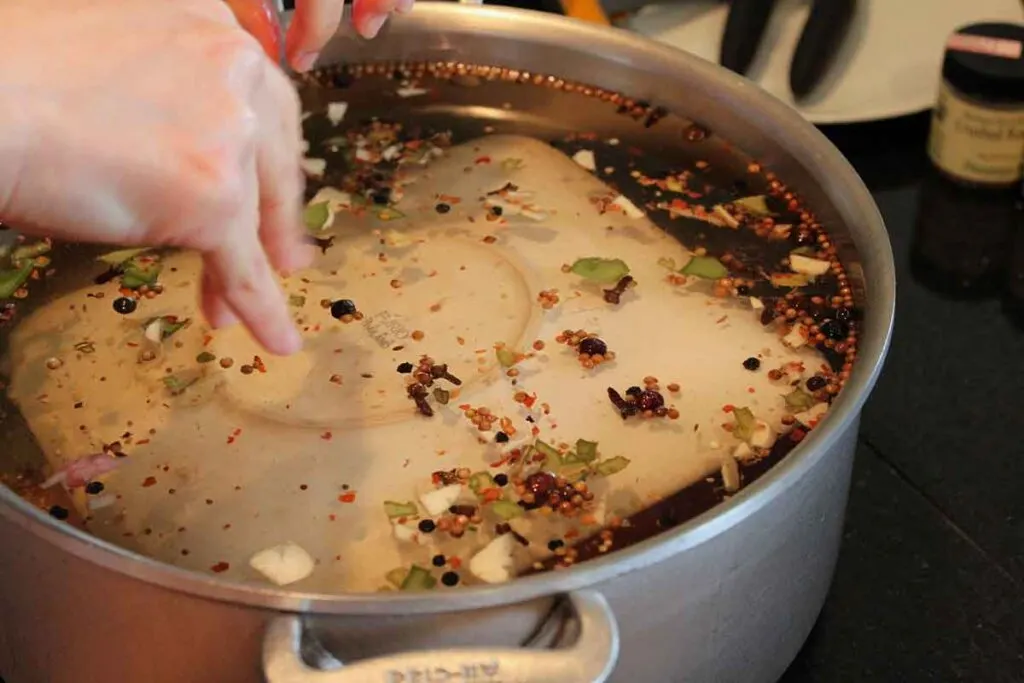
Wet Brining (saltwater soak)

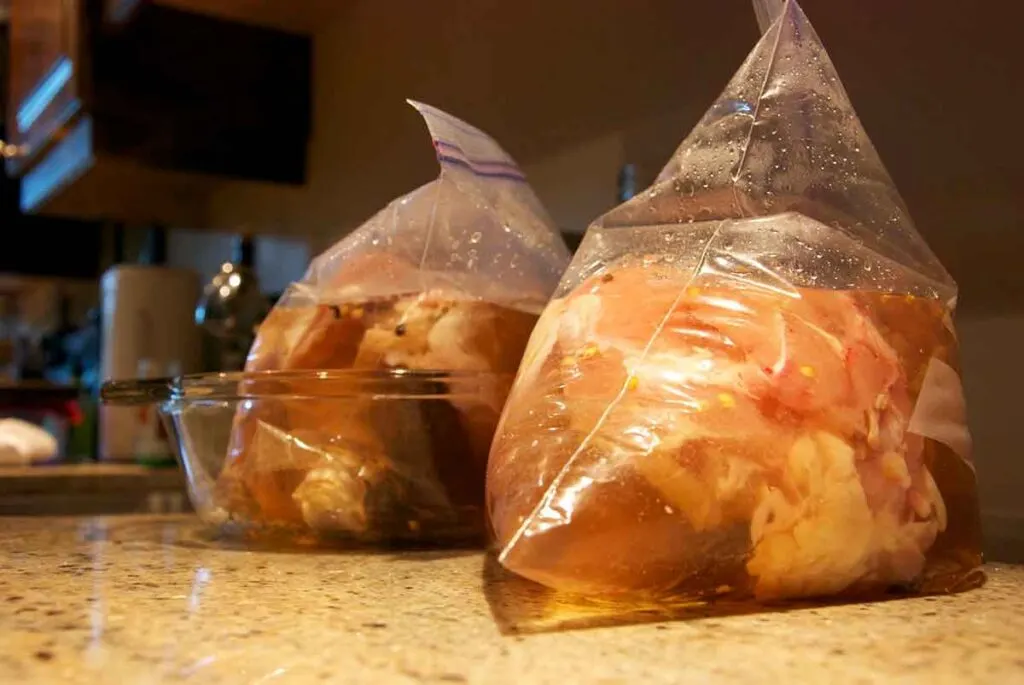
Wet brines make cooking more forgiving. The soak gives you a cushion so chicken parts, turkey breast, pork chops, and fish don’t go from perfect to parched in 10 minutes. The trade-off is added surface moisture, so drying the skin afterward becomes part of the plan.
“Wet brining is generally best for lean, small, relatively quick-cooking meats… [but] uses more salt and space than dry brining,” notes Dave Joachim on AmazingRibs.
Best for: lean meats that dry out, whole chicken/turkey, chicken parts, pork chops, and fish for smoking. (Want a real-world holiday example? Try this smoked turkey recipe.)
Why: adds moisture and makes long cooks more forgiving.
How to (step-by-step)
- Mix a 5% brine: 50–60 g salt per liter water. Optional: a little sugar/aromatics. Chill completely.
- Submerge & chill: Meat must be fully covered and ≤ 40°F (4°C) the entire time. (per FSIS)
- Time it: Follow the table ranges; don’t exceed for thin/small cuts.
- Discard brine. Pat very dry. Don’t rinse unless you overshot salt.
- For poultry skin: Air-dry on a rack in the fridge 4–12 h for best crispness.
- Season smart: Use a low- or no-salt rub; the interior is already salted.
Dry Brining (pre-salting)


Lexlex, CC BY-SA 4.0, via Wikimedia Commons
“Since discovering [dry brining], I almost never wet brine anymore,” writes Meathead Goldwyn, pitmaster and publisher of AmazingRibs.
“Dry-brining… is easier, takes up less space, and improves browning," writes Sasha Marx for Serious Eats.
Taken together, these notes capture why cooks reach for dry brining. Now here’s how to do it well.
Best for: big roasts and bark-sensitive cuts (brisket, pork shoulder), and any poultry where you want crisp skin. (For crispy skin after a dry brine, see these smoked chicken wings. And smoked chicken loves Alabama white sauce.)
Why: all the seasoning benefits with no dilution of meaty flavor; friendlier to bark/skin.
How to
- Weigh the meat; salt at ~2% (that’s 20 g per 1,000 g meat, ≈ 0.32 g per ounce). Home shortcut: ≈ ½ teaspoon kosher per lb, brand-dependent.
- Volume varies: At about 2% dry brine: Diamond Crystal ≈ 1¾ teaspoon per lb; Morton ≈ 1¼ teaspoon per lb. Weigh if you can.
- Refrigerate, uncovered: small cuts 8–24 hours; whole birds or large roasts 24–48 hours
- Do not rinse. Pat any surface moisture; apply a low- or no-salt rub, then cook.
Equilibrium Brining (precision method)

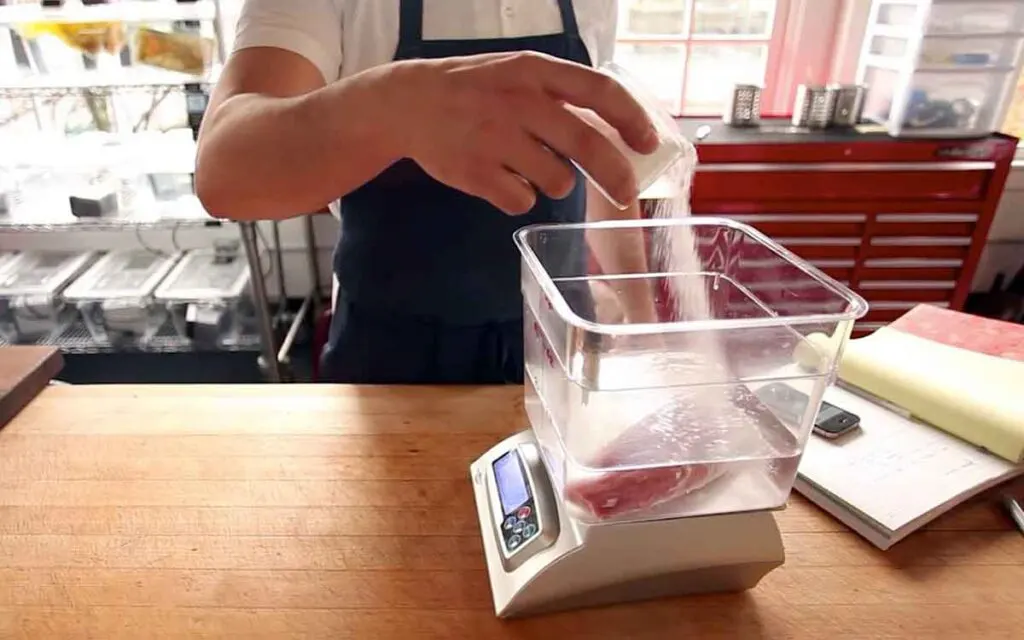
When the schedule is fuzzy or you want repeatable salt levels, switch to equilibrium. You set the exact target, weigh the meat (and water if using), and let time do the rest. It’s slower up front, but it won’t creep past your chosen salinity.
"With brining," writes ChefSteps, "you have the same choice: brine the food in a very strong salt solution and then remove it before it is over-salted, or soak the food in a brine with just the right amount of salt. The latter is our preferred approach because it does away with all of the guesswork. We call it equilibrium brining."
How to
- Pick a target salt % (great range: 1.2–1.8% final in the meat).
- Weigh meat and water if using a wet brine, then add salt so the combined system reaches your target % by weight.
- Brine longer, often 24–72 hours, until the salt equalizes throughout. It’s very hard to overshoot.
Think of the whole tub (meat plus water) as one “system.” Total system weight × target % = salt grams, simple.
Example
1,800 g meat + 1,200 g water = 3,000 g system. Target 1.5% → 45 g salt total.
Precision Calculator (Equilibrium Brine)
Pick a target salt %, enter meat (and water) weights, and get exact salt grams, no guesswork.
Open the Equilibrium Brining CalculatorTip: 1.2–1.8% is a great starting range for equilibrium brines.
Injection Brining (flavor inside, fast)
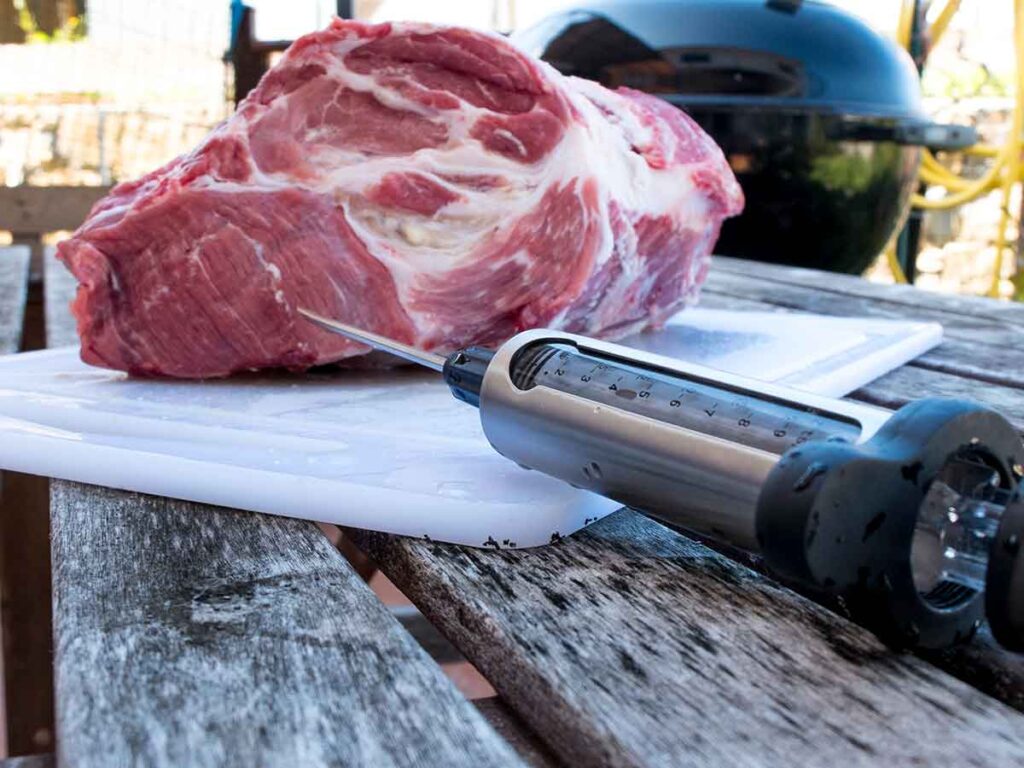
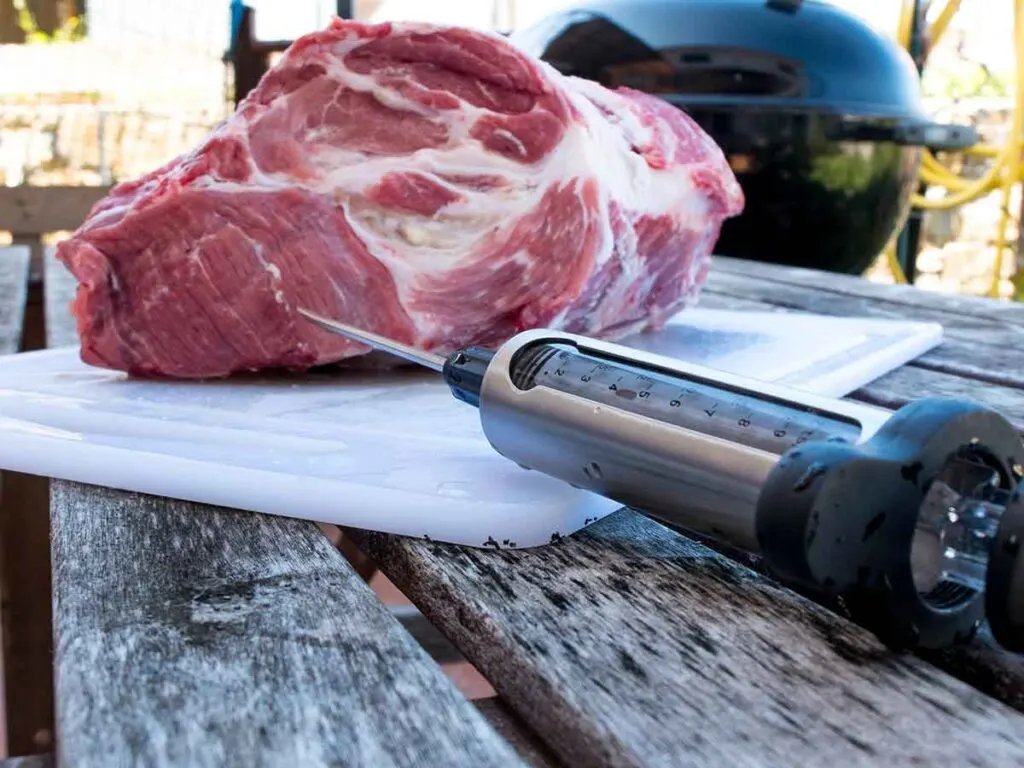
Thick cuts don’t allow much time for diffusion. A light, even injection plants seasoning where it’s needed (through the flat on a brisket, deep in a turkey breast) without pushing the exterior toward a “hammy” cure. Keep the salt modest if you’ve already dry brined.
Best for: brisket flat, pork shoulder, whole turkey; thick cuts where surface brining can’t reach center in time.
Why: rapid penetration; you can keep salt modest and deliver flavor where it matters.
How to
- Mix a thin injection: stock/juice + modest salt (or go salt-free if you dry-brined).
- Inject evenly across thick zones; total volume ~10–15% of meat weight.
- Guardrails: Keep it on the low end (~0.5–0.8%) if you already dry-brined.
- Chill a few hours to equilibrate. Pat leaks dry; apply a low- or no-salt rub.
When to Skip Brining or Use Less Salt
Brining is powerful, but it isn’t always the right move. Use the guide below to know when to skip it or dial the salt down.
- Enhanced or pre-injected meats
If the package says “contains up to X% solution,” treat it as pre-brined. Skip wet brines and reduce added salt; see Read the Label: “Enhanced” or Pre-injected Meats for what to look for and exact % targets. - Already cured or heavily salted products
Corned beef, ham, bacon, and koshered meats are salt-forward by design. Do not brine. Rely on a salt-free rub and careful cooking. - Very thin or delicate fish
Thin fillets (tilapia, sole) over-salt quickly and turn spongy. Either skip or use a brief 1–2% equilibrium brine, then pat dry thoroughly. - Dry-aged steaks and prime rib
Dry aging concentrates flavor and reduces surface moisture. Brining can muddy that texture. Skip brining and season lightly right before cooking. - Crisp-skin poultry cooks
Wet brines leave extra surface moisture that fights crisp skin. Prefer dry brining at ~2%, then air-dry uncovered in the fridge 8–24 hours for best crackle. - Short cooks and small cuts
Quick searing of thin chops or steaks won’t benefit much. Season normally or do a brief dry brine (30–90 minutes) instead of a full wet brine. - Sodium-sensitive diners
Target the low end of each range (for dry brine ≈1.0–1.5%; for wet brine ≈3–4%) and keep the finishing rub salt-free. - If you’ve already brined
Don’t stack salt. Skip added salt in the rub, taste after cooking, and finish with unsalted butter, herbs, citrus, or vinegar if it needs brightness.
Label check tip: If you see injected, enhanced, or self-basting wording, treat it as pre-brined and reduce or omit additional salt.
Read the Label: “Enhanced” or Pre-injected Meats
Some packages are already salted at the plant. If a package states “contains X% added solution,” that wording is required by USDA rules to disclose both the percentage and the ingredients; see the regulations for meat (9 CFR §317.2) and for poultry (9 CFR §381.117). When you see it, reduce or omit added salt.
Look for these phrases on the front or near the ingredients:
- “Contains up to X% solution”
- “Enhanced,” “plumped,” “self-basting,” “basted,” “pre-brined,” “injected”
- A longer ingredient list that includes water and salt (sometimes phosphates or broth)
What it means: The meat already has added water and salt distributed through the muscle. Treat it as partially brined.
How to adjust your plan
- Wet brine: Usually skip it to avoid oversalting.
- Dry brine: If you brine at all, go light at ~0.5–1.0% of meat weight and keep the rub low-salt.
- Equilibrium brine: Aim for the low end of your target range (about 1.2–1.4% final salinity).
- Rubs and injections: Prefer salt-free rubs and avoid additional saline injections.
Quick label check
- Scan the Nutrition Facts for unusually high sodium per serving.
- If a percent solution is listed, assume noticeable added salt even if the ingredient list is short.
Safety & handling
- No need to rinse. Pat dry thoroughly for cleaner smoke; a drier surface speeds the Maillard reaction, building deeper color without overcooking.
Food Safety & Labels (Quick Notes)
- Keep it cold: Brine in the refrigerator at ≤ 40°F. Add ice to wet brines as needed; no room-temp brining.
- Discard used brine: Don’t reuse. It’s raw-meat liquid.
- Dry well before cooking: Brief rinse after wet brining if overly salty on the surface, then pat dry and air-dry 30–60 min for better skin/bark.
- Check the label: If it says “contains up to X% solution,” reduce or skip added salt. Kosher poultry is pre-salted; use shorter times and lighter salt.
- Stay within the timetable: Over-brining (especially lean cuts or fish) can get hammy or mushy.
- Injection hygiene: Sanitize needles, keep meat cold, and avoid pooling; if you also dry brine, lower injection salinity (≈0.5–1.0%).
- Thaw first: Brine fully thawed meat for even uptake.
Tip: Weigh salt for consistency; brand volume varies.
Time & Ratio Guide (by cut)
Use the chart below for brining time by cut and adjust within the ranges based on thickness and desired salt level. Use these ranges to plan; aim for the low end when pieces are thin or already “enhanced,” and the high end for larger, denser cuts.
Measure salt by weight. Kosher brands differ hugely by volume, so teaspoons/cups can mislead.
| Cut | Wet Brine (≈5% salt) | Dry Brine (~2% salt) |
|---|---|---|
| Chicken pieces | 4–8 h | 8–24 h |
| Whole chicken (~4–5 lb) | 8–12 h | 24–48 h |
| Turkey breast / small turkey | 12–24 h | 24–48 h |
| Pork chops (1–1.5″) | 1–6 h | 8–24 h |
| Pork shoulder / butt | Not typical (prefer dry or inject) | 24–72 h |
| Brisket (packer or flat) | Not typical (prefer dry or inject) | 24–72 h |
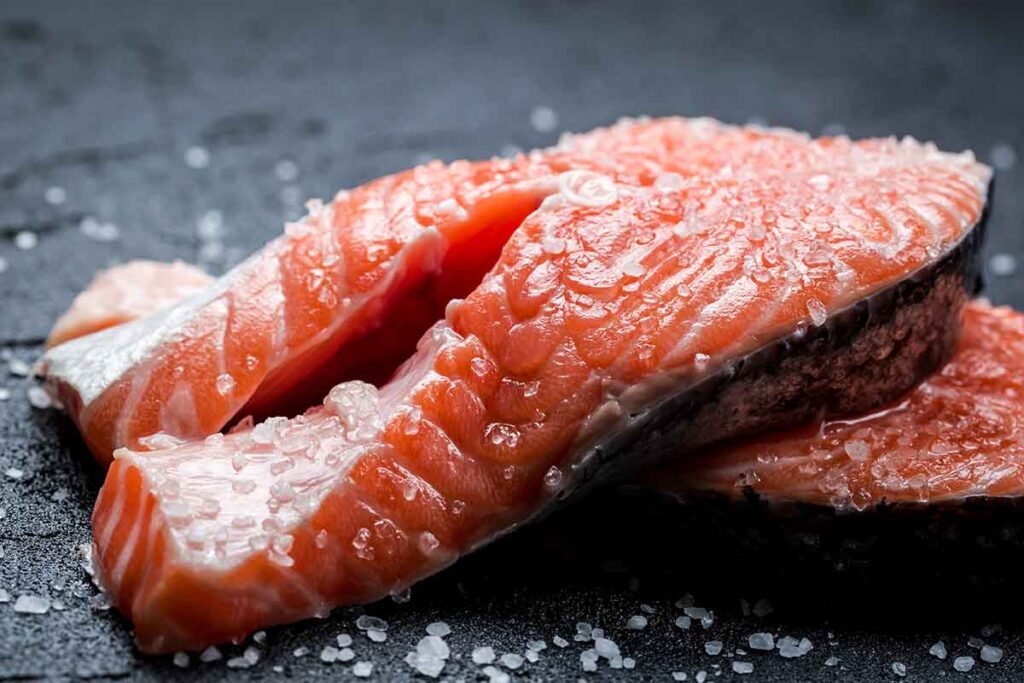
| Fish fillets (~1″) | 20–60 min (2–4% salt) | Light sprinkle & 15–30 min rest (not a true dry brine) |
For stronger or longer fish soaks (classic smoked fish), plan a brief fresh-water “freshening” before cooking to keep texture clean.

Troubleshooting (quick fixes)
Salt is powerful, which is why little mistakes show up fast. If you overshoot, don’t toss dinner. Most problems have quick fixes. Start here:
| Problem | Salvage now (this cook) | Next time (prevention) |
|---|---|---|
| Too salty | Slice thin; pair with unsalted sides; add acidity (vinegar sauce, lemon) or a low-salt jus to dilute on the plate. | Reduce salt % or time; weigh salt (~2% dry, ~5% wet). Avoid brining meat labeled “enhanced.” |
| Mushy / soft texture | Add contrast: quick hot sear for crust; chop/pull and mix with crisp edges; serve in tacos/sandwiches for texture balance. | Shorten or lighten the brine; prefer dry brine; skip brining pre-injected meat. |
| Rubbery poultry skin | Hit with dry heat (broiler, hot grill, or air fryer) a few minutes to crisp, or remove skin before slicing. | Dry brine and air-dry 4–12 h on a rack; start the cook with a dry surface. |
| Bland center (thick cuts) | Slice thinner across the grain; serve with a seasoned (not salty) jus or finishing sauce. | Go longer within the table ranges, use equilibrium brine, or inject lightly. |
| Uneven salting (salty spots) | Chop/pull and mix to distribute; sauce on the plate instead of more rub. | Salt by weight and distribute evenly; allow time for diffusion before cooking. |
| Fish too salty | Flake into spreads, salads, or tacos with neutral/creamy components (rice, mayo, crema) and acid. | Use 2–4% for 20–60 min only; stronger/longer soaks need a brief fresh-water freshening before cooking. |
Safety: Keep brining ≤ 40°F (4°C). Discard used brine.
Brining Gear Picks
Quick Gear Picks
- Digital food scale (grams) : Weigh meat, water, and salt for precise % targets.
- Meat injector : Even distribution for low-salinity injections (≈0.5–1.0% salt equivalent).
- 12–22 qt food-safe container (Cambro or similar): Holds full cuts under brine; pair with a lid and rack/weight to keep meat submerged.
- Diamond Crystal & Morton kosher salt: Different crystal sizes; if measuring by volume, check the conversion chart on this page.
- Instant-read thermometer : Verify safe temps and avoid overcooking after brining.
Disclosure: Some links above are affiliate links; if you buy through them, we may earn a commission at no extra cost to you. As an Amazon Associate, Destination BBQ earns from qualifying purchases.
Competition & practical notes
In contests and at home, good results come from managing trade-offs. Wet brines boost forgiveness; dry brines protect bark and skin. Budget rub salt accordingly, keep the fire steady (the Snake Method is your friend), and aim for thin, sweet smoke.
- Dry brine for bark and bite-through skin. Target ~1.5–2.0% salt by meat weight for ribs, pork, and brisket. For poultry you want crisp skin, so go dry brine and air-dry 8–24 hours uncovered in the fridge.
- Keep injections mild. If you inject, stay around 0.5–1.0% salt equivalent in the solution to avoid hammy notes.
- Skip wet brines before comps. Extra surface moisture fights bark and extends cook time; save wet brines for lean weeknight cuts.
- Count total salt. Brine + dry rub + injection can stack fast; use low- or no-salt rubs after brining.
- Process discipline. Pat dry, apply rub evenly, and manage clean airflow for blue smoke. Hot-hold at 140–160°F without steaming the exterior.
Next step: Plan smoke flavor and fire setup: visit our BBQ Wood Pairing Guide and the Charcoal Chimney entry. For clean flavor, burn seasoned hardwoods like oak, hickory, or pecan; brined meat takes smoke readily, so keep the fire clean.
If you like to cook by feel, the tables and ranges will get you there. If you like to cook by numbers, the calculator will make you dangerous...in a good way.
Brining FAQs: Salt Ratios, Times, and Safety
For dry brine, use ~2% of meat weight (≈20 g per kg). For wet brine, a ~5% solution works for most cuts. Measuring in grams avoids brand-to-brand volume swings. Pick a target, weigh meat and water, then weigh the salt. Open the Brining Calculator for exact grams.
Choose wet brine when you want extra forgiveness and even seasoning on lean cuts like turkey breast, chicken parts, pork chops, and fish. Dry brine favors surface texture (skin, bark) and simpler workflow. If timing is uncertain, consider equilibrium brining for set salinity without overshooting.
Use the timetable ranges as your starting point: thinner cuts on the low end, thicker or lean roasts on the high end. For long windows or if plans change, switch to equilibrium brining so the meat stops at your target salinity. Always brine cold and keep the meat refrigerated.
After a wet brine, a brief rinse can knock down surface salt; always pat dry thoroughly and air-dry 30–60 minutes for better skin or bark. After a dry brine, do not rinse. Just brush off excess rub if needed and dry the surface before cooking.
Yes, but adjust. If the label says “contains up to X% solution,” reduce or skip added salt and use the low end of time ranges. Kosher poultry is pre-salted, so shorten times and lighten salt. Keep brines at or below 40°F and discard used brine.
Your Turn: Brining Wins & Lessons
What did you brine and which method did you use? Share your % salt, time, and cut, plus whether you’d change anything next time. Your notes help other readers dial in their cooks.
- Cut & weight (e.g., “bone-in pork chops, 1.25″, 900 g”)
- Method & target (% or g)—dry, wet, or equilibrium
- Time & result (juiciness, bark/skin, saltiness)
Drop your notes in the comments below.
Sources & Further Reading
Core science on salt, diffusion, and water-holding, plus tested technique guides for wet and dry brining.
Primary science & guidance
- USDA FSIS — Marinating: Safe Handling (refrigerate ≤ 40°F; discard or boil used liquids)
- FoodSafety.gov — 4 Steps to Food Safety (danger zone; ≤ 40°F refrigerator guidance)
- FDA — Refrigerator Thermometers: Cold Facts (verify ≤ 40°F with an appliance thermometer)
- Ohio State Meat Science — Salt and Water-Holding in Meat (protein extraction & moisture)
- Greg Blonder, PhD — Diffusion Basics for Salt in Foods
- Labeling (enhanced meats): 9 CFR §317.2 (meat) • §381.117 (poultry)
Practical guides & tested techniques
Note: We standardize on weights (g, %) for repeatable results; volume conversions vary by brand.
About the author
James Roller documents South Carolina barbecue for Destination BBQ and authored Going Whole Hog. He researches techniques, interviews pitmasters, creates tools, and curates reliable sources so home cooks can cook barbecue safely and confidently at home.
More about James.See something that needs a tweak? Send a correction.
« See All BBQ Terms