Reheat ribs with covered heat, a little liquid, and a thermometer so the center reaches 165°F before the edges turn tough
The hard part is already done. The smoke, rendered fat, and bark all came from the first cook. Now you need the ribs hot again without drying out the meat, burning the sauce, or leaving the center cold.
The main risk is dry heat. Leftover ribs have already given up a lot of their moisture, so they have less to give this time. Leave them exposed in a hot oven, air fryer, or grill too long, and the outside dries out before the middle is ready.
The fix is not complicated. Wrap the ribs or put them in a covered pan. Add a small splash of liquid. Heat them gently until the thickest part reads 165°F on a thermometer. If the surface needs a few minutes uncovered at the end to firm the bark or set the sauce, do that last. That's the basic idea.
First, make sure this is the problem you’re solving: this page is for cooked ribs that have already been refrigerated or frozen. If your ribs just came off the smoker and you need to keep them warm until everyone sits down, that is a different problem. Use the guide on how to keep ribs warm for that situation.
Quick answer
- Best default: Oven. Wrap the ribs in foil or place them in a covered pan, add a small splash of broth, apple juice, water, or drippings, and heat until the thickest part reads 165°F on a thermometer.
- For bark or a set sauce: Uncover briefly at the end once the center is already at temperature. A few minutes under the broiler or in a hot oven can help. Watch it closely.
- For small portions: Air fryer works for two or three cut bones, dry-rubbed or lightly sauced. Microwave is acceptable as a last resort with the right setup.
- The temperature to hit: 165°F internal for any leftover food, per FoodSafety.gov. Do not rely on how the ribs look or whether the sauce is bubbling. Use a thermometer.
Just need the best way to reheat ribs without drying them out? Use the table of contents to jump straight to the oven method. If you’re reheating a small portion, frozen ribs, or sauced ribs, the comparison table can help you choose the right fit.
Reheating ribs vs keeping ribs warm
Reheating and holding can look similar from the outside, but they are not the same.
Reheating means the ribs have gone cold. They were in the refrigerator after last night's cookout, or in the freezer for the past few weeks. Getting them from cold back up to a safe serving temperature is what this page covers.
Holding means the ribs just came off the smoker, they are still hot, and you need to keep them above a safe temperature until everyone is ready to eat. That requires a different approach. The right guidance is on the keep already-hot ribs warm page.
There is a third situation worth naming. If you are cooking today specifically to serve ribs tomorrow, you’re planning ahead, not just warming up leftovers. Make ribs ahead for next-day serving covers how to cook, cool, store, and set yourself up for the next day.
Food safety basics before you reheat ribs
Before anything goes on the heat, run through a few quick questions. They take a minute and they matter.
Were the ribs refrigerated within 2 hours of the cook? The CDC notes that bacteria multiply rapidly between 40°F and 140°F and says perishable food should not sit out more than 2 hours, or 1 hour if the ambient temperature was above 90°F. Ribs that sat on a table longer than that should be thrown out. Reheating does not undo what happened during that window.
How long have they been in the fridge? The FoodSafety.gov cold storage chart puts cooked meat and poultry leftovers at 3 to 4 days in the refrigerator at 40°F or below. After that window, toss them. If you are not sure when they went in, that uncertainty is your answer.
How long can they stay frozen? Cooked ribs keep best quality in the freezer for roughly 2 to 6 months, according to the FoodSafety.gov cold storage chart. Food stored continuously at 0°F stays safe indefinitely, though quality declines over time. Past a few months, the texture will tell you.
How hot do the ribs need to get? The FoodSafety.gov safe minimum internal temperature chart lists all leftover food at 165°F. That is the target temperature for reheated ribs, measured with a thermometer in the thickest part of the meat. This number comes from the leftovers row of the chart, not from fresh-pork doneness tables. Those are different questions with different answers.
One more thing: do not use a slow cooker to reheat ribs. FSIS says slow cookers are not recommended for reheating leftovers because food can spend too long in the 40°F to 140°F range before getting fully hot. If you want to use a slow cooker to keep already-reheated ribs warm while people are serving themselves, that is a different job. But it should not be the reheating step.
Before you reheat leftover ribs
- Were the ribs refrigerated within 2 hours (or 1 hour above 90°F)?
- Have they been refrigerated for 3 to 4 days or less?
- If frozen, were they thawed safely, or are you reheating straight from frozen?
- Are you only reheating what you plan to eat right now?
- Do you have foil, a covered pan, or a microwave-safe lid?
- Do you have a small amount of liquid ready? (broth, apple juice, water, or drippings)
- For sauced ribs: will you wait to add fresh sauce until the last few minutes?
- Do you have a thermometer to check the thickest part?
Reheat only what you plan to eat now. Repeatedly cooling and reheating the same ribs hurts the texture and gives you more chances to mishandle the food.
Why ribs dry out when you reheat them
Most ribs dry out during reheating because they spend too much time uncovered in hot air. Leftover ribs are already fully cooked, and they have less moisture to give the second time around. When you put them in a hot oven unwrapped, the outside dries out before the center is even warm. High heat speeds that up. A long uncovered session makes it worse.
Thick cuts can make the problem worse. Beef plate short ribs especially: the outside can get hot while the center is still cold, and turning up the heat to fix the center only makes the edges worse. You end up with dry, tough edges and a rib that still needs more time in the middle.
Sauce adds its own risk. Many barbecue sauces are sugary, and that sugar can scorch. AmazingRibs notes that fructose starts to caramelize around 230°F, with sucrose and glucose following around 320°F. That is not far from the temperatures most people use for reheating, particularly in an air fryer or under a broiler. Leaving sauced ribs exposed to heat for the full reheat is asking for burned sugar.
The wrap fixes most of this. Foil or a covered pan traps moisture around the meat, slows the surface from drying, and helps the heat stay even. The tradeoff is softer bark. That is why a short uncovered finish, once the center is already at temperature, helps firm things back up. The key word is short. The finish is minutes, not another cooking session.
Choose the right rib reheating method
Before choosing a method, think through what you have in front of you.
First: are the ribs still good? Run through the storage check above. Ribs that sat out too long or have been in the fridge more than four days are not worth trying to save. Reheating does not change what happened in storage.
How much are you reheating?
- One or two bones: air fryer if they are dry-rubbed or lightly sauced; microwave if it is all you have.
- Two or three bones: air fryer, oven, or grill all work.
- Half rack or full rack: oven, grill, or smoker.
- Multiple racks: oven or smoker.
What matters most for this reheat?
- If keeping the meat moist matters most: keep the ribs covered most or all of the way.
- If you want bark or a tacky sauce finish: reheat covered first, then uncover briefly once the center is hot.
- If you are reheating a small lunch portion: use the air fryer.
- If the microwave is your only real option: use it with the right setup.
What kind of ribs are you reheating? Baby back pork ribs are leaner than spare ribs or St. Louis ribs and dry out faster. Spare ribs and St. Louis ribs are more forgiving. Beef back ribs look bigger than how much meat is actually on them, and that meat dries quickly if it is not protected. Beef plate short ribs are thick and need more time and more careful probing to make sure the center is actually hot. More on each of these in the section below.
Here’s how the main methods stack up:
| Method | Use it for | Time | Moisture | Result | Watch for |
|---|---|---|---|---|---|
| Oven | Full racks, half racks, multiple racks, pork or beef | 20–45 min for most refrigerated portions; longer for thick beef ribs or ribs reheated from frozen | Foil wrap or covered pan with a small splash of liquid | Most practical method for even reheating; bark may soften without a brief uncovered finish | FSIS recommends at least 325°F for oven reheating meat and poultry. Lower covered BBQ temperatures are common for moisture, but the safety check is still 165°F internal. |
| Grill | When bark, char, or a fresh-grill finish matters | 15–35 min over indirect heat | Foil wrapped over indirect heat first; sauce applied near the end only | Better surface texture than oven alone; closest to the original outdoor finish | Direct heat burns sauce before the center is hot; warm through over indirect heat before any uncovering |
| Smoker | When a pit is already running or you want the ribs to taste like they came off a smoker | 30–60 min or more; thick beef ribs take longer | Foil wrap with light moisture; gentle convection throughout | Best BBQ feel when done gently; easy to over-smoke or dry out if treated like a full second cook | Use gentle heat and little or no added smoke; this is warming, not a second cook |
| Air fryer | Two or three cut bones, dry-rubbed or lightly sauced, quick small-portion lunch | 5–10 min in short checks | Very light moisture or minimal sauce; single layer only | Fastest surface crisping; edges dry quickly | Dries edges fast; burns sticky sauce fast; not the right fit for full racks or half racks |
| Microwave | One small serving, last resort | 2–5 min plus 2 min standing time | Covered dish or damp paper towel, small splash of liquid, rotate between bursts | Soft bark, uneven texture; weakest result in this comparison | Cold spots are real; must still reach 165°F in multiple spots; use medium power, not full blast |
How to reheat ribs in the oven
For most people, the oven is the best way to reheat ribs because it gives you steady heat, room for larger portions, and an easy way to keep the ribs covered. It works whether you have two bones or two full racks, and it gives you more control than faster, drier methods. Keeping the ribs covered gives you some margin, as long as you use a thermometer and stop when they are done rather than when a timer goes off.
Here’s the short version:
- Heat the oven to 325°F.
- Wrap the ribs tightly in foil or cover the pan.
- Add a few tablespoons of broth, water, apple juice, or drippings.
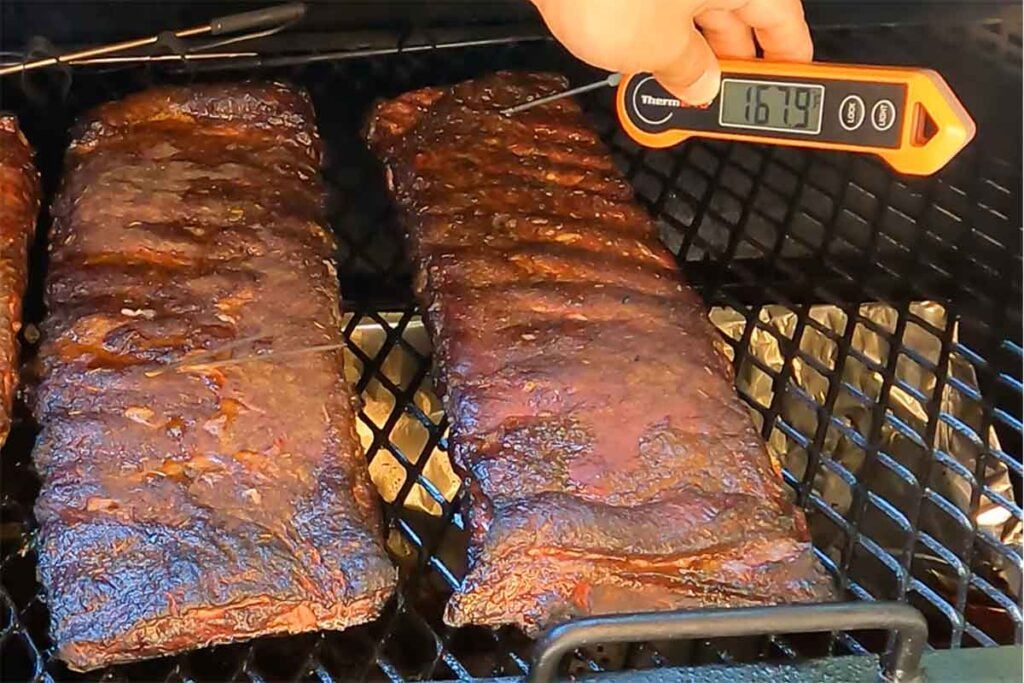
- Heat until the thickest part reaches 165°F.
- Uncover only briefly at the end if the bark or sauce needs help.
Set up. Wrap the ribs tightly in foil, or place them in a baking dish with a fitted lid or foil sealed over the top. Add a few tablespoons of liquid, just enough to create moisture inside the wrap. For pork ribs, broth, apple juice, water, or reserved drippings all work well. For beef ribs, beef broth, water, or drippings are the better fit. Seal it well so the moisture does not escape during the reheat.

Temperature. There is a real disagreement here worth knowing about.
To follow FSIS oven-reheating guidance, use a covered 325°F oven and pull the ribs when the thickest part reaches 165°F. That gives you steady heat, keeps the ribs covered, and stays inside the official oven-reheating guidance for meat and poultry leftovers.
That said, you will also see BBQ cooks reheat ribs at lower temperatures, often around 225°F to 275°F, because covered low heat is gentle on the meat. That can work well for moisture, but it is a BBQ technique choice, not the official FSIS oven-reheating recommendation. Either way, the safety check does not change: the thickest part needs to reach 165°F.
When to check. Start checking before you think you need to. A refrigerated pork portion of a few ribs or a half rack will often be ready somewhere in the 20- to 35-minute range at 325°F covered, or a bit longer at lower heat. A full pork rack generally takes 35 to 45 minutes or more. Thick beef plate short ribs take longer than pork, and ribs reheated from frozen take longer still. None of those estimates cover every oven or every rack. Use those times as a place to start. The thermometer decides when they’re done.
Place the thermometer probe between two bones, centered in the thickness of the meat, and do not let it touch bone. ThermoWorks explains that bones conduct heat differently than meat and that a probe resting against bone can give a falsely high reading. For thick beef short ribs especially, check multiple spots.
The uncovered finish. Once the thickest part reads 165°F, you have options. If the ribs are sauced and you want the glaze to tighten, pull back the foil and give them 5 to 8 minutes in the hot oven. If the bark is soft and you want it to firm back up, a few minutes under the broiler can do it. Either way, watch it. Sugary sauce at broiler heat can go from set to scorched in a short window.
Starting from frozen. FSIS confirms that reheating frozen leftovers without thawing first is safe. Keep the ribs wrapped and plan for at least half again as much time as a refrigerated portion, more for thick beef ribs. Check the center carefully before you unwrap.
How to reheat ribs on the grill
The grill makes sense when you want bark back, want a little char, or want the outdoor finish the oven cannot give you. Start with indirect heat. Use direct heat only briefly at the end if you want char or a firmer surface.
Set up the grill for two-zone cooking: heat on one side, nothing on the other. Wrap the ribs in foil with a small splash of liquid, place them on the cool side, and close the lid. Keep them there until the thickest part reads at least 165°F. This takes longer than it looks like it should, especially for a full rack or thick beef ribs. Do not move them over direct heat early to speed things up. That is how you get dry edges and a center that still needs time.
Once the thickest part hits 165°F, you have a short window. Unwrap and move the ribs over direct heat for a few minutes to firm the surface or add a little char. For sauced ribs, apply or refresh the sauce and watch it very closely over direct flame. A sweeter barbecue sauce can go from sticky and good to bitter and burned in less than a minute. For dry-rub ribs, a minute or two of direct heat tightens the crust without much risk.
How to reheat ribs on a smoker
If the smoker is already running for something else, or if you want the ribs to come out tasting closer to how they did when they first came off the pit, the smoker is a good option. The important word here is gentle. This is warming, not a second cook.
Set the smoker to a low setting, around 225°F to 250°F. That is a gentle BBQ reheat, so don’t use time as the safety check. Wrap the ribs in foil with a small splash of liquid. Use little or no additional smoke. Extra smoke on ribs that have already been through a full session can turn bitter, and they do not need it. They just need heat.
Let them come up to 165°F internal slowly, checking the thickest part with a thermometer and giving beef plate short ribs more spots to check than you would with pork. For full pork racks, plan on 45 minutes to an hour. For thick beef short ribs, an hour or more is realistic.
Once the center is hot through, you can unwrap for the last 10 to 15 minutes to let the bark firm back up. The gentle heat of the smoker is easier on the surface than a broiler. Sauced ribs still need close watching during this stage.
How to reheat ribs in an air fryer
The air fryer works for a few cut ribs. That's about it.
Cut the ribs into two- or three-bone portions. Single layer only. Set the temperature around 300°F to 320°F and check at the 5-minute mark. The hot, moving air works fast, which means it dries edges fast. Do not start at a higher temperature hoping to speed things up.

For dry-rub ribs, this method works well. The surface firms up quickly, and because there is no sugary sauce to burn, there is less risk of scorching. For sauced ribs, be careful. Apply any fresh sauce near the end rather than at the start, and check it frequently once it is on. A sticky glaze can go from glossy to burned in a minute.
The air fryer is not the right tool for full racks, half racks, or heavily sauced ribs. The outside gets hot before the center does, and with a bigger portion there is not enough time to fix that without drying or burning the edges. Confirm 165°F in the center before eating, even for small portions.
How to reheat ribs in the microwave
No one picks the microwave first for ribs. But if it is what you have, it can work acceptably for a small serving, and it is worth knowing how to use it correctly rather than just heating and hoping.
A few bones, not a half rack. Put them in a microwave-safe dish and cover with a lid or a damp paper towel. Add a small splash of broth or water. Set the power to medium if your microwave allows it (50 to 60 percent is a reasonable starting point). Heat in 90-second bursts, flipping or rotating the ribs between rounds. After the last burst, let them sit for two minutes before checking the temperature.
Probe the thickest part of the meat, not near the bone. Cold spots in food reheated in the microwave are real, and ribs are particularly prone to them because the bones conduct heat at a different rate than the meat. Check more than one spot.
The bark will be soft. The texture will not match what you get from the oven or the grill. The microwave is a last resort, not how I’d want to reheat a rack for dinner. Done correctly, it is safe and it feeds you lunch.
Can you reheat ribs sous vide or in a water bath?
If the ribs are already vacuum sealed or sealed tightly in a freezer bag, a water bath is one of the gentlest ways to reheat them. The bag holds in moisture, and the water brings the ribs up evenly without blasting the outside.
The tradeoff is time and texture. A water bath will not bring bark back or set sauce by itself. Once the ribs are hot, dry the surface and finish them briefly under the broiler, on the grill, or in a hot oven if the outside needs help.
Keep the same safety target in mind: reheated leftovers should reach 165°F in the thickest part. Do not stop at a lower sous vide temperature and assume the ribs are safe just because they feel warm.
How pork ribs and beef ribs reheat differently
Not all ribs reheat the same way. The kind of rib matters, sometimes more than what you reheat it in.
Baby back ribs
Baby backs are leaner than spare ribs or St. Louis ribs. Less fat means they dry out faster, and the difference shows up quickly if you push them with too much heat or leave them exposed too long.
Give them more moisture in the wrap than you think they need. Keep the heat at the lower end. Keep the uncovered finish brief. If the surface looks done before the thermometer confirms 165°F in the thickest part, keep going covered rather than turning up the heat.
Spare ribs and St. Louis ribs
Spare ribs and St. Louis ribs carry more fat and connective tissue than baby backs. That makes them more forgiving. They can handle a little longer covered reheat across a range of temperatures without turning dry or stringy, and the uncovered finish has more room for error.
They are still better wrapped than exposed. The fat just gives you more margin when something runs a few minutes longer than planned.
Beef back ribs
Beef back ribs look like a substantial rack, but most of the edible meat sits between and under the bones rather than stacked on top of them. That meat is exposed on multiple sides and dries quickly if it is not protected.
Treat beef back ribs more like baby backs. Keep them covered and moist throughout the reheat, and check the temperature carefully before pulling the foil back.
Beef plate short ribs and dino ribs
These are different from thinner pork ribs. Thick blocks of meat on a flat bone, sometimes several inches deep. The center is a long way from the surface, and the outside gets hot well before the middle does.
Use low heat, more time, and careful probing deep in the thickest part of the meat, well away from bone. Give them more time than you think they need. ThermoWorks’ beef short rib guidance shows why thick beef ribs need careful probing: the center can lag behind the hotter outer edges, so check more than one spot before you unwrap or finish them.
If you are not sure whether you have beef back ribs or the thicker plate short ribs, beef back ribs vs dino ribs explains the difference and helps you identify which cut you are working with.
How to reheat sauced ribs and dry-rub ribs
The approach differs a little depending on whether your ribs finished with a glaze or a crust.
For sauced ribs, use broth, water, drippings, or another plain liquid in the wrap during reheating, not more sauce. The sauce already on the ribs will warm through fine. Adding more sauce before you seal the foil means it sits against the meat in wet heat the whole time, and it will be flat and wet by the time the ribs are hot. Apply fresh sauce in the last few minutes, after the ribs are already at temperature and you have pulled the foil back. Apply it, watch it, and do not let it sit over high heat for more than a minute or two.

For dry-rub ribs, the same covered moisture approach applies during the main reheat. Bark softens in steam, but you have more flexibility at the finish because there is no sugar on the surface waiting to burn. A few minutes uncovered under the broiler or on the grill can get you close to the original crust. A light dusting of the original rub after reheating, if you have it, can help.
One thing to accept either way: reheated bark is not the same as fresh-off-smoker bark. It can get close. It will not be identical. The goal is good, not perfect.
How to reheat frozen ribs
Frozen cooked ribs are easy to ruin and easy to save, depending on how much patience you bring to the process.
Refrigerator thaw. The best approach for texture and predictable reheating: move the ribs to the refrigerator the night before you plan to heat them. Slow, even thawing in the cold means the ribs go into the reheat cold, not frozen. FSIS guidance on thawing identifies this as the safest method and the one best for quality.
Cold-water thaw. If you need them faster, seal the ribs in a zip-close bag and submerge them in cold water. Change the water every 30 minutes to keep it cold. FSIS says this is safe as long as the water stays cold and you reheat the ribs promptly once thawed.
Microwave thaw. Safe only if you go straight to reheating immediately after. Defrost in short bursts and move directly to the oven, grill, or chosen method. Do not defrost in the microwave and then set them aside.
Reheating straight from frozen. You do not have to thaw first. FSIS confirms that reheating frozen leftovers directly is safe. It just takes longer. Plan for roughly 50 percent more time than you would for ribs that came out of the fridge, and more than that for thick beef ribs. Wrap tightly, keep the heat covered, and probe the thickest part carefully. Start checking earlier than you think you need to.
Do not thaw ribs on the counter, in hot water, in a warm garage, or out in the sun. FSIS is direct about this: room-temperature thawing is not a safe method for cooked meat leftovers.
Troubleshooting reheated ribs
When something goes wrong with reheated ribs, it usually comes down to one of a handful of causes. The table below covers the most common ones.
| Problem | Likely cause | Best fix for next time |
|---|---|---|
| Dry meat | Exposed to heat without covering; no liquid in the wrap; reheated too long; microwave on full power | Wrap tightly, add a splash of liquid, use covered heat, shorten the uncovered finish, apply sauce lightly at the end |
| Mushy bark | Kept covered and steamed all the way through with no uncovered finish | Uncover briefly at the end once the center is at temperature; use the broiler, grill, or air fryer for a few minutes; watch it closely |
| Burned sauce | Sugary sauce exposed to high heat for the full reheat | Use broth, water, or drippings during the covered portion; refresh sauce near the very end; finish over indirect heat or under close watch |
| Cold center | Thick ribs or reheating from frozen where the outside reached temperature before the center did; probe placed near the bone | More time covered, not more direct heat; probe the thickest part of the meat away from the bone; give beef plate short ribs significantly more time than pork |
| Rubbery texture | Microwave on full power; too aggressive with heat; reheated too fast | Use medium microwave power in short bursts with rest time afterward; or switch to the oven next time |
| Overcooked leftovers | Treated reheating like a second full cook; left on heat well past 165°F | Use a thermometer and stop when the thickest part hits 165°F; a brief surface finish is not a second cook |
How to store ribs so they reheat better next time
Good reheating starts with what you do right after the original cook.
Get the ribs cold quickly. FSIS recommends using shallow containers for cooling and storing leftovers because they cool faster and more evenly than deep containers. If you cooked multiple racks, divide them into smaller portions before refrigerating. A shallow dish with a half rack chills much faster than a deep container with the whole cook piled in.
Wrap tightly. Whether you use foil, plastic wrap, or an airtight container, the goal is to keep air off the meat. Loosely covered ribs in the refrigerator will be noticeably drier after 24 hours than ribs that were sealed well.
If you have drippings or cooking liquid from the original cook, save them in a small separate container. A spoonful of those drippings added to the wrap when you reheat gives you exactly the moisture that belongs with those ribs.
Think about portioning before you refrigerate. If you know you will want a few bones for lunch tomorrow and then the rest later in the week, separate them now. Smaller portions reheat more evenly, and handling the ribs once is better than cutting into a refrigerated rack twice.
For the freezer, press out as much air as possible before sealing. A vacuum sealer is ideal, but a zip-close bag with the air pushed out works well. Label with the date. For best quality, use them within a few months. They should still be safe if frozen continuously at 0°F after that, but the texture will reflect the time.
If you ended up with more ribs than you meant to cook, the rib calculator can help you size the next batch a little closer. If the problem was store packs, rounding, or buying an extra rack “just in case,” buying ribs for a crowd can help you shop the number without overdoing it.
FAQs about reheating ribs
The oven is the best default for most leftover ribs. Wrap the ribs in foil or place them in a covered pan with a small splash of broth, water, apple juice, or drippings. Heat until the thickest part of the meat reaches 165°F, then uncover briefly only if you want to firm the bark or set the sauce.
Leftover ribs are generally safe to reheat if they were refrigerated within 2 hours of cooking, or within 1 hour if it was above 90°F outside, and kept at 40°F or colder. Cooked ribs should be used within 3 to 4 days. If you do not know when they went in the fridge, throw them out.
Reheated ribs should reach 165°F in the thickest part of the meat because they are leftovers, not fresh ribs being cooked for the first time. Probe between the bones without touching bone. For thick beef ribs, check more than one spot so the center is hot, not just the outside edges.
Reheat ribs covered while they warm through. Foil, a covered pan, or a tight lid keeps moisture around the meat and helps the center heat before the surface dries out. Once the ribs reach 165°F, you can uncover them for a few minutes to firm bark or sauce. Keep that finish short.
Keep sauced ribs covered while they warm, and add water, broth, drippings, or another liquid that is not more sauce. Once the meat reaches 165°F, uncover the ribs and brush on fresh sauce for the last few minutes. Watch closely because sugary barbecue sauce can burn quickly over high heat.
Yes, you can reheat cooked ribs straight from frozen, but they usually come out better if you thaw them in the refrigerator first. If reheating from frozen, keep them wrapped, allow more time than refrigerated ribs, and check the thickest part carefully. Thick beef ribs need extra time because the center warms slowly.
Corrections and editorial standards
- Spotted something wrong or outdated? Send a correction here: Corrections & Updates
- How we handle sources, testing, and updates: Editorial Standards
- Media or general notes: Email the publisher
Sources
This guide combines first-hand leftover-rib reheating experience with USDA FSIS and FoodSafety.gov safety guidance. The method advice reflects practical BBQ reheating, while time ranges are planning estimates, not controlled test averages.
- FoodSafety.gov: Cook to a Safe Minimum Internal Temperature and Cold Food Storage Chart. Primary sources for the 165°F leftover reheating target, 3-to-4-day refrigerator window, and freezer quality guidance for cooked meat and poultry leftovers.
- USDA FSIS: Leftovers and Food Safety and Slow Cookers and Food Safety. Support for cooling, wrapping, reheating from frozen, the 165°F target, oven reheating at 325°F or higher, and the no-slow-cooker rule.
- USDA FSIS: The Big Thaw and Danger Zone (40°F to 140°F). Sources for safe thawing methods, why counter thawing is unsafe, shallow-container cooling, and microwave cover/rotate guidance.
- CDC: Food Safety at Home. Supports the danger-zone warning and the 2-hour rule, or 1 hour when temperatures are above 90°F.
- ThermoWorks: How to Reheat BBQ, Are Your Ribs Done?, and Smoked Short Ribs. Temperature-control, probe-placement, and thick beef rib guidance.
- AmazingRibs: Strategies for Using BBQ Sauces. Sauce timing and sugar caramelization guidance for avoiding burned barbecue sauce during the final reheating stage.
Time estimates vary by rib cut, portion size, starting temperature, and appliance. Use a thermometer.
About the author
James Roller documents South Carolina barbecue for Destination BBQ and authored the SC BBQ cookbook Going Whole Hog. His BBQ guides focus on practical planning questions, including how much food to buy, how to avoid running short, and how to use reliable meat-cut and food-safety guidance without making backyard cooking more complicated than it needs to be.