
Learn what St Louis style ribs are, how they’re trimmed from spare ribs, and why the shape cooks more evenly, with simple tips for seasoning and slicing

What are St. Louis Style Ribs?
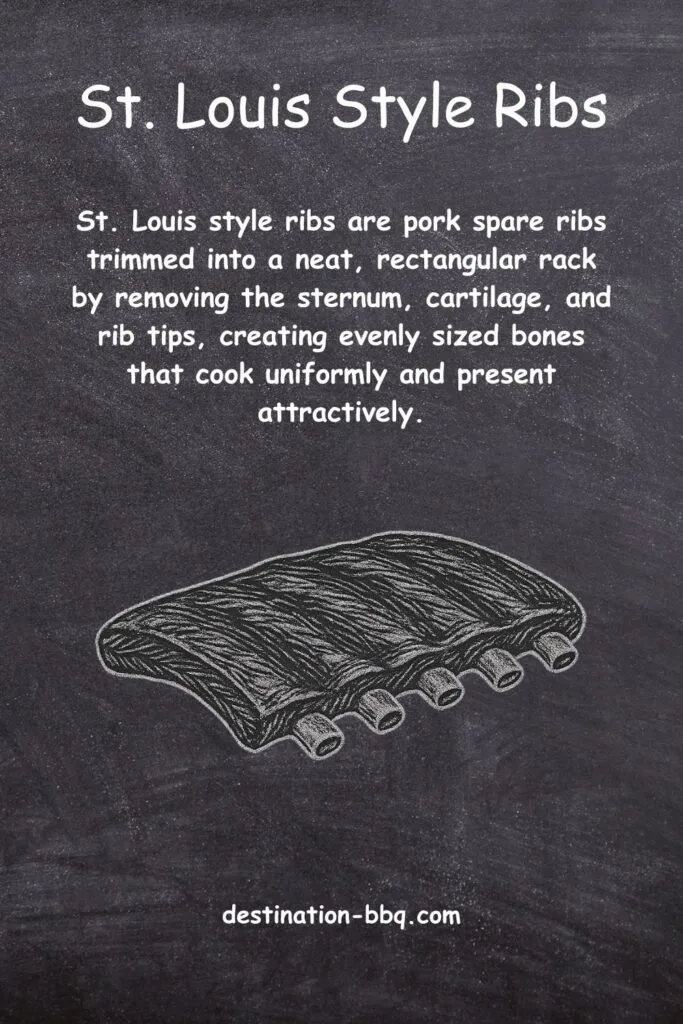
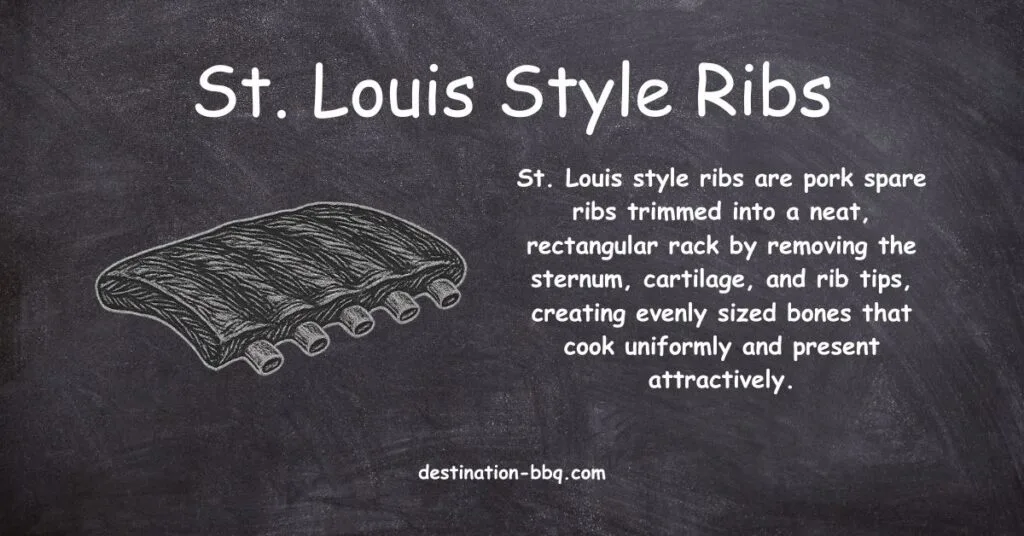
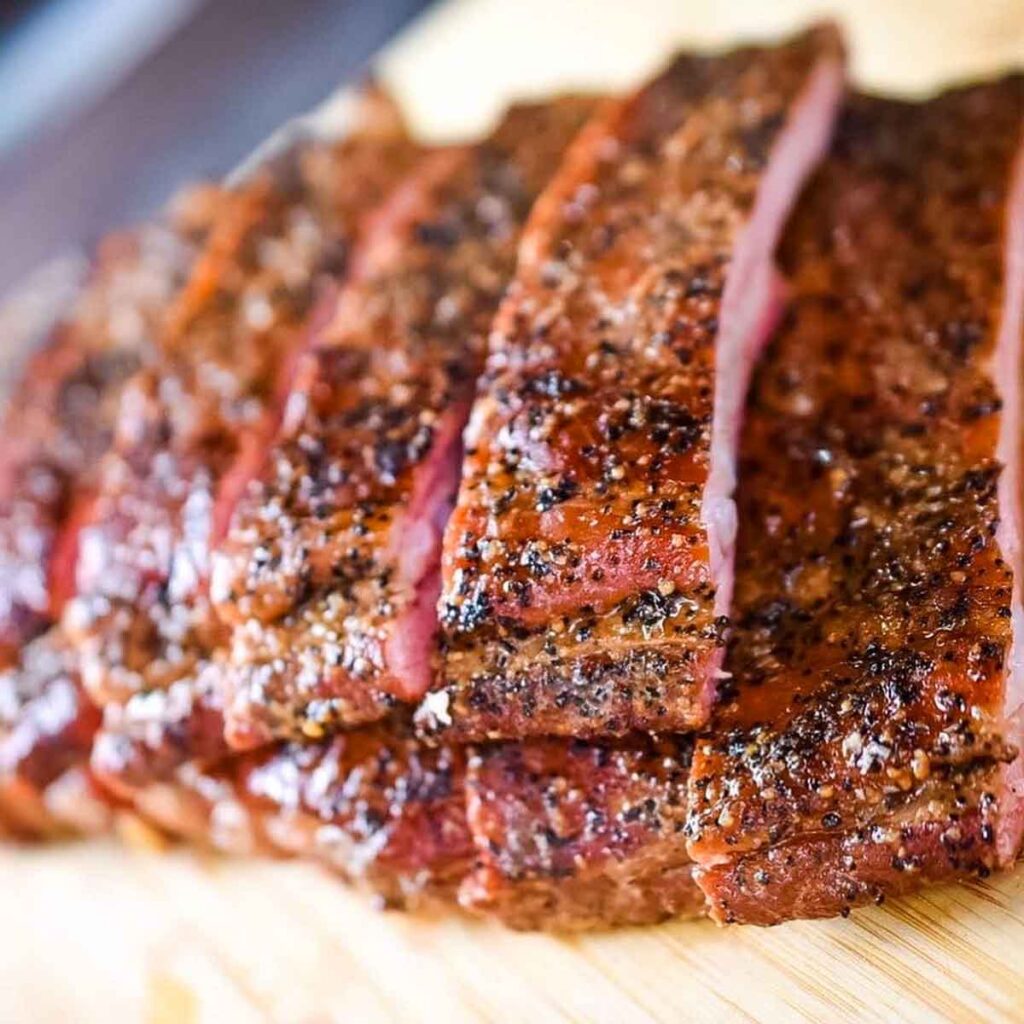
St. Louis-style ribs are pork spare ribs that have been trimmed down to a uniform, rectangular slab by removing the sternum bone, rib tips, cartilage, and a small flap of meat known as the skirt. This method of trimming makes them easier to handle, more consistent in cooking, and better looking when served. The USDA recognizes them officially as Item 416A in its meat-cutting guide, but for most cooks, the “St. Louis cut” simply means spare ribs at their neatest and most competition-ready.
Key Takeaways
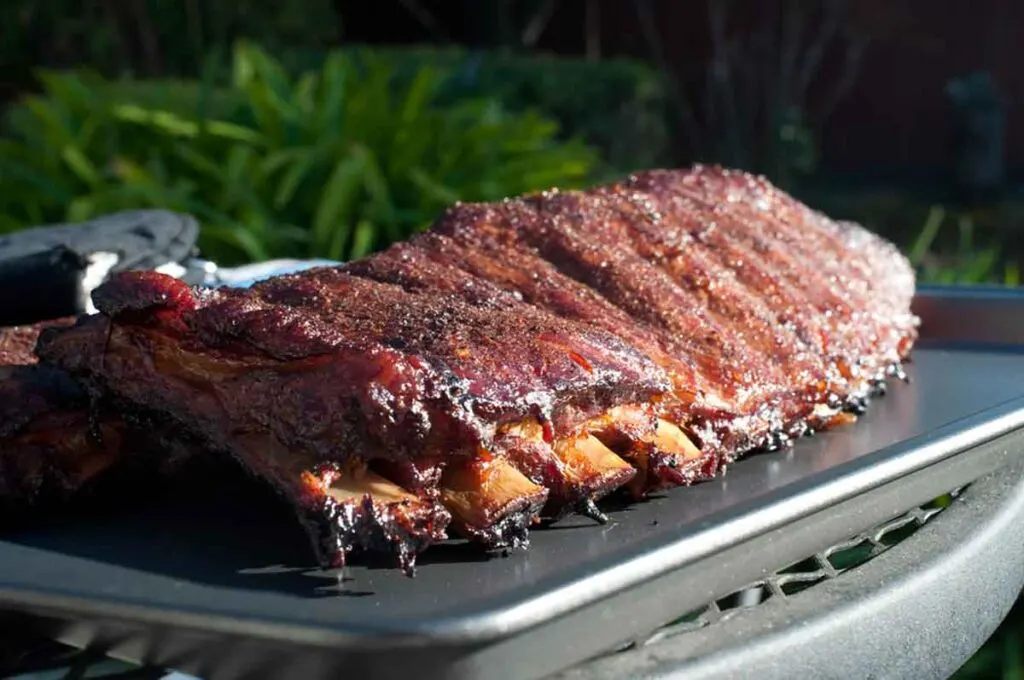
- St. Louis-style ribs are trimmed spare ribs with the sternum, rib tips, and skirt removed, giving a flat rectangular rack that cooks more evenly, slices cleanly between bones, and plates well for competition.
- Cook to tenderness, not a number by running 250–275°F and expecting about 5–6 hours, judging doneness with the bend and toothpick tests with typical internal 195–203°F, saucing in the final 20–30 minutes, and using optional wraps like 3-2-1 or a shorter 2.5-2-0.5 for a softer bite.
- Buy and serve with confidence by choosing straight-boned 2.75–3.5 lb racks and avoiding shiners, adjusting salt if the package is enhanced by skipping an overnight dry brine and reducing rub salt, planning 3–4 bones per adult as a main or 2 bones as part of a spread, then resting 10–15 minutes and slicing meat-side down.
“St. Louis spareribs usually win [competitions]. … I stick with St. Louis cut spare ribs.”
—Clint Cantwell, AmazingRibs

Quick-Start: Time, Temp, and Doneness at a Glance
Quick-Start Cook Card
- Pit temp: 250–275°F indirect.
- Time: ~5–6 hours for 2.75–3.5 lb racks.
- Wrap: optional; 3-2-1 method or 2.5-2-0.5 variant works.
- Spritz: optional every 45–60 minutes.
- Sauce: last 20–30 minutes.
- Doneness: Use bend test - rack bends and surface cracks; toothpick slides in easily.
- Internal temp (typical): 195–203°F.
- Rest: 10–15 minutes; slice meat-side down.
Times are guidelines. Cook to tenderness.
Understanding St. Louis Style Ribs
Where They Come From
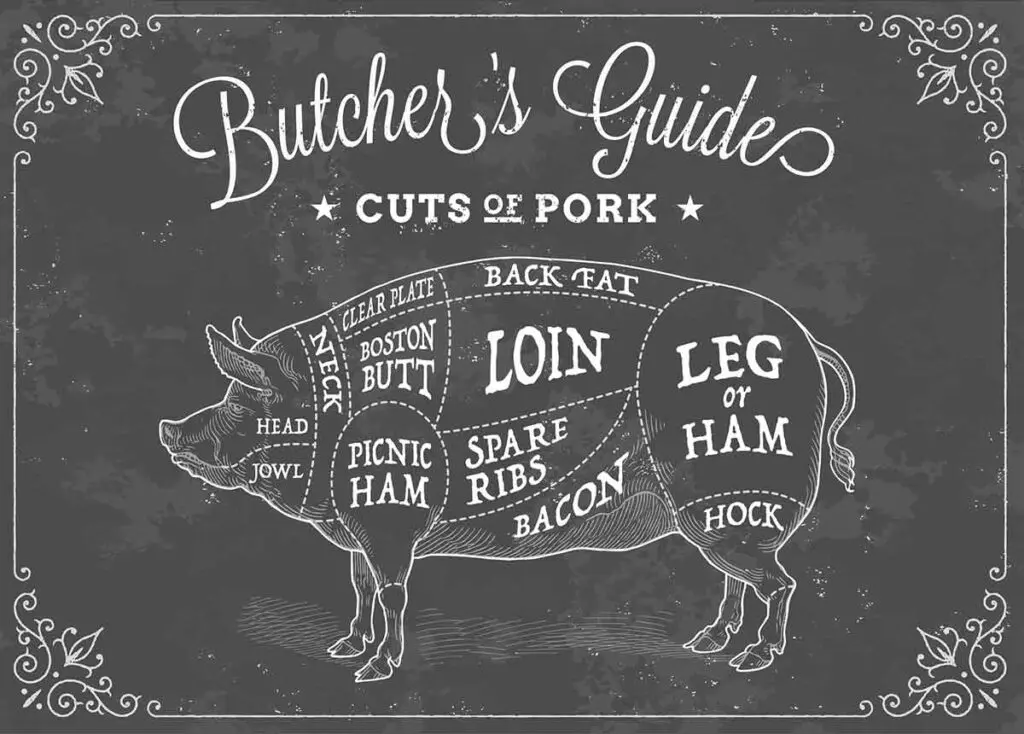
Think of a whole spare rib rack as a bit of organized chaos, delicious chaos, but still uneven in shape and thickness. At one end, the ribs are wide; at the other, they narrow. Up front, you’ve got rib tips made of cartilage and small bones; underneath, the skirt hangs like a flap of excess fabric.
Trimming these into the St. Louis cut means squaring up the rack so every rib is about the same length and cooks at the same rate. As Texas A&M’s Meat Science team explains, “The removal of the sternum, costal cartilage, and ventral ends of the ribs creates a uniform slab ideal for portion control and even heat application.” That’s why competition teams, restaurants, and backyard pitmasters alike often prefer this cut.
The USDA’s IMPS 400 series spells it out in plain terms: “Pork Spareribs, St. Louis Style… consists of the sternum, costal cartilages, and the ventral ends of the ribs removed from item no. 416.”

History and Origin
The “St. Louis” part has nothing to do with how they’re cooked or seasoned. Instead, it’s about history and location. In the mid-20th century, St. Louis meatpacking plants began trimming spare ribs this way for local markets.
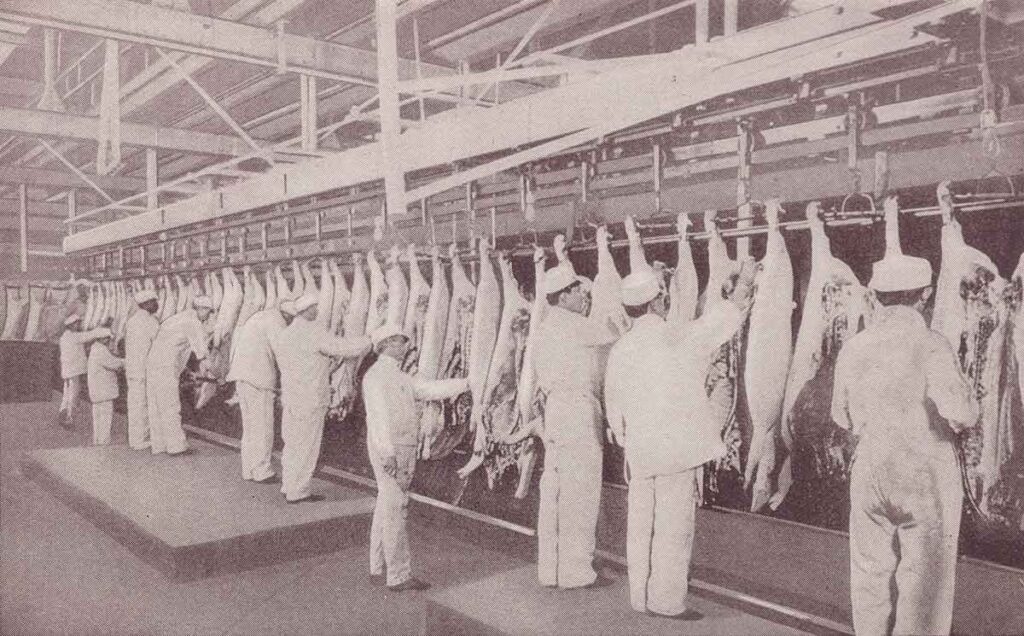
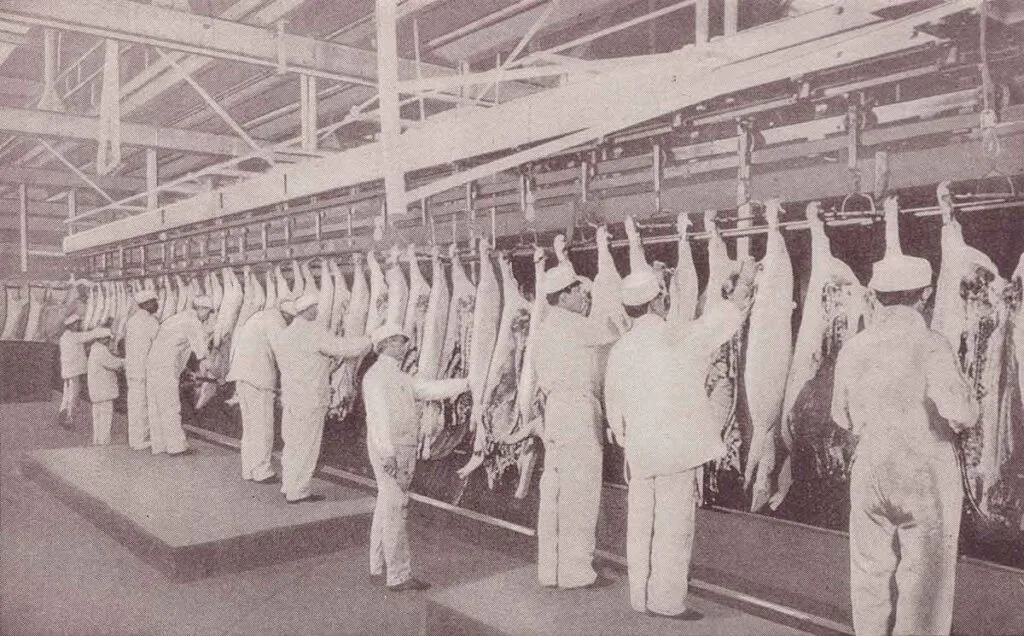
As one Food & Wine article put it, “St. Louis was home to some of the busiest pork processors in the country, and their squared-off racks quickly became the house style.”
Restaurants liked the tidy look and consistent cooking, and home cooks appreciated racks that didn’t have awkward tips sticking out. Over time, the name traveled far beyond Missouri, and now you’ll find “St. Louis style” in grocery coolers from coast to coast.
St. Louis vs. Spare Ribs vs. Baby Back (Quick Compare)
Here’s how St. Louis ribs vs. spare ribs vs. baby back ribs differ in size, fat, typical cook time, and more.
| Feature | St. Louis–Style | Spare Ribs | Baby Back |
|---|---|---|---|
| Cut location | Spare ribs trimmed (cartilage/tips removed) to a rectangular rack | Belly/breastbone side with cartilage and rib tips intact | Upper ribs along the loin/backbone |
| Trim & shape | Flat, even, easy to slice | Longer, tapered rack with tips | Shorter, curved bones |
| Typical rack weight | ~2.5–3.5 lb | ~3.0–4.0 lb (untrimmed) | ~1.5–2.5 lb |
| Meatiness & fat | Meaty with moderate fat | Meatiest with higher fat | Leaner, less fat |
| Cook time (275–300°F indirect) | ≈ 4.5–6 hr (2.5-2-0.5 or 3-2-1 variants) | ≈ 5–6.5 hr (3-2-1 common) | ≈ 4–5 hr (2-2-1 as a starting point) |
| Texture & flavor | Tender + meaty, balanced flavor | Richer pork flavor, bigger chew | Tender, milder pork flavor |
| Best for | Clean slices, even cooking, comps | Big flavor, value, rib tips/burnt ends | Quicker cooks, glaze-forward ribs |
| Price (typical) | Mid | Usually lowest per lb | Highest |
Note: St. Louis–style ribs are simply spare ribs trimmed for uniform shape and easier slicing.
Buying & Selecting
When you’re shopping, look for racks that are evenly meaty from end to end. You want evenly thick racks around 2.75–3.5 pounds with straight bones and a tidy rectangle. Avoid shiners, spots where the butcher trimmed too close and bone peeks through, since they can dry out.
Weber’s describes a shiner as “an exposed bone on a rack of ribs… look for something better.” Labels may say “St. Louis Style Ribs” or the less common “Center-Cut Side Ribs.” If you’re shopping by spec or with a wholesaler, ask for IMPS 416A by name; it guarantees the sternum and rib tips have been removed to the standard.
If the label reads “enhanced,” “injected,” or “contains up to X% solution,” the ribs have been pre-brined with water, salt, and sometimes phosphates. Skip an overnight dry brine and reduce the salt in your rub by about 25–30 percent; expect a little extra surface moisture early in the cook, so pat the rack dry before seasoning. If you want full control over flavor and texture, choose natural, unenhanced racks when available.
How many ribs per person?
Most St. Louis–style racks yield 10–13 bones. For planning, figure 3–4 bones per adult when ribs are the main course, or 2 bones per person when ribs are part of a larger spread. Round up on racks if your guests have big appetites.
| Guests | Main course (3–4 bones each) | Part of a spread (2 bones each) |
|---|---|---|
| 4 | 1–2 racks (12–16 bones) | 1 rack (8 bones) |
| 6 | 2 racks (18–24 bones) | 1–2 racks (12 bones) |
| 8 | 2–3 racks (24–32 bones) | 1–2 racks (16 bones) |
| 12 | 3–4 racks (36–48 bones) | 2 racks (24 bones) |
Notes: Racks vary from 10–13 bones. If you want 4 bones per adult, round up if your racks are on the small side. Count kids as 1–2 bones each.
For a broader comparison across baby backs, spare ribs, St. Louis ribs, and beef ribs, see the ribs per person guide. For a real crowd, our rib calculator turns those bone counts into whole racks to buy.
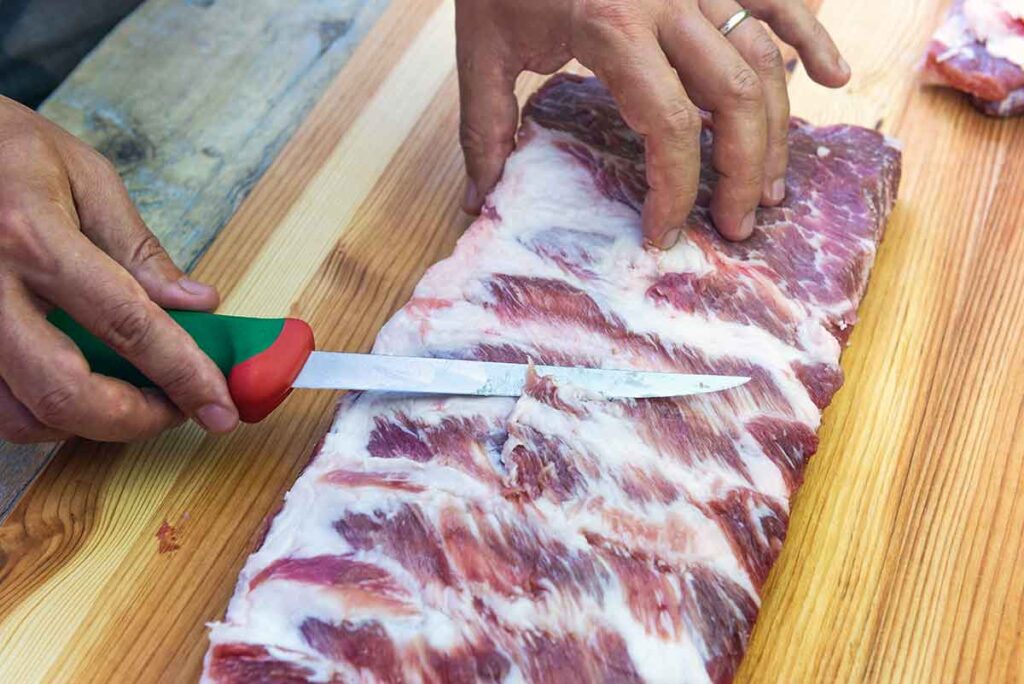

Trimming Your Own
If you’ve got whole spare ribs, doing your own St. Louis trim isn’t hard, and it gives you those prized rib tips for another meal:
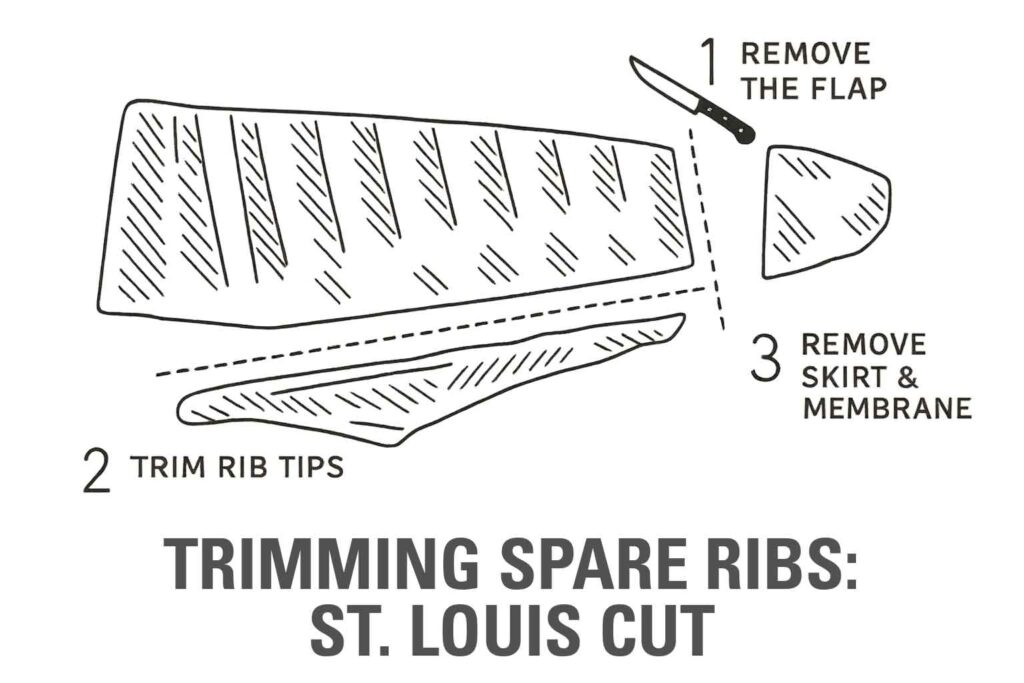
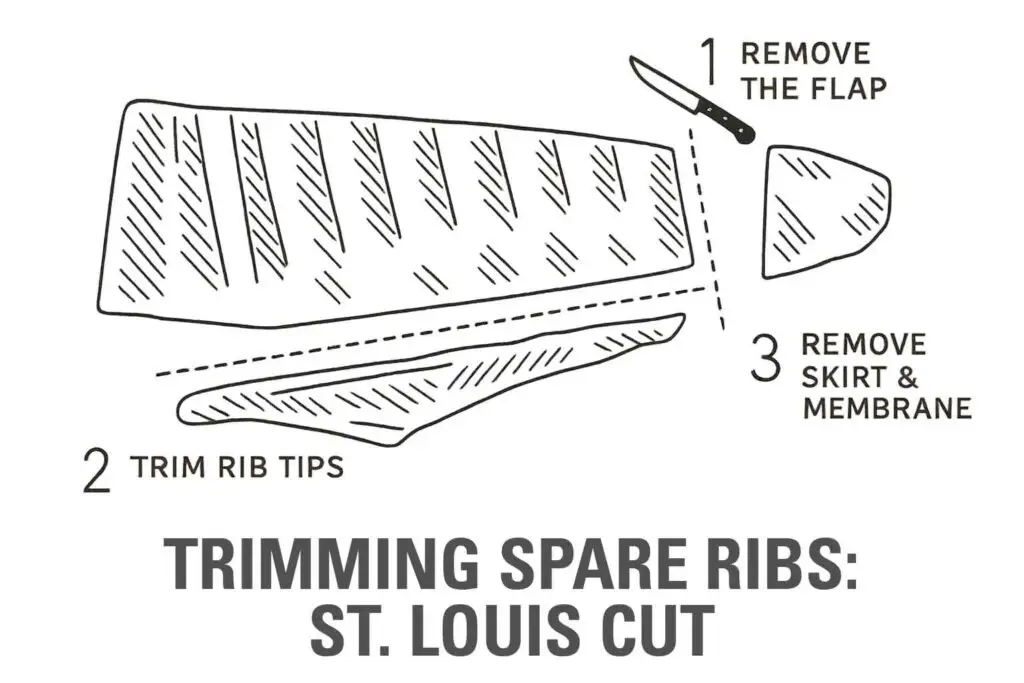
- Square the ends by trimming away the "flap" after the last rib bone.
- Find the rib tips, the softer cartilage strip between the ribs and sternum.
- Cut along that line to remove them in one strip.
- Remove the membrane and skirt from the bone side for a flatter, more even rack.
As for the membrane, virtually everyone encourages you to remove it, and for good reason. It can be unpleasant. But not everyone agrees.
Aaron Franklin has his own philosophy: “Lots of people remove [the membrane], but [I] personally like to leave it on — it helps keep the ribs together.” Whether you follow his lead or go membrane-free, the goal is the same: bite-through tenderness, not fall-apart mush.
Those rib tips? They’re gold. Chicago's "most glowing contribution to the barbecue map," according to Serious Eats. Be sure to hang on to those trimmings.
As Hey Grill Hey founder Susie Bulloch says, "A hidden gem of the BBQ world, rib tips are a super flavorful cut of pork you might not have even known you were missing out on.
Kansas City Cut vs. St. Louis Style
Kansas City style trimming is a close cousin. It’s similar to the St. Louis cut but not quite as squared off, a little more meat left on the ends, a little less fuss in the trimming. It’s not an official USDA cut, but you might see the term used in recipes or butcher cases. Think of it as “casual Friday” compared to the St. Louis rack’s pressed suit.
Seasoning Options
Start with salt. Give the rack a light, even sprinkle of kosher salt on both sides at least an hour before cooking, or dry-brine it overnight in the fridge for deeper seasoning. Pat dry, then add your rub right before the ribs hit the pit so the spices don’t pull out too much moisture.
A light to medium coat of a dry rub is plenty. (Rodney Scott’s Rib Rub would be a great choice.) Pork loves sweet-heat, but balance matters: use sugar for color and caramel notes, paprika for that deep red mahogany, black pepper for bite, and a little garlic and onion for savoriness. If your pit runs hotter than 285°F, use less fine sugar and more turbinado to reduce scorching.
Binders are optional. A thin smear of yellow mustard, neutral oil, or even a mist of water helps the rub grip but won’t change flavor once smoked. Let the rub hydrate until it looks slightly wet and tacky, then leave the rack alone during the first hour so the bark can set.
Think about texture as much as taste. A slightly coarser grind on the meat side builds bark; a finer grind on the bone side keeps slices tidy for the platter or a turn-in box. If you like a layered profile, use a simple savory base rub before the cook and a light “finishing dust” after slicing.
Best Wood for St. Louis Ribs
For wood, start with an oak or hickory backbone and adjust to taste. Oak is steady and versatile, hickory is stronger and more classic, and fruitwoods add color and a gentle sweetness. Cherry lays down beautiful color on St. Louis racks, apple is mild and friendly, pecan sits between fruitwood and hickory, and mesquite is assertive so use it sparingly.
Good starter hardwood blends for St. Louis racks:
- Oak with cherry, two parts oak to one part cherry, for mahogany color and clean smoke.
- Hickory with apple at one-to-one for a traditional profile with softer edges.
- Pecan with a touch of cherry for nutty depth and a rosy finish.
How much wood to use by cooker:
- Kettle with a Snake Method: tuck 3–5 fist-size chunks along the first half of the snake so you get steady smoke through the tenderizing phase.
- Offset stickburner: add small splits to maintain a modest flame and clear exhaust; feed the fire as needed for steady pit temp.
- Pellet grill: set 250–275°F and consider a smoke tube if you want more flavor density; choose pellet blends that include oak plus a fruitwood.
- Electric or gas with a smoke box: small, frequent chip additions keep the smoke clean without smoldering.
Cooking: More Than Just Temperature
The USDA’s food safety guideline is clear: whole-muscle pork is safe at 145°F with a 3-minute rest. But ribs are loaded with connective tissue, and at 145°F they’ll still be tough.
For tenderness, you need to keep cooking until that collagen melts into gelatin. Most pitmasters find the magic between 195–203°F internal, but even more important than the number is the feel. When a toothpick slides in with almost no resistance, you’re there.
As Meathead Goldwyn at AmazingRibs notes, “Good barbecue is done when it’s done," and the only way to know is to check it. See Testing Doneness, below.
Heat, Smoke, and the Saucing Question
St. Louis ribs shine in the smoker at 250–275°F. You’ve got options:
- Low-and-slow unwrapped for maximum bark and smoke flavor. To refine your smoke even more, see our BBQ Wood Selector, which shows how woods like apple, cherry, peach, oak, or hickory complement different meats.
- 3-2-1 method (for spare ribs, including St. Louis): smoke unwrapped for 3 hours, wrap for 2 hours with a small splash of liquid or butter, then unwrap for 1 hour to set bark and glaze; adjust the last two phases shorter if you want a firmer, bite-through texture rather than fall-apart.
- Texas crutch: wrapping in foil or butcher paper to speed tenderness and lock in moisture.
- Snake method on a charcoal kettle: lay out a curved line of briquettes two-by-two along the edge of the grill, light one end, and let the fire slowly burn around the “snake,” maintaining a steady temperature for hours without constant tending. Alternatively, you can simply try banking the coals.
- Sauce late in the cook, about 20–30 minutes before you’re done, so sugars caramelize without burning. A Kansas City–style sauce works well when brushed on in the last 20–30 minutes.
Testing Doneness
Internal temperature may provide clues, but getting an accurate temperature with ribs, even with the best instant read thermometers, is tricky. Collagen breaks down around 195–205°F, so if you’re in that range, you may be good.
The real test is touch. Pick up the slab with tongs and use the bend test.
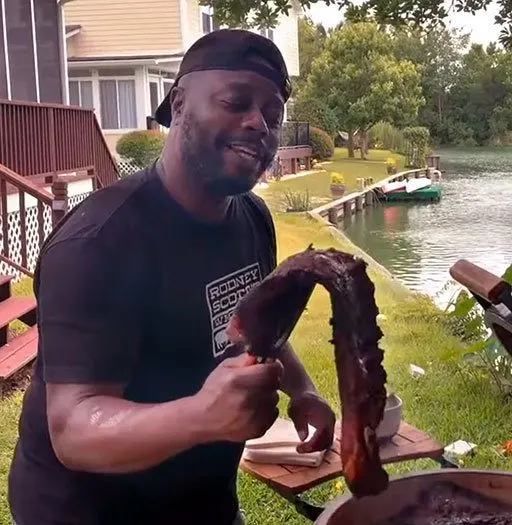
As Meathead notes, using the bend test, you’ll know the ribs are done if they bend significantly, starting to crack on top. A toothpick (often called the toothpick test) should slide between the bones with little resistance.
Judges often remind cooks that ribs should “bite off the bone cleanly” rather than fall off completely. At home, you can decide whether you like a competition-style bite or a softer, fall-apart rib.
Pro Tip: When slicing St. Louis ribs, flip the rack meat-side down on your cutting board. This lets you clearly see the bones so you can cut between them without hacking through bone. Always use a sharp knife and cut straight down between bones for clean presentation.
Troubleshooting St. Louis ribs
Use these quick fixes when results miss the mark. Cook to tenderness and let the bend and toothpick tests lead the way.
- Bark too dark or bitter: Pit likely ran hot or smoke was dirty. Settle the fire at 250–265°F, burn clean thin blue smoke, and reduce fine sugars in the rub if your cooker runs hot.
- Dry overall: Often overcooked or too much time unwrapped. Wrap a little earlier or shorten the uncovered finish, spritz lightly to manage surface drying, and verify grate temp with a trustworthy thermometer. Dad’s Mop Sauce is always a good choice for spritzing.
- Tough or chewy: Under-rendered collagen. Keep cooking until the rack bends and surface cracks appear, or do a short wrap with a small splash of liquid, then unwrap to set bark.
- Mushy or slide-off-the-bone: Too long wrapped or too high heat late. Cut wrap time, finish unwrapped 20–30 minutes to firm the bark, and avoid saucing early.
- Edges dry, center fine: Hot spots or uneven airflow. Rotate the rack end-to-end midway, position thicker ends toward the heat, and keep at least an inch of space around the meat.
- Sauce scorched: Sugars burned. Apply sauce in the last 20–30 minutes or after the cook, and keep the fire steady rather than spiking to finish.
- Too smoky or acrid: Smoldering fuel or wet chips. Use seasoned wood, smaller chunks, wide-open top vent for clean draft, and put meat on only after white billowy smoke clears.
- Rub patchy or not sticking: Surface was wet or slick. Pat ribs dry, use a light binder if you like, and season 30–60 minutes before cooking to let salt draw and settle.
Cooking two or more racks at once
Even heat and airflow matter more as the pit gets crowded. Give the fire time to stabilize, leave space between racks, and minimize lid openings.
- Spacing: Keep at least 1–2 inches between racks so air can circulate. Avoid racks touching, which steams the sides and softens bark.
- Orientation: Run bones parallel to airflow where possible. Aim thicker ends toward the hotter side of the cooker for even rendering.
- Rotation: At roughly the halfway point, swap front to back and top to bottom if using multiple shelves. On a kettle, rotate each rack and swap positions to balance hot spots.
- Rib racks (vertical): Helpful for capacity. Alternate bone direction, keep at least one grate area open for airflow, and expect 15–30 minutes more total time than a single rack.
- Fuel planning: Preheat a little longer before loading, add fuel early rather than late, and steady the pit before you open to sauce or wrap.
- Wrapping logistics: Wrap each rack as it reaches color, not by the clock. Do not stack wrapped packets for long. Unwrap to set bark 20–30 minutes before pulling.
- Time expectations: Two racks often add 15–45 minutes depending on cooker size and airflow. Trust the bend and toothpick tests rather than a strict schedule.
- Holding and slicing: Rest wrapped 10–15 minutes. If finishing times are staggered, hold wrapped in a warm, dry cooler and slice just before serving.
Researcher’s note: Multiple pro sources recommend leaving 1–2 inches between racks and rotating once mid-cook to even out hot spots and preserve bark.

Why They’re a Competition Favorite
"In the MBN and Memphis in May competitions, you always use Loin-Back ribs – because it is simply what the judges expect," acknowledges pitmaster Heath Riles. "But in the Kansas City BBQ circuit, you always use St. Louis Spares."
In Kansas City Barbeque Society contests, St. Louis ribs are legal alongside baby backs and full spares, but they’re often the go-to choice. Their neat, rectangular shape makes for picture-perfect turn-in boxes, and their even thickness helps teams avoid the dreaded half-overcooked, half-undercooked rack.
As Malcom Reed notes on How to BBQ Right, "In KCBS contests we cook St. Louis cut Spare Ribs. I look for a well-marbled rib with good weight – 2.75lbs and up. This size rib has plenty of meat on the bones for the judges, so they can get a good bite."
Notable pitmaster and BBQ instructor Harry Soo agrees: "I know you can win a World Championship using baby back ribs... but I prefer to use St. Louis ribs when I cook in contests because I think that it retains moisture, and it's very meaty and it has done well for me."
St. Louis Ribs FAQ
Yes. Dry-brine with kosher salt overnight on a rack in the fridge, uncovered, so the surface dries slightly. Apply rub just before the cook. If the package says “enhanced” or injected, skip the overnight salt and reduce rub salt about 25–30%.
Smoke them alongside the rack until tender and slice, cube for burnt ends, or dice into beans and stews. They’re flavorful and worth saving—don’t toss them.
When they’re tender, wrap and rest 10–15 minutes, then hold wrapped in a warm, dry cooler lined with towels. Slice just before serving to keep moisture in the ribs.
Yes. Set a steady 250–275°F with a two-zone setup and a smoke box or foil pouch of wood. Keep the top venting unobstructed for clean draft and add small amounts of chips frequently rather than smoldering a big load.
You can cut between bones to make two shorter sections. Arrange pieces with thicker ends toward the hotter side and leave space between them for airflow. Expect a slight time change; judge doneness by bend and toothpick tests.
Sources & references
- IMPS 416A (North American Meat Institute): definitions/specs for St. Louis–style ribs.
- USDA FSIS: pork safety temps and reheating/holding guidance.
- Texas A&M Meat Science: pork rib anatomy and trimming fundamentals.
- KCBS rules: competition rib cut expectations and turn-in standards.
About the author
James Roller documents South Carolina barbecue for Destination BBQ and authored Going Whole Hog. He researches techniques, interviews pitmasters, creates tools, and curates reliable sources so home cooks can cook barbecue safely and confidently at home.
More about James.See something that needs a tweak? Send a correction.
« See All BBQ Terms
art
Thursday 2nd of October 2025
where in sc can we buy properly cooked and prepared st louis ribs? we live on hilton head island. thanks.
James Roller
Friday 3rd of October 2025
Hey Art, thanks for the question. I guess the sticking point is the subjective nature of the phrase "properly cooked and prepared." That can mean different things to different people, of course. That said, my gut reaction is to suggest you try Bullies BBQ. The one caveat is that the original owner, Bob Sutton, sold it, but he recently required it. SlowCountry BBQ is the only other place that offer St. Louis ribs. The rest serve baby backs.